Looking for a crochet baby fox amigurumi idea that you can actually finish and gift? This free, step-by-step crochet baby fox amigurumi idea walks you through every single row of a charming standing fox, from the magic ring to the final stitches on the neck. It is a classic amigurumi project with a cream muzzle, a fluffy tail tip, embroidered forehead details and a cozy scarf, which makes it a favorite crochet baby fox amigurumi idea for baby showers, nursery shelves and holiday gifts.
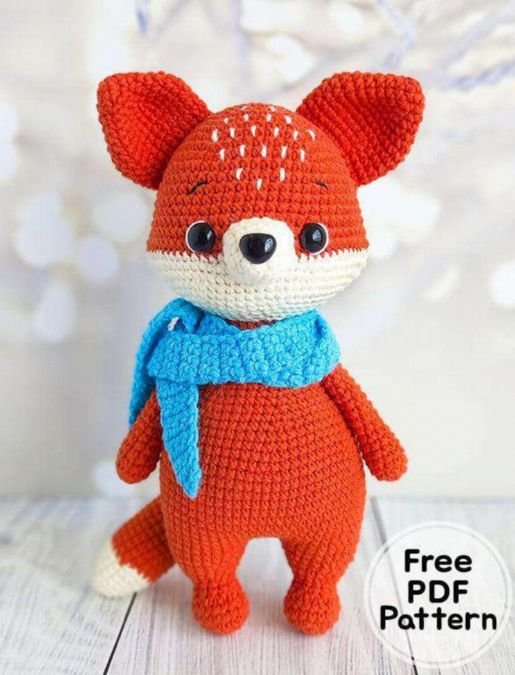
Quick answerThis crochet baby fox amigurumi idea is a free amigurumi fox pattern worked entirely in single crochet in the round, using orange-red and beige yarn, a magic ring start, safety eyes (or embroidered eyes), polyester fiberfill and a tapestry needle. You crochet the upper paws, tail, head, ears, muzzle, lower legs and body separately, then sew everything together. The full written pattern is included on this page.
What you will find in this post
- Project overview and key facts
- Why this crochet baby fox amigurumi idea is so popular
- Baby-safe tips before you start
- Materials, tools and abbreviations
- The free crochet baby fox amigurumi idea pattern
- Expert tips for a perfect fox
- FAQ about crochet baby fox amigurumi ideas
Crochet Baby Fox Amigurumi Idea: Project Overview
Before you pick up your hook, here is a quick snapshot of this crochet baby fox amigurumi idea, so you can decide if it fits your skill level and your schedule.
| Project | Standing amigurumi fox with scarf (free pattern) |
|---|---|
| Pattern designer | Olga Romahina |
| Skill level | Advanced beginner to intermediate (single crochet, increases, decreases, sewing) |
| Stitches used | Magic ring (MR), single crochet (sc), increase (inc), decrease (dec), chain (ch), slip stitch (slst) |
| Yarn | YarnArt Jeans No. 85 (orange-red) and No. 03 (beige), or any similar colors you like |
| Pieces | Upper paws, tail, head, ears, muzzle, lower legs, body |
| Best for | Baby shower gifts, nursery decor, keepsakes, woodland-themed collections |
Why This Crochet Baby Fox Amigurumi Idea Is So Popular
Amigurumi is the Japanese art of crocheting or knitting small stuffed creatures, and foxes are one of the most loved woodland animals in the craft world. The red fox (Vulpes vulpes) has an instantly recognizable look: pointed ears, a white muzzle, a bushy tail with a pale tip. All of that translates perfectly into yarn, which is why a crochet baby fox amigurumi idea keeps showing up in searches for baby crochet ideas, nursery themes and handmade gifts.
This particular crochet baby fox amigurumi idea stands out for three reasons. First, the proportions are cute and slightly “baby-like”: a big round head, a small muzzle and a soft little body. Second, the construction is clean, with every piece worked in continuous rounds of single crochet, so the fabric is dense and holds its shape. Third, the finishing touches (forehead embroidery, optional eyebrows and a scarf) give each fox its own personality. If you have ever wondered how to crochet a fox for beginners, this crochet baby fox amigurumi idea is a great step up once you have made a simple ball or mini animal.
You can also treat this crochet baby fox amigurumi idea as a template. Swap the orange-red yarn for grey to make an Arctic fox, use brown for a fennec-style toy, or change the scarf color to match a nursery palette. One pattern, endless crochet baby fox amigurumi ideas.
Baby-Safe Tips for Your Crochet Baby Fox Amigurumi Idea
Because this crochet baby fox amigurumi idea is often gifted to babies and toddlers, safety matters as much as style. Hard parts such as plastic eyes and noses can become choking hazards if they are not attached securely, and the pattern itself lets you choose between secure-fastening parts and sewn-on or embroidered details.
Safety note: For children under 3 years old, many makers skip hard eyes and noses completely and embroider the eyes, nose and muzzle with yarn or thread instead. Stuff firmly, sew every part on with strong yarn, and always check the finished toy for loose pieces before gifting it.
Materials and Tools for the Crochet Baby Fox Amigurumi Idea
Gather everything before you begin. Here is the complete supply list for this free crochet baby fox amigurumi idea pattern by designer Olga Romahina:
- Hook suitable for your yarn.
- YarnArt Jeans No. 85 (or any color of your choice from the orange-red palette) for the body.
- YarnArt Jeans No. 03 for the muzzle and tail tip.
- Some black or dark brown brow thread. Take it thinner than the main yarn from which you will knit the toy. The designer used “Openwork” from “Pekhorka” No. 02 (black, 280 m / 50 gr.).
- Filler (polyester fiberfill).
- Eyes on a secure fastening, 10 mm, or sewn on, glued (beads, half beads – your choice).
- Muzzle (nose) on a secure mount, 12×10 mm (optional, can be embroidered).
- Needle for sewing details, scissors, pins, stitch marker.
Abbreviations Used in This Pattern
| MR | Magic ring |
|---|---|
| Sc | Single crochet |
| Ch | Chain |
| Inc | Increase (two single crochets in the same stitch) |
| Dec | Decrease (two stitches worked together) |
| Slst | Slip stitch |
Expert tip: Amigurumi is worked tighter than normal crochet so the stuffing does not show through. Many makers choose a hook one or two sizes smaller than the yarn label suggests. Work in a spiral without joining rounds and use a stitch marker on the first stitch of every round, and your crochet baby fox amigurumi idea will look neat and professional.
Free Crochet Baby Fox Amigurumi Idea Pattern (Full Written Instructions)
Below is the complete, row-by-row crochet baby fox amigurumi idea pattern. Work each piece in continuous rounds unless the instructions say otherwise. The numbers in the brackets at the end of a row show the total stitch count, so check it often.
1. Upper Paws (Make 2) – Crochet Baby Fox Amigurumi Idea
We crochet with the main color.
- 1: 5 sc in MR
- 2: 5 inc = 10
- 3-18: 10 sc
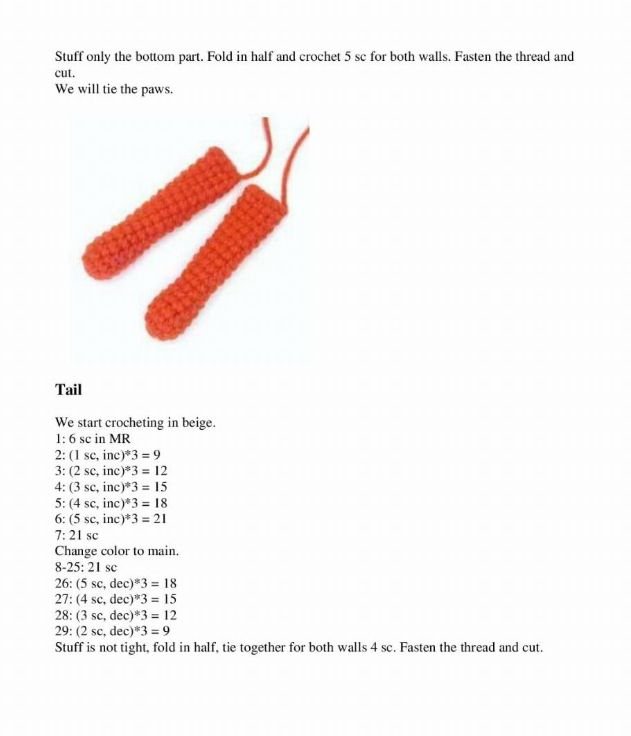
Stuff only the bottom part. Fold in half and crochet 5 sc for both walls. Fasten the thread and cut. We will tie the paws on later.
2. Tail
We start crocheting in beige.
- 1: 6 sc in MR
- 2: (1 sc, inc)*3 = 9
- 3: (2 sc, inc)*3 = 12
- 4: (3 sc, inc)*3 = 15
- 5: (4 sc, inc)*3 = 18
- 6: (5 sc, inc)*3 = 21
- 7: 21 sc
Change color to main.
- 8-25: 21 sc
- 26: (5 sc, dec)*3 = 18
- 27: (4 sc, dec)*3 = 15
- 28: (3 sc, dec)*3 = 12
- 29: (2 sc, dec)*3 = 9
Stuff is not tight. Fold in half and tie together for both walls 4 sc. Fasten the thread and cut.
3. Head – The Heart of the Crochet Baby Fox Amigurumi Idea
We start crocheting with the main color.
- 1: 6 sc in MR
- 2: 6 inc = 12
- 3: (1 sc, inc)*6 = 18
- 4: (2 sc, inc)*6 = 24
- 5: (3 sc, inc)*6 = 30
- 6: (4 sc, inc)*6 = 36
- 7: (5 sc, inc)*6 = 42
- 8: (6 sc, inc)*6 = 48
- 9: (7 sc, inc)*6 = 54
- 10: (8 sc, inc)*6 = 60
- 11-16: 60 sc
- 17: (9 sc, inc)*6 = 66
- 18: 20 sc, 2 inc, 31 sc, 2 inc, 11 sc = 70
To make it easier to navigate later when installing the peephole (eyes), place additional markers on both sides in the 18th row, between two increases.
- 19: 21 sc, 2 inc, 33 sc, 2 inc, 12 sc = 74
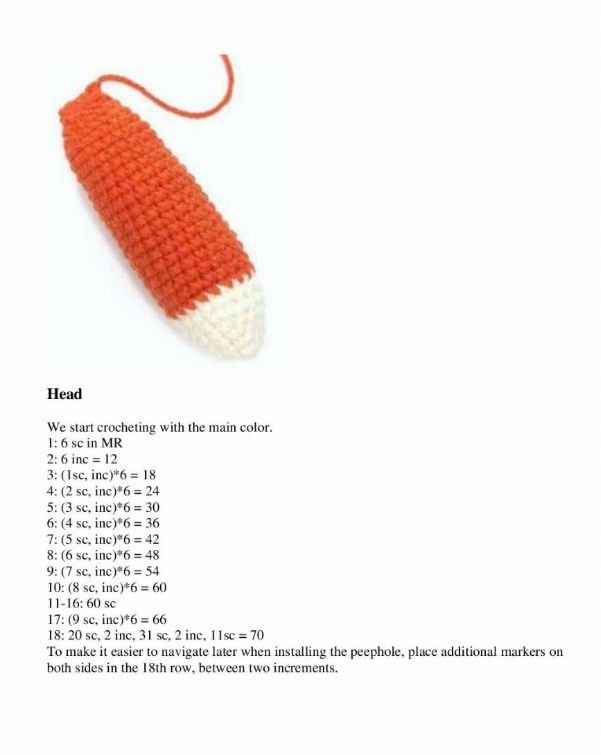
Change color to beige.
- 20-21: 74 sc
At this stage, we install the eyes (diameter 10 mm) between the 18th and 19th rows, with 11 sc between the eyes. The distance from the side additional markers to the installation site along the 18th row is 12 sc (we count the increase as 2 loops). Now the additional markers can be removed.
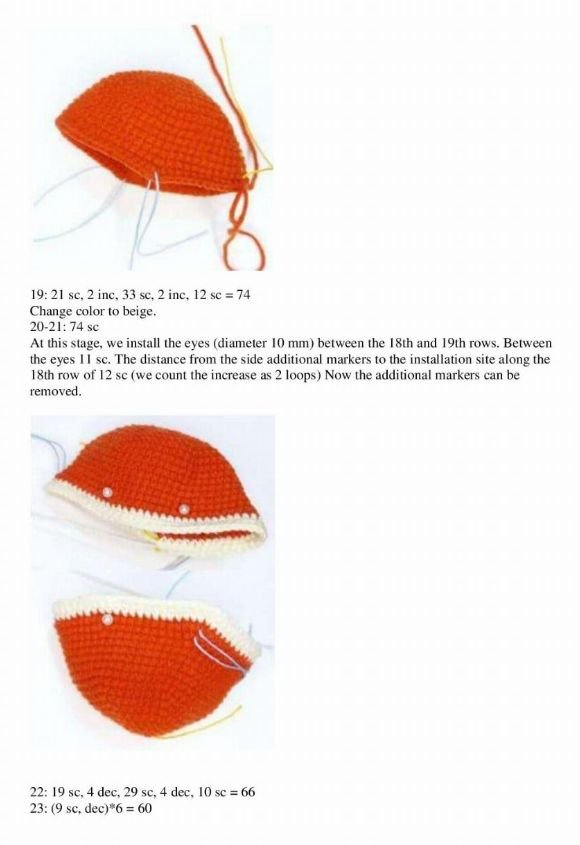
- 22: 19 sc, 4 dec, 29 sc, 4 dec, 10 sc = 66
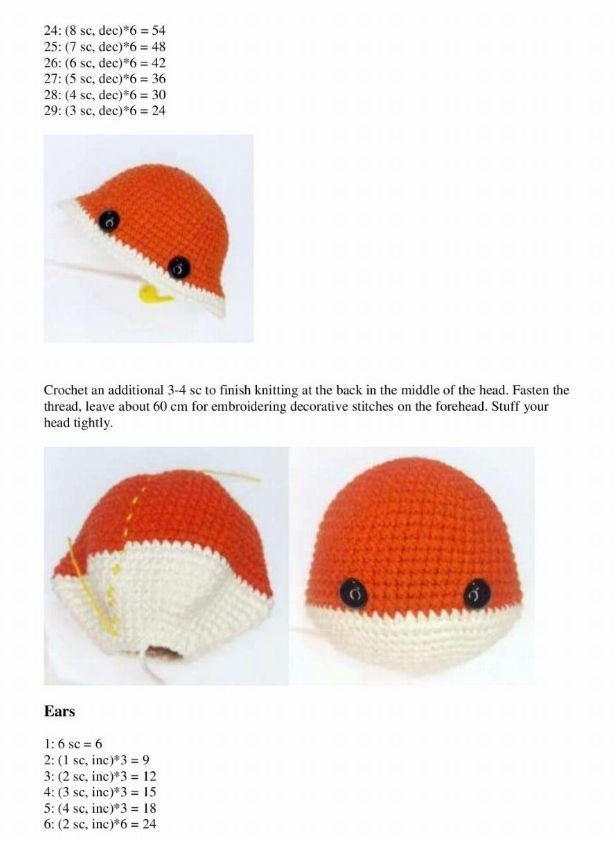
- 23: (9 sc, dec)*6 = 60
- 24: (8 sc, dec)*6 = 54
- 25: (7 sc, dec)*6 = 48
- 26: (6 sc, dec)*6 = 42
- 27: (5 sc, dec)*6 = 36
- 28: (4 sc, dec)*6 = 30
- 29: (3 sc, dec)*6 = 24
Crochet an additional 3-4 sc to finish knitting at the back in the middle of the head. Fasten the thread, leaving about 60 cm for embroidering decorative stitches on the forehead. Stuff your head tightly.
4. Ears (Make 2)
- 1: 6 sc = 6
- 2: (1 sc, inc)*3 = 9
- 3: (2 sc, inc)*3 = 12
- 4: (3 sc, inc)*3 = 15
- 5: (4 sc, inc)*3 = 18
- 6: (2 sc, inc)*6 = 24
- 7: (3 sc, inc)*6 = 30
- 8-9: 30 sc
- 10: (3 sc, dec)*6 = 24
- 11: 24 sc
- 12: (6 sc, dec)*3 = 21
Crochet an additional 1 sc, fold in half and crochet 10 sc together, capturing both walls of the ear. Leave the thread for sewing.
5. Muzzle
- 1: 6 sc = 6
- 2: (1 sc, inc)*3 = 9
- 3: (2 sc, inc)*3 = 12
- 4: (3 sc, inc)*3 = 15
- 5: (4 sc, inc)*3 = 18
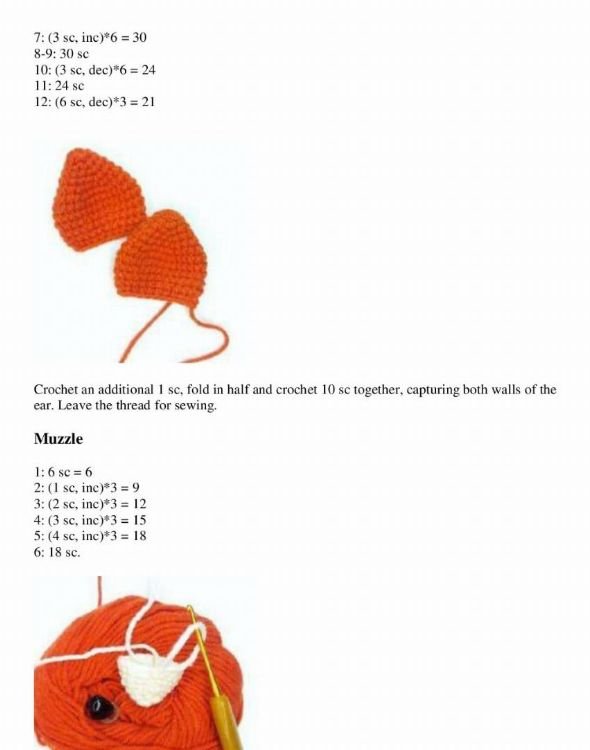
- 6: 18 sc
We fix the thread, leaving about 50 cm for sewing. We put the muzzle between 1 and 2 rows, or embroider it (the designer used a nose on a safe mount, 12 × 10 mm).
6. Head Decoration: Ears, Muzzle and Embroidery
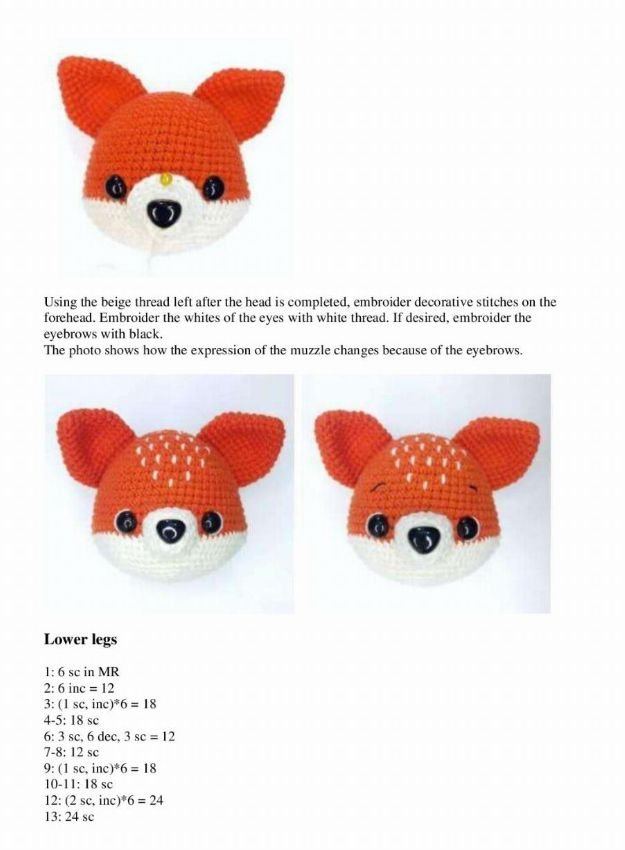
Mark the places and sew the ears along the line of the rows, opposite the side increases. Adjust the height to your liking. The designer sewed the bottom of the ears between rows 13 and 14.
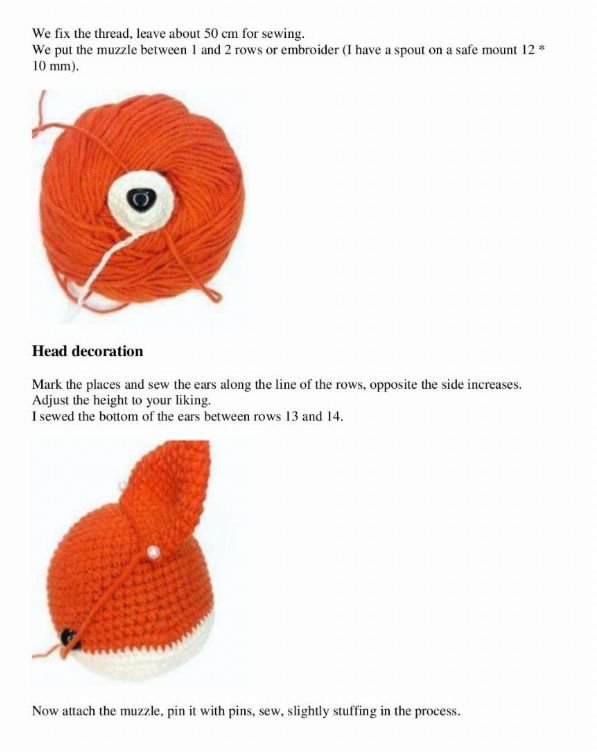
Now attach the muzzle: pin it with pins and sew, slightly stuffing in the process.
Using the beige thread left after the head is completed, embroider decorative stitches on the forehead. Embroider the whites of the eyes with white thread. If desired, embroider the eyebrows with black. The photos show how the expression of the muzzle changes because of the eyebrows.
7. Lower Legs (Make 2)
- 1: 6 sc in MR
- 2: 6 inc = 12
- 3: (1 sc, inc)*6 = 18
- 4-5: 18 sc
- 6: 3 sc, 6 dec, 3 sc = 12
- 7-8: 12 sc
- 9: (1 sc, inc)*6 = 18
- 10-11: 18 sc
- 12: (2 sc, inc)*6 = 24
- 13: 24 sc
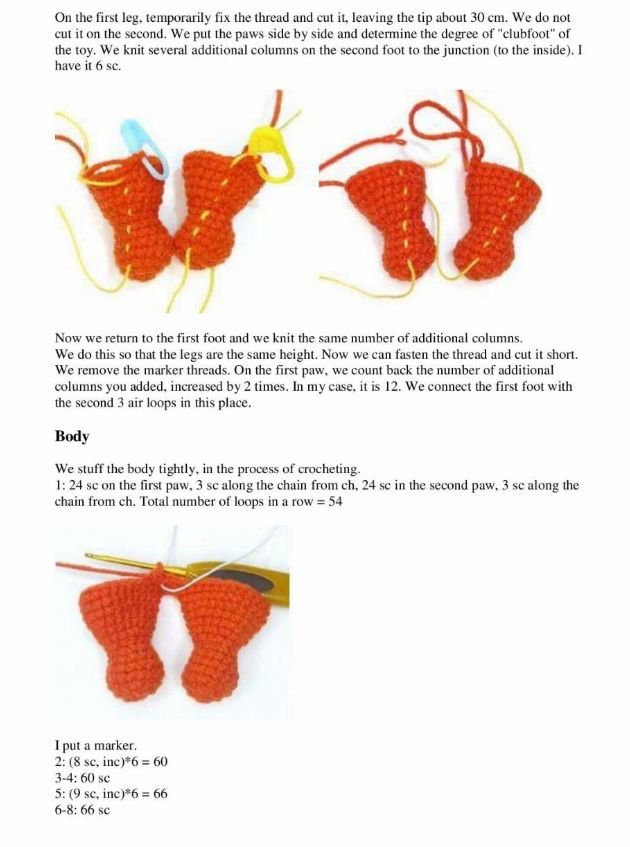
On the first leg, temporarily fix the thread and cut it, leaving the tip about 30 cm. We do not cut it on the second. We put the paws side by side and determine the degree of “clubfoot” of the toy. We knit several additional stitches on the second foot to the junction (to the inside). The designer has 6 sc.
Now we return to the first foot and knit the same number of additional stitches. We do this so that the legs are the same height. Now we can fasten the thread and cut it short. We remove the marker threads. On the first paw, we count back the number of additional stitches you added, increased by 2 times. In the designer’s case, it is 12. We connect the first foot with the second with 3 chains in this place.
8. Body (Legs, Tail and Upper Paws Joined)
We stuff the body tightly in the process of crocheting.
- 1: 24 sc on the first paw, 3 sc along the chain from ch, 24 sc in the second paw, 3 sc along the chain from ch. Total number of loops in a row = 54
Put a marker.
- 2: (8 sc, inc)*6 = 60
- 3-4: 60 sc
- 5: (9 sc, inc)*6 = 66
- 6-8: 66 sc
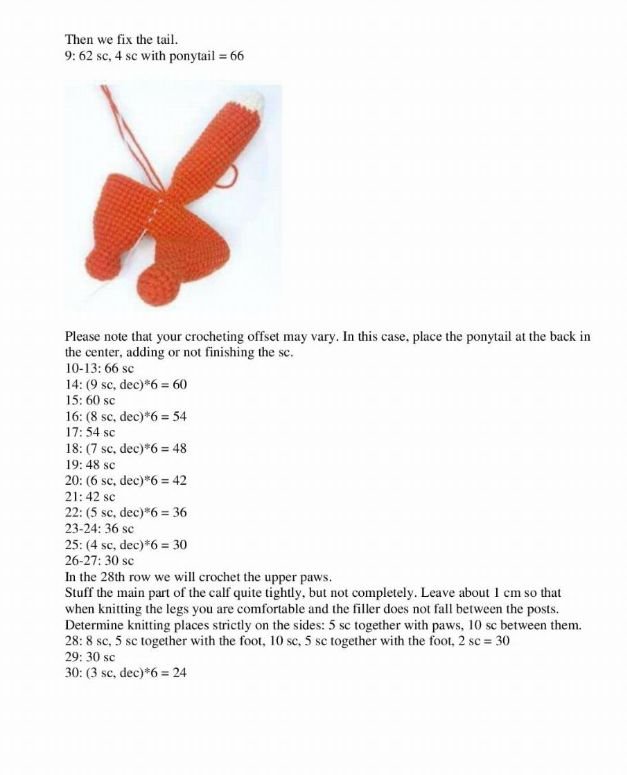
Then we fix the tail.
- 9: 62 sc, 4 sc with ponytail = 66
Please note that your crocheting offset may vary. In this case, place the ponytail (tail) at the back in the center, adding or not finishing the sc.
- 10-13: 66 sc
- 14: (9 sc, dec)*6 = 60
- 15: 60 sc
- 16: (8 sc, dec)*6 = 54
- 17: 54 sc
- 18: (7 sc, dec)*6 = 48
- 19: 48 sc
- 20: (6 sc, dec)*6 = 42
- 21: 42 sc
- 22: (5 sc, dec)*6 = 36
- 23-24: 36 sc
- 25: (4 sc, dec)*6 = 30
- 26-27: 30 sc
In the 28th row we will crochet the upper paws. Stuff the main part of the body quite tightly, but not completely. Leave about 1 cm so that when knitting the legs you are comfortable and the filler does not fall between the posts. Determine the knitting places strictly on the sides: 5 sc together with the paws, 10 sc between them.
- 28: 8 sc, 5 sc together with the paw, 10 sc, 5 sc together with the paw, 2 sc = 30
- 29: 30 sc
- 30: (3 sc, dec)*6 = 24
9. Final Assembly of Your Crochet Baby Fox Amigurumi Idea
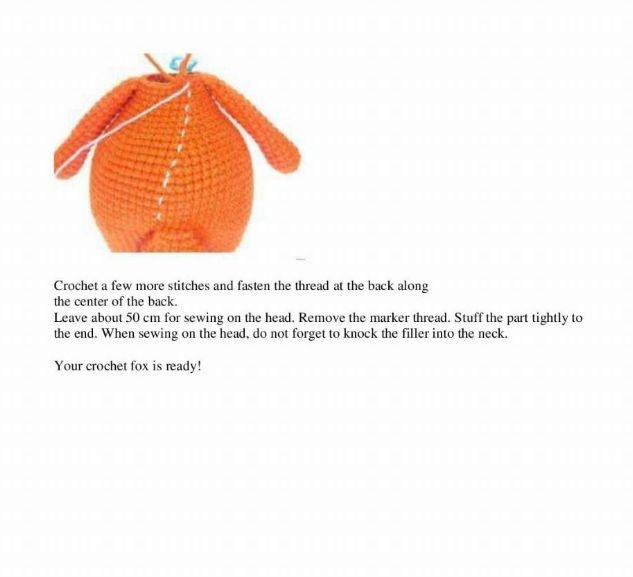
Crochet a few more stitches and fasten the thread at the back along the center of the back. Leave about 50 cm for sewing on the head. Remove the marker thread. Stuff the part tightly to the end. When sewing on the head, do not forget to knock the filler into the neck.
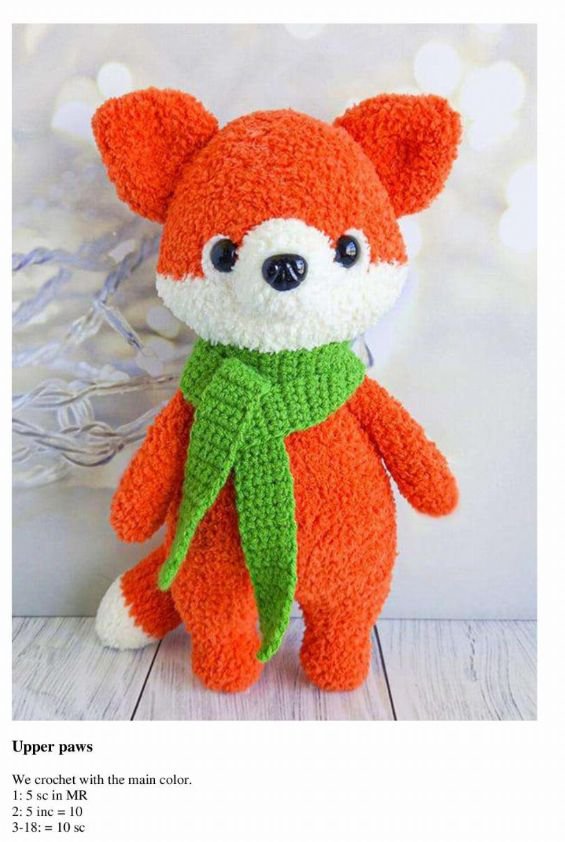
Your crochet fox is ready! Add a scarf (a simple rectangle of single crochet in any bright color works beautifully, such as the blue or green scarves in the photos) and your crochet baby fox amigurumi idea is finished.
Expert Tips for the Best Crochet Baby Fox Amigurumi Idea
- Count your stitches. The stitch total at the end of each row keeps the shape of this crochet baby fox amigurumi idea even and symmetrical.
- Use the invisible join and magic ring. A tight magic ring prevents a hole at the tip of the nose, tail and paws.
- Stuff in small pieces. Tightly packed polyester fiberfill gives your crochet baby fox amigurumi idea a smooth, professional surface with no lumps.
- Pin before you sew. Test ear height and muzzle position with pins. A small change in placement can make the fox look sweet, sly or sleepy.
- Choose washable yarn for baby gifts. Smooth cotton blends are easy to care for and keep stitch definition sharp. Fuzzy yarn is softer, but harder to crochet and to see your stitches.
- Make a matching set. Create several foxes in different colors to build a woodland collection of crochet baby fox amigurumi ideas.
FAQ: Crochet Baby Fox Amigurumi Ideas
What is the easiest amigurumi animal to crochet?
Small, simple shapes are the easiest: balls, bunnies, bears and mini animals with few separate parts. They use basic single crochet in the round and very little sewing. Once you are comfortable, a crochet baby fox amigurumi idea like this one is a rewarding next step because it teaches ears, muzzles and joined legs.How to crochet a fox for beginners?
Start with the magic ring, single crochet, increases and decreases, which are the only stitches used in this pattern. Crochet the head, ears, muzzle, body and legs separately, stuff each piece, then sew them together. Take your time with the sewing and the face, as that is where a crochet baby fox amigurumi idea gets its personality.What are some new baby crochet ideas?
Popular baby crochet ideas include amigurumi animals, security blankets, rattles, hats, booties and mobiles. A crochet baby fox amigurumi idea is a favorite for nursery decor and baby showers because it is cute, handmade and easy to personalize with a colorful scarf.What can I crochet in 1 hour?
In about an hour you can usually crochet small items such as a mini amigurumi head, a keychain, a scarf for a toy, a headband or a coaster. A full standing fox takes longer, but you can crochet the pieces of this crochet baby fox amigurumi idea in short sessions, for example one piece per sitting.Is this crochet baby fox amigurumi idea free?
Yes. The full written pattern by designer Olga Romahina is included on this page, row by row, with step photos.Which yarn is best for a crochet baby fox amigurumi idea?
The designer used YarnArt Jeans in orange-red (No. 85) and beige (No. 03). Any smooth, medium-weight yarn that gives a dense fabric works well, and cotton or cotton blends are a practical choice for baby toys.Can I make this crochet baby fox amigurumi idea without safety eyes?
Yes. You can embroider the eyes and nose with yarn or thread. This is the recommended option for babies and toddlers under 3 years old.
Final Thoughts on This Crochet Baby Fox Amigurumi Idea
This crochet baby fox amigurumi idea combines a clear, row-by-row amigurumi pattern with a design that is cute enough for any nursery. You have the materials list, every abbreviation, every row for the paws, tail, head, ears, muzzle, legs and body, plus finishing tips to make your fox look polished. Save this crochet baby fox amigurumi idea for your next project, share it with a friend who loves crochet, and remember: every fox turns out a little different, and that is the charm of handmade toys.
Loved this crochet baby fox amigurumi idea? Bookmark the pattern, make one in your favorite colors and share your finished fox with the crochet community!
Pattern designer: Olga Romahina. Learn more about the craft on Wikipedia: Amigurumi and about the animal on Wikipedia: Red fox. Looking for more projects? Browse our free crochet patterns.