
How to Crochet Granny Squares Together Tutorials (Free Pattern)
If you have ever searched for how to crochet granny squares together tutorials, you know the tricky part is not making the squares, it is joining them so the seams look neat. This guide shows six easy joining methods, and you can browse more free crochet patterns and tutorials on Crochet Lovers Club when you finish. To practice, there is also a free pink heart granny square pattern in US and UK terms, with every round written out.
Quick answer: how do you crochet granny squares together? The easiest way to crochet granny squares together is to whip stitch the edges with a yarn needle, or to slip stitch or single crochet them together with a hook. Match the stitches on both edges, work corner to corner, and block your squares first. These how to crochet granny squares together tutorials cover six methods and a free practice square.

At a Glance: How to Crochet Granny Squares Together Tutorials
| Topic | How to crochet granny squares together tutorials with a free practice square |
|---|---|
| Joining methods | Whip stitch, mattress stitch, slip stitch, single crochet, double crochet, join-as-you-go |
| Practice square | Loving Kiss Square (puff stitches, 2 colours) |
| Yarn and hook | DK (double knit) yarn, 3.5 mm crochet hook |
| Finished size | About 14.5 x 14.5 cm (5.5 x 5.5 in) |
| Stitches per side | 27 stitches on each side, plus 2 chains at each corner |
| Terms | US and UK versions included |
What Are Granny Squares?
A granny square is a small square motif worked in the round from the center outward. It is one of the most loved shapes in crochet because you can make squares one at a time, carry them anywhere, and then join them into a blanket, afghan, cushion cover, bag or cardigan. The classic version uses clusters of double crochet, but modern designs add puff stitches, colorwork and textured rounds, like the practice square below.
Because every square is a separate piece, learning how to crochet granny squares together tutorials style is the skill that turns a pile of motifs into a finished project.
Before You Start: Prep for How to Crochet Granny Squares Together Tutorials
Good joining begins before you pick up a needle or hook. Use this quick checklist with any of the how to crochet granny squares together tutorials below:
- Make every square the same size. Use the same yarn, hook and tension so the edges line up stitch for stitch.
- Weave in your ends before joining so loose yarn does not get trapped in a seam.
- Block your squares. Gently pin each square to size and steam or wet block it so the corners are sharp and the edges are straight.
- Count your stitches. Each edge should have the same number of stitches. The practice square below has 27 on each side.
- Lay out the design. Arrange all the squares on the floor, take a photo, and check the colors before you join anything.
- Use matching yarn. Join with the same yarn as the final round, or a neutral color for a framed look.
6 Easy Ways: How to Crochet Granny Squares Together Tutorials
These how to crochet granny squares together tutorials start simple and build up. Every method has a different look. Some leave an almost invisible seam, others create a raised ridge that becomes part of the design. Try a few on spare squares and pick the one you like best.
1. Whip Stitch (Best for Beginners)
Whip stitch, also called the overcast stitch, is the simplest way to sew granny squares together. Thread a yarn needle with matching yarn. Place two squares side by side with the right sides facing up and the edges touching. Pass the needle through the matching loops of the edge stitches on both squares, working from corner to corner, and pull gently so the seam lies flat. Working through the back loops only gives a neat, flat seam, and using both loops makes it a little stronger.
2. Mattress Stitch (Nearly Invisible Seam)
Mattress stitch gives the flattest, least visible join. Lay the squares side by side with the right sides facing you. Using a yarn needle, pick up the horizontal bars of the stitches along one edge, then the matching bars on the other edge, zigzagging between the squares like a zipper. Pull the yarn gently and the two edges close together. It takes a little longer, but it is perfect for baby blankets and garments.
3. Slip Stitch Join (Quick and Tidy)
Hold two squares together with the right sides facing each other and the corners aligned. Insert your hook through the back loops of both squares at the corner, join your yarn, and work a slip stitch in each pair of stitches across the edge. Slip stitch is low-profile, so it adds very little bulk. If you hold the squares with the wrong sides together instead, the seam shows on the right side as a decorative ridge.
4. Single Crochet Join (Strong and Sturdy)
The single crochet join works the same way as the slip stitch join, but with single crochet stitches through both squares. The seam is thicker and sturdier, which makes it a great choice for blankets and bags that will get lots of use. Chain 1 at each corner so the seam turns neatly.
5. Double Crochet Join (Raised, Decorative Seam)
Many crocheters search for joining granny squares with double crochet when they want a bold, textured grid. Hold two squares together and work double crochet stitches through the back loops of both. The result is a taller, stretchier and more visible seam, which can look lovely on a chunky afghan. It uses more yarn and adds bulk, so use it when you want the joins to stand out.
6. Join-as-You-Go (No Sewing at the End)
With the join-as-you-go method, you attach each square to its neighbor while you work the last round, so there is no separate joining step. At the corner, instead of chaining, slip stitch into the corner space of the neighboring square, then continue along the shared edge, joining stitch to stitch with slip stitches or single crochet. It saves time and keeps ends to a minimum, but it works best when you plan the layout in advance.
Which Joining Method Should You Choose?
Use this table to compare the how to crochet granny squares together tutorials at a glance.
| Method | Tool | Seam look | Best for |
|---|---|---|---|
| Whip stitch | Yarn needle | Flat, neat | Beginners, quick projects |
| Mattress stitch | Yarn needle | Almost invisible | Baby blankets, garments |
| Slip stitch join | Hook | Low ridge | Everyday blankets |
| Single crochet join | Hook | Thick ridge | Durable bags and throws |
| Double crochet join | Hook | Tall, decorative ridge | Chunky afghans |
| Join-as-you-go | Hook | Neat grid | Large projects |
Free Practice Pattern for How to Crochet Granny Squares Together Tutorials
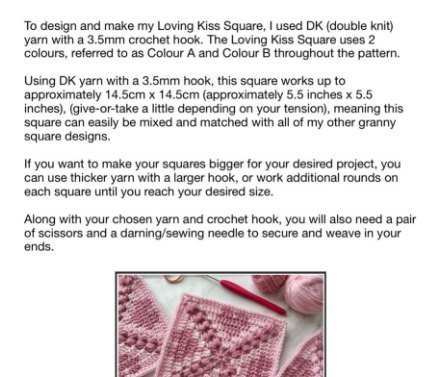
The best way to learn how to crochet granny squares together tutorials is to make a few squares and try each join. The Loving Kiss Square is a pretty pink puff-stitch square with hearts, and every edge ends with the same 27 stitches, which makes it ideal for practicing joins. You will need two colours, referred to as Colour A and Colour B.
Materials and Size
- DK (double knit) yarn in 2 colours: Colour A and Colour B
- 3.5 mm crochet hook
- Scissors
- Darning or sewing needle to weave in ends
With DK yarn and a 3.5 mm hook, the square measures approximately 14.5 cm x 14.5 cm (5.5 in x 5.5 in), give or take a little depending on your tension. To make bigger squares, use thicker yarn with a larger hook, or work additional rounds until you reach your desired size. The squares can also be mixed and matched with other granny square designs.
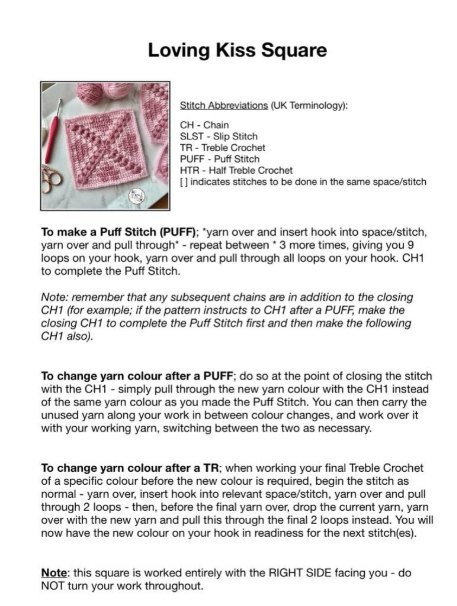
Stitch Abbreviations
| US terms | UK terms |
|---|---|
| CH = chain | CH = chain |
| SLST = slip stitch | SLST = slip stitch |
| DC = double crochet | TR = treble crochet |
| PUFF = puff stitch | PUFF = puff stitch |
| HDC = half double crochet | HTR = half treble crochet |
Square brackets [ ] mean the stitches are worked in the same space or stitch.
Special Stitches and Techniques
Puff stitch (PUFF): *yarn over and insert your hook into the space or stitch, yarn over and pull through*. Repeat between * 3 more times, giving you 9 loops on your hook. Yarn over and pull through all loops on the hook, then CH1 to complete the puff stitch.
Note: any chains that follow are in addition to the closing CH1. For example, if the pattern says CH1 after a PUFF, make the closing CH1 first to complete the puff, then make the following CH1 as well.
Changing colour after a PUFF: do it at the point of closing the stitch with the CH1. Pull the new colour through with the CH1 instead of the old one. Carry the unused yarn along your work between colour changes and work over it with your working yarn, switching between the two as needed.
Changing colour after a DC (US) or TR (UK): when you work the final stitch of one colour, begin the stitch as normal: yarn over, insert your hook into the space or stitch, yarn over and pull through 2 loops. Then, before the final yarn over, drop the current yarn, yarn over with the new yarn and pull it through the final 2 loops. The new colour is now on your hook, ready for the next stitches.
Important: this square is worked entirely with the right side facing you. Do not turn your work.

Loving Kiss Square Pattern: US Terms
- Round 1: Using Colour A, CH3 and SLST into the first CH to make a loop. CH5 (counts as first DC plus CH2). *DC into the centre of the loop, CH2*. Repeat between * 6 more times, then SLST to the 3rd CH of your beginning CH5. (8 stitches, 8 CH2 spaces)
- Round 2: SLST into a CH2 space. (Instead of making chains before the puff stitches, which would be more noticeable, you can pull up your loop slightly to get a suitable height.) *Using Colour A: [PUFF, CH1, PUFF] in the same CH2 space. Colour B: CH1, [3DC] in the next CH2 space. Colour A: CH1*. Repeat between * 3 more times. Colour A: SLST to the first PUFF. (3 DC, 2 PUFF and 2 CH1 spaces per side, plus 1 CH space at each corner throughout)
- Round 3: SLST into the corner CH space. *Using Colour A: [PUFF, CH1, PUFF] in the corner space. Colour B: CH1, skip the PUFF, [2DC] in the CH1 space, 1DC in the next stitch. Colour A: 1DC. Colour B: 1DC, [2DC] in the CH1 space. Colour A: CH1, skip the PUFF*. Repeat between * 3 more times. Colour A: SLST to the first PUFF. (7 DC, 2 PUFF, 2 CH1 spaces per side)
- Round 4: SLST into the corner CH space. *Using Colour A: [PUFF, CH1, PUFF] in the corner space. Colour B: CH1, skip the PUFF, [2DC] in the CH1 space, 1DC in the next stitch. Colour A: 5DC. Colour B: 1DC, [2DC] in the CH1 space. Colour A: CH1, skip the PUFF*. Repeat between * 3 more times. Colour A: SLST to the first PUFF. (11 DC, 2 PUFF, 2 CH1 spaces per side)
- Round 5: SLST into the corner CH space. *Using Colour A: [PUFF, CH1, PUFF] in the corner space. Colour B: CH1, skip the PUFF, [2DC] in the CH1 space, 1DC in the next stitch. Colour A: 9DC. Colour B: 1DC, [2DC] in the CH1 space. Colour A: CH1, skip the PUFF*. Repeat between * 3 more times. Colour A: SLST to the first PUFF. (15 DC, 2 PUFF, 2 CH1 spaces per side)
- Round 6: SLST into the corner CH space. *Using Colour A: [PUFF, CH1, PUFF] in the corner space. Colour B: CH1, skip the PUFF, [2DC] in the CH1 space, 4DC. Colour A: 3DC. Colour B: 4DC, [2DC] in the CH1 space. Colour A: CH1, skip the PUFF*. Repeat between * twice more. Colour A: [PUFF, CH1, PUFF] in the corner space. Colour B: CH1, skip the PUFF, [2DC] in the CH1 space, 4DC. Colour A: 3DC. Colour B: 1DC. Colour A: 3DC. Colour B: 4DC, [2DC] in the CH1 space, CH1, SLST to the first PUFF. Fasten off Colour A. (19 DC, 2 PUFF, 2 CH1 spaces per side)
- Round 7: Continue with Colour B. SLST into the CH2 corner space, CH1 (does NOT count as a stitch). *[2HDC, CH2, 2HDC] in the corner space, skip the PUFF, [2HDC] in the CH1 space, 19HDC, [2HDC] in the CH1 space, skip the PUFF*. Repeat between * 3 more times, then SLST to the first HDC. Fasten off, then secure and weave in your ends. You should have 27 stitches on each side, plus 2CH at each corner.

Loving Kiss Square Pattern: UK Terms
- Round 1: Using Colour A, CH3 and SLST into the first CH to make a loop. CH5 (counts as first TR plus CH2). *TR into the centre of the loop, CH2*. Repeat between * 6 more times, then SLST to the 3rd CH of your beginning CH5. (8 stitches, 8 CH2 spaces)
- Round 2: SLST into a CH2 space. (Instead of making chains before the puff stitches, which would be more noticeable, you can pull up your loop slightly to get a suitable height.) *Using Colour A: [PUFF, CH1, PUFF] in the same CH2 space. Colour B: CH1, [3TR] in the next CH2 space. Colour A: CH1*. Repeat between * 3 more times. Colour A: SLST to the first PUFF. (3 TR, 2 PUFF and 2 CH1 spaces per side, plus 1 CH space at each corner throughout)
- Round 3: SLST into the corner CH space. *Using Colour A: [PUFF, CH1, PUFF] in the corner space. Colour B: CH1, skip the PUFF, [2TR] in the CH1 space, 1TR in the next stitch. Colour A: 1TR. Colour B: 1TR, [2TR] in the CH1 space. Colour A: CH1, skip the PUFF*. Repeat between * 3 more times. Colour A: SLST to the first PUFF. (7 TR, 2 PUFF, 2 CH1 spaces per side)
- Round 4: SLST into the corner CH space. *Using Colour A: [PUFF, CH1, PUFF] in the corner space. Colour B: CH1, skip the PUFF, [2TR] in the CH1 space, 1TR in the next stitch. Colour A: 5TR. Colour B: 1TR, [2TR] in the CH1 space. Colour A: CH1, skip the PUFF*. Repeat between * 3 more times. Colour A: SLST to the first PUFF. (11 TR, 2 PUFF, 2 CH1 spaces per side)
- Round 5: SLST into the corner CH space. *Using Colour A: [PUFF, CH1, PUFF] in the corner space. Colour B: CH1, skip the PUFF, [2TR] in the CH1 space, 1TR in the next stitch. Colour A: 9TR. Colour B: 1TR, [2TR] in the CH1 space. Colour A: CH1, skip the PUFF*. Repeat between * 3 more times. Colour A: SLST to the first PUFF. (15 TR, 2 PUFF, 2 CH1 spaces per side)
- Round 6: SLST into the corner CH space. *Using Colour A: [PUFF, CH1, PUFF] in the corner space. Colour B: CH1, skip the PUFF, [2TR] in the CH1 space, 4TR. Colour A: 3TR. Colour B: 4TR, [2TR] in the CH1 space. Colour A: CH1, skip the PUFF*. Repeat between * twice more. Colour A: [PUFF, CH1, PUFF] in the corner space. Colour B: CH1, skip the PUFF, [2TR] in the CH1 space, 4TR. Colour A: 3TR. Colour B: 1TR. Colour A: 3TR. Colour B: 4TR, [2TR] in the CH1 space, CH1, SLST to the first PUFF. Fasten off Colour A. (19 TR, 2 PUFF, 2 CH1 spaces per side)
- Round 7: Continue with Colour B. SLST into the CH2 corner space, CH1 (does NOT count as a stitch). *[2HTR, CH2, 2HTR] in the corner space, skip the PUFF, [2HTR] in the CH1 space, 19HTR, [2HTR] in the CH1 space, skip the PUFF*. Repeat between * 3 more times, then SLST to the first HTR. Fasten off, then secure and weave in your ends. You should have 27 stitches on each side, plus 2CH at each corner.

Want more patterns like this? If you enjoy granny squares and puff stitches, you can find ready-to-print PDF crochet patterns in the CosyLoopCrochet pattern shop on Etsy, including seasonal designs and cute projects you can start today.
How to Crochet Granny Squares Together With the Loving Kiss Square
Because the final round has 27 half double crochet stitches on every side, plus a 2-chain corner, the Loving Kiss Square is a great square for testing the how to crochet granny squares together tutorials above. Here is a simple way to join two of them:
- Block both squares and weave in every end.
- Place the squares side by side and match the corners first. The 2-chain corner spaces should line up.
- Join the first edge using your chosen method, working one stitch of the joining row into each pair of stitches, so you use all 27 stitches on each side.
- At the corners, work through the corner spaces so the seam turns neatly.
- Join the squares into strips first, then join the strips together to form the full layout.
Tip for four-corner junctions: where four squares meet, stitch through all four corner spaces together so you do not leave a gap or a bump in the middle.
How to Add a Border After Joining Your Granny Squares
A border frames your finished piece and hides small differences along the outer edge. Many crocheters search for how to crochet granny squares together with a border because it makes a project look polished. Join a new yarn at any corner, then work one round of single crochet or half double crochet around the whole piece, putting 3 stitches into each corner. Add a second round in a contrasting color for a bolder frame.
What Can You Make With Joined Granny Squares?
- Blankets and afghans, from baby size to full throws
- Cushion and pillow covers
- Tote bags and market bags
- Scarves, shawls and cardigans
- Table runners and coasters
- Patchwork wall hangings and gifts
To plan a blanket, divide the width you want by the size of one square. With the Loving Kiss Square at about 14.5 cm (5.5 in), that tells you how many squares you need in each row.
How to Crochet Granny Squares Together Tutorials: FAQ
What is the easiest way to crochet granny squares together?
Whip stitch is the easiest method for beginners. It needs only a yarn needle and matching yarn, and you can see exactly where each stitch goes. If you prefer to use a hook, slip stitch is the next easiest joining method.
How do you crochet granny squares together for beginners?
Start with squares that are all the same size, block them, and weave in the ends. Then pick one of the beginner-friendly how to crochet granny squares together tutorials above, such as whip stitch, and practice on two spare squares before joining your whole project.
How do you crochet granny squares together with a border?
Join the squares first, then work a border round of single crochet or half double crochet around the outside edge, with 3 stitches in each outer corner. A border hides uneven edges and gives a clean finish.
How do you join granny squares with a granny stitch?
There is no single standard method for this. Most crocheters mean working a border of granny clusters (groups of double crochet stitches separated by chain spaces) around each square so the edges match, then joining them with slip stitch or single crochet. If you are new, start with a simple slip stitch or single crochet join.
How do you join granny squares with double crochet?
Hold two squares together, insert your hook through the back loops of both, and work double crochet stitches across the edge. The seam is taller and more decorative than a slip stitch join, so it is best for chunky, textured projects.
Should I block granny squares before joining them?
Yes. Blocking evens out the shape, straightens the edges and makes the corners square, which makes every method in these how to crochet granny squares together tutorials easier and neater.
Final Thoughts: How to Crochet Granny Squares Together Tutorials
Now you have six ways to join your motifs and a free practice pattern to try them on. Pick a method, make a few Loving Kiss Squares, and see which seam you like best. If you want to keep going, explore more crochet tutorials and free patterns on the Crochet Lovers Club blog or find your next project in the CosyLoopCrochet Etsy shop. Happy crocheting, and I hope these how to crochet granny squares together tutorials help you finish your next blanket!


