
Crochet Hello Kitty Headband Pattern: Free & Easy
Looking for a crochet hello kitty headband pattern that is free, quick and easy to follow? You are in the right place. This crochet hello kitty headband pattern gives you a soft white band with pointy cat ears and a bright red bow, all written out in full below with the original photos and measurements.
The sample in the photos sits on a pair of pink over-ear headphones, so it works as a cute headphone cover, a cosplay accessory or a statement cat-ear headband. Whichever way you use it, this crochet hello kitty headband pattern uses only basic stitches, so confident beginners can finish it in a short crafting session.
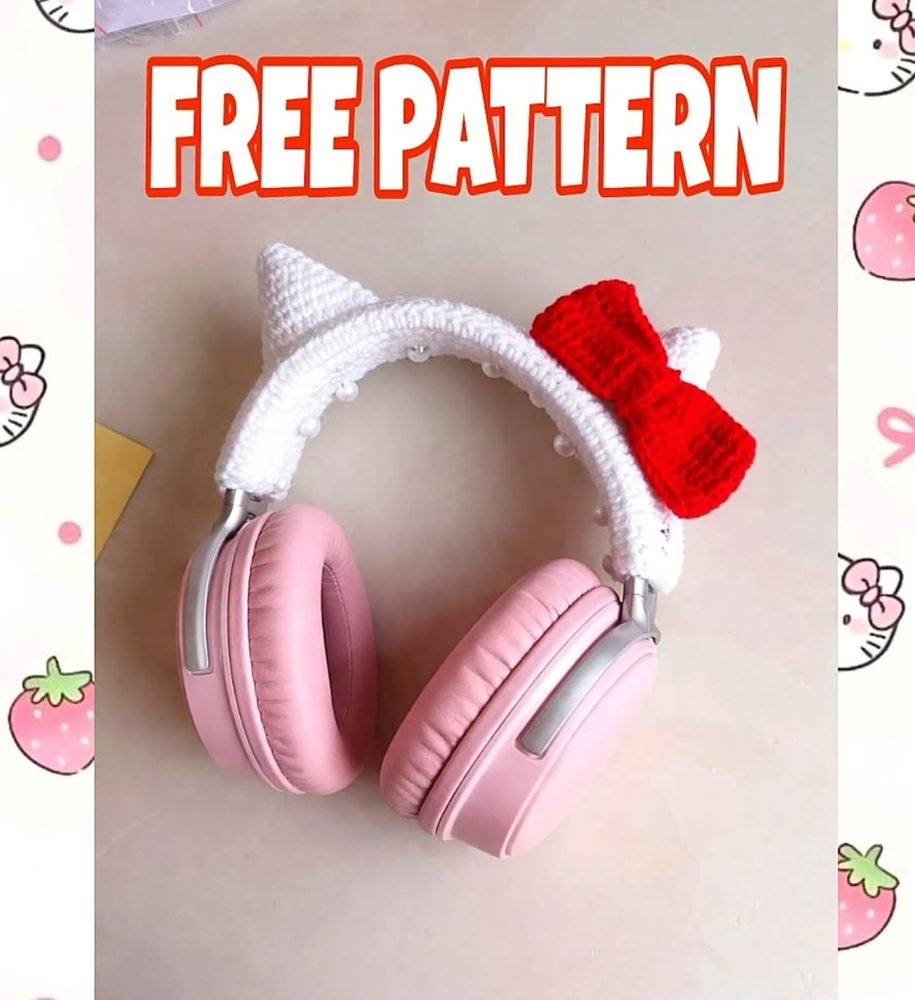
Quick Summary: Crochet Hello Kitty Headband Pattern
- Project: white cat-ear headband (or headphone cover) with a red bow
- Pieces: headband base, bow, 2 ears
- Stitches: chain, half double crochet, single crochet, increases and a magic ring
- Size in the sample: about 27 cm long and 7 cm wide (adjust to your yarn and head or headphones)
- Cost: free pattern, with a small amount of white and red yarn
Why Make This Crochet Hello Kitty Headband Pattern?
A handmade cat-ear accessory is one of the most popular crochet projects right now. People search for a free crochet hello kitty headband pattern because the design is instantly recognizable, cozy to wear and a great gift for friends, kids and anyone who loves kawaii style. This easy crochet hello kitty headband pattern also works as a headphone band cover, which protects your headphones and makes them look one of a kind.
If you enjoy this project, browse more ideas on our free crochet patterns blog. If you prefer printable PDFs, visit my crochet pattern shop on Etsy for more cozy designs you can download instantly.
This is an unofficial, fan-made tutorial for personal use and is not affiliated with or endorsed by Sanrio. Check the original designer’s terms before selling anything you make from it.
What You Need for the Crochet Hello Kitty Headband Pattern
- White yarn for the headband base and ears
- Red yarn for the bow
- A crochet hook that suits your yarn (the original pattern does not name a size, so pick the hook recommended on your yarn label)
- Tapestry needle and a long tail of yarn for gathering the bow and sewing the pieces
- Scissors
- Optional: small pearl beads, as seen on the sample, sewn along the band for decoration
The original pattern says you can crochet using the measurements according to the thickness of your yarn, so every crochet hello kitty headband pattern will come out a little different. If you are new to the craft, the history and basics of crochet are a good place to start.
Abbreviations Used in This Crochet Hello Kitty Headband Pattern
- Ch / Zn: chain
- Hdc: half double crochet
- Sc: single crochet
- Inc: increase (2 sc in the same stitch)
- MR: magic ring
- Dc: written as “Dc” in the original bow instructions (see the note in the bow section)
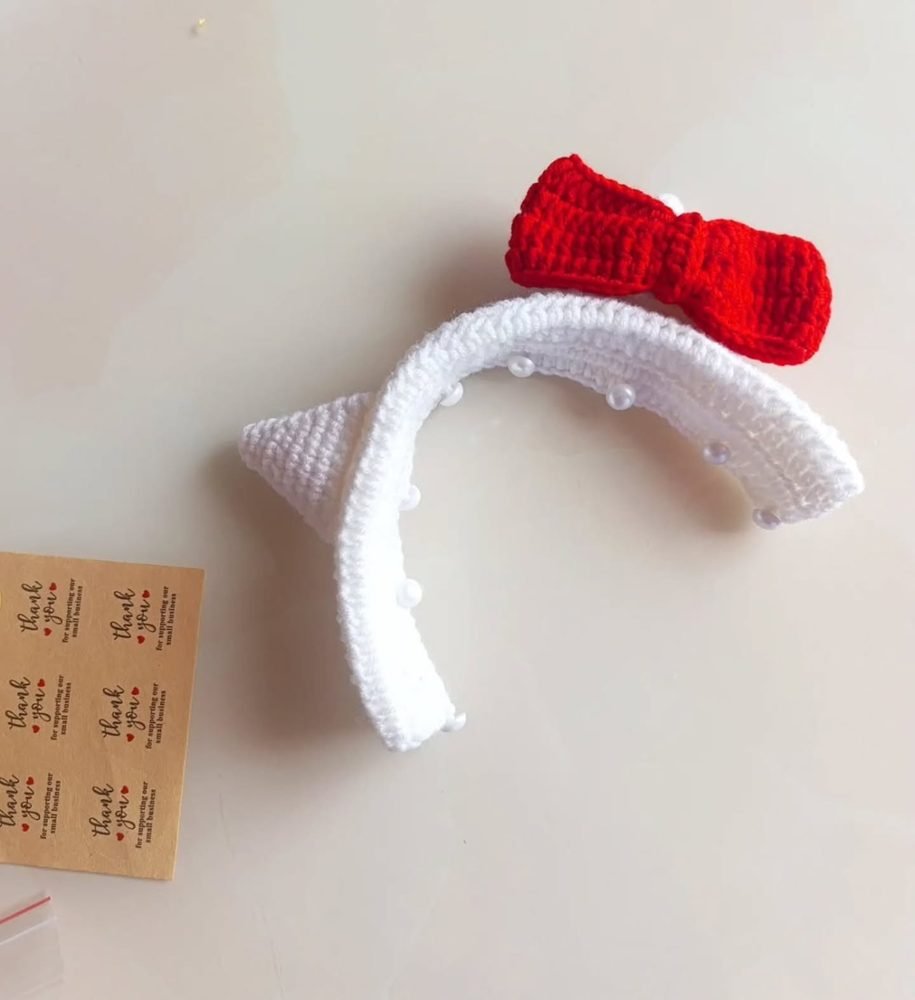
Step 1: Headband Base in the Crochet Hello Kitty Headband Pattern
The base is a flat strip that curves over the head or over your headphones. You can adjust the length and width to the thickness of your yarn.
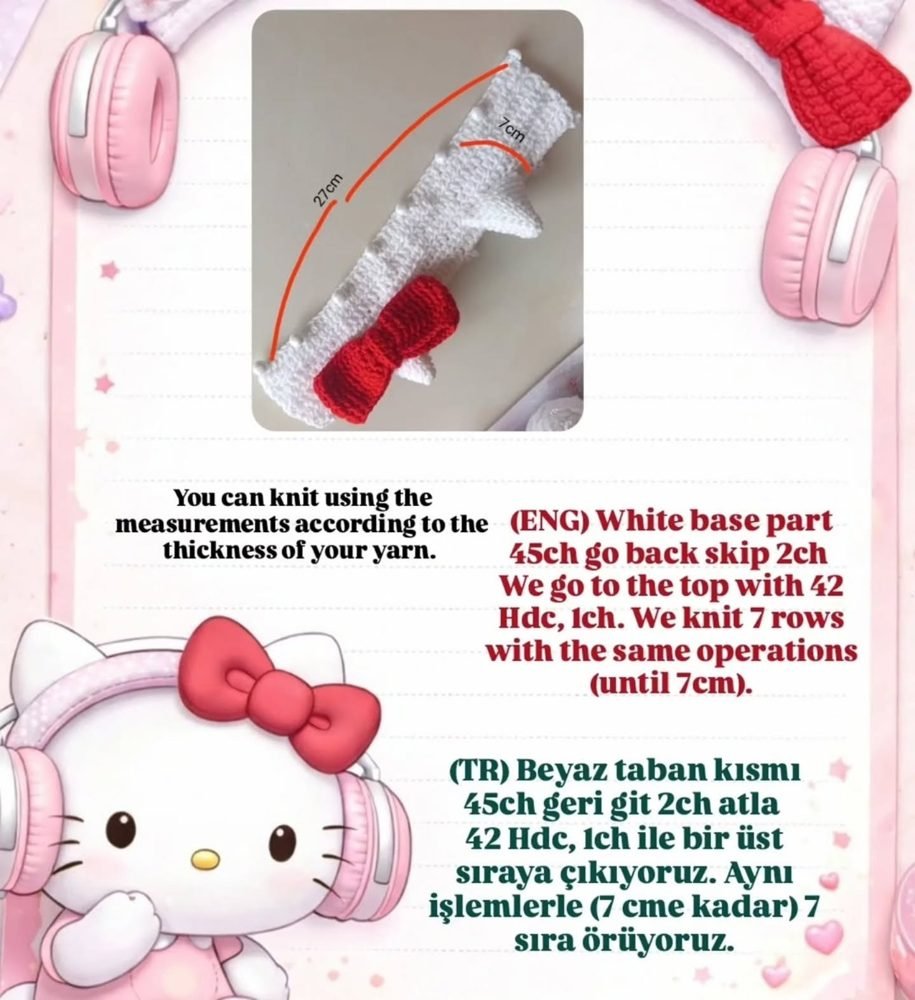
White base part:
- Ch 45, go back and skip 2 ch.
- Work 42 Hdc across to the top, then Ch 1.
- Work 7 rows with the same operations (until the strip is 7 cm wide).
In the sample, the strip measures about 27 cm along the curve and 7 cm across. Because yarn thickness changes the size, hold your work against your head or headphones as you go and add or remove stitches if needed. That flexibility is what makes this crochet hello kitty headband pattern so easy to customize.
Step 2: Bow for Your Crochet Hello Kitty Headband Pattern
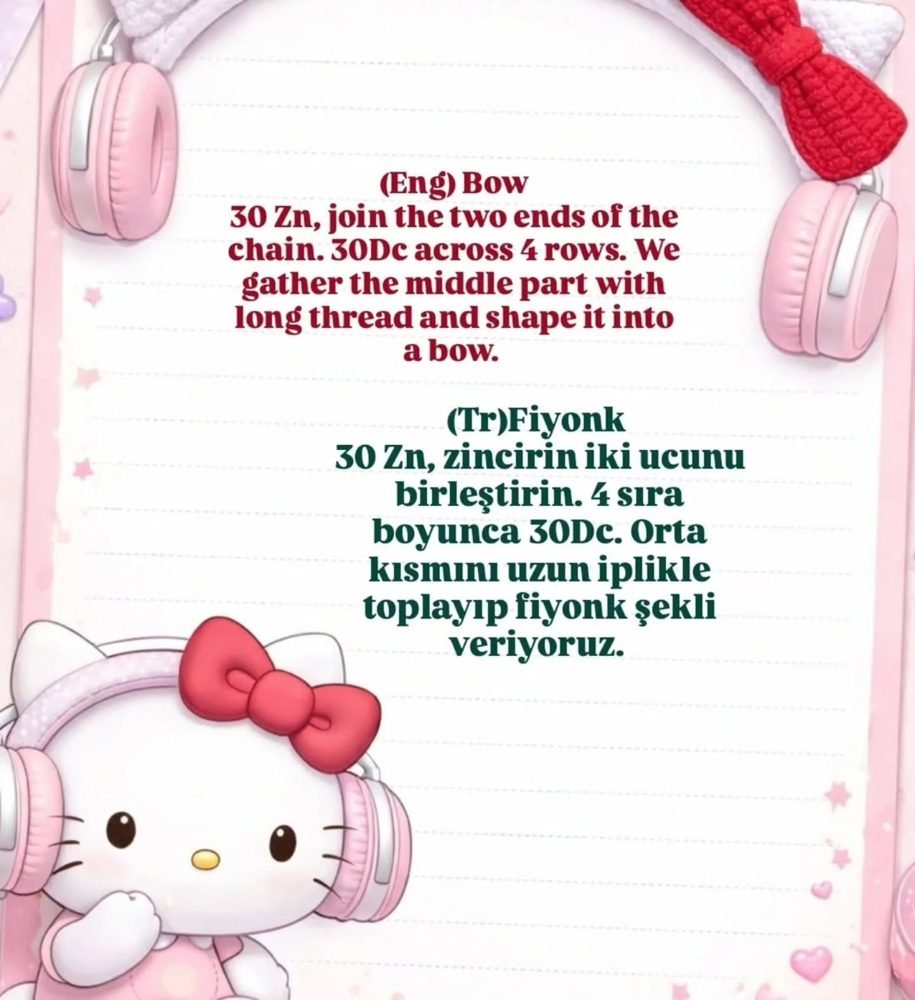
Bow (red yarn):
- Ch 30, then join the two ends of the chain.
- Work 30 Dc across 4 rows.
- Gather the middle part with a long thread and shape it into a bow.
Stitch note: the original writes the bow stitch as “Dc”. In UK terms that is a single crochet, which matches the dense, firm look of the bow in the photos. If you use US terms and your bow looks too loose, work single crochet instead. Check your tension against the photos before gathering the bow.
Step 3: Cat Ears in the Crochet Hello Kitty Headband Pattern
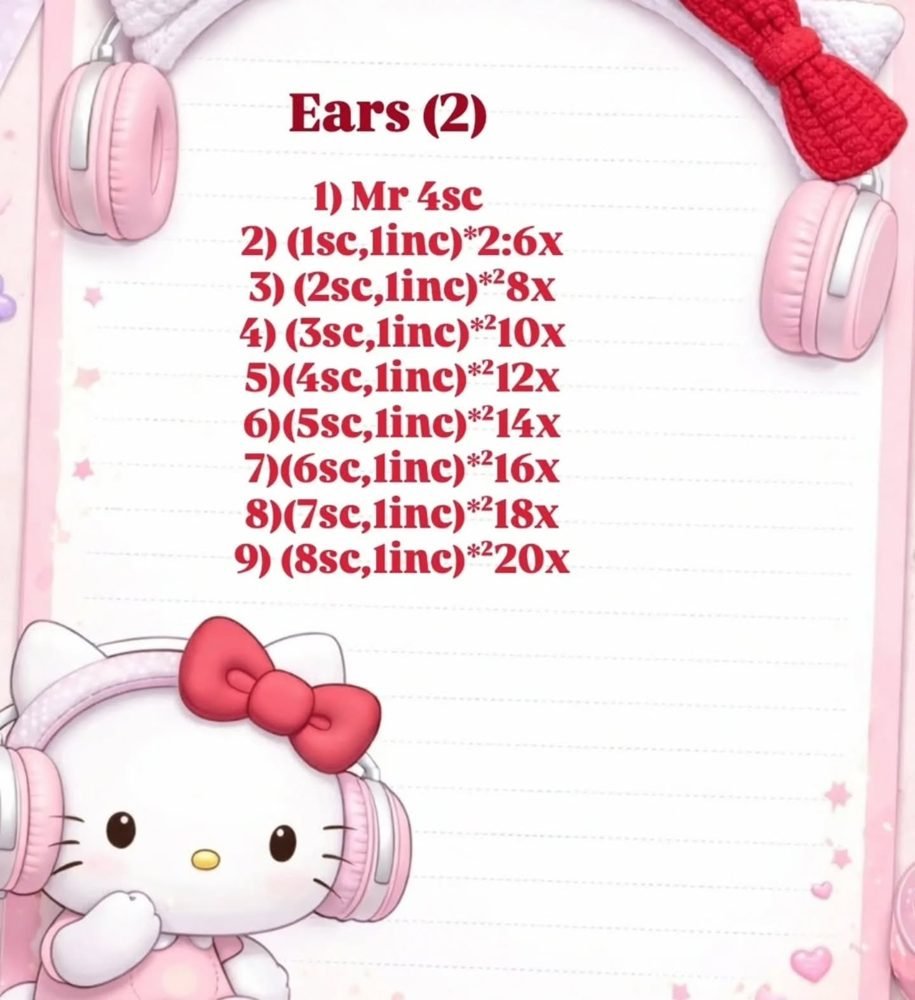
Ears (make 2, in white yarn):
- Round 1: MR, 4 sc (4)
- Round 2: (1 sc, 1 inc) x 2 (6)
- Round 3: (2 sc, 1 inc) x 2 (8)
- Round 4: (3 sc, 1 inc) x 2 (10)
- Round 5: (4 sc, 1 inc) x 2 (12)
- Round 6: (5 sc, 1 inc) x 2 (14)
- Round 7: (6 sc, 1 inc) x 2 (16)
- Round 8: (7 sc, 1 inc) x 2 (18)
- Round 9: (8 sc, 1 inc) x 2 (20)
The stitch total after each round is shown in brackets. Each ear is a small pointed cone, which gives the headband its classic cat look.
Assembly: Finish Your Crochet Hello Kitty Headband Pattern
The original pattern does not include written assembly steps, so here is the simple approach that matches the finished photos:
- Weave in all loose ends except the long tails you need for sewing.
- Sew the two ears to the top of the white band, placing them toward each side like cat ears.
- Sew the gathered bow on at the side of one ear, as in the sample.
- Optional: sew small pearl beads along the band for the sparkly look in the photos.
- Slip the band over your headphones, or sew the ends to an existing headband, and check it sits comfortably.
Take your time with the placement. Small changes in ear angle and bow position give every crochet hello kitty headband pattern its own personality.
Tips to Customize Your Crochet Hello Kitty Headband Pattern
- Change the colors: a pink, black or pastel version of this crochet hello kitty headband pattern looks great too.
- Resize it: use thicker yarn for a wider band or thinner yarn for a slim, delicate one.
- Make it a headphone cover: measure your headphone band first, then work the base to that length.
- Add details: sew on pearls, tiny hearts or a small charm for extra sparkle.
- Gift it: pair the headband with a handwritten card for a unique handmade present.
For more inspiration, explore our crochet accessory ideas or browse downloadable patterns in the CosyLoopCrochet Etsy shop.
FAQ: Crochet Hello Kitty Headband Pattern
Is this crochet hello kitty headband pattern really free?
Yes. The full written pattern is above, so you do not need to download a PDF. If you prefer a printable version, check the PDF patterns in the Etsy shop linked in this post.
Is this an easy crochet hello kitty headband pattern for beginners?
Yes. It uses chains, half double crochet, single crochet and increases. The magic ring for the ears is the only slightly tricky part, and many beginners learn it quickly.
What yarn works best for a crochet hello kitty headband pattern?
Smooth cotton or acrylic yarn in white and red works well. The original pattern lets you adjust the size to your yarn thickness, so use the weight you like and match your measurements.
Can I use this crochet hello kitty headband pattern as a headphone cover?
Yes. The sample in the photos sits on over-ear headphones. Measure your headphone band and work the base to that length before you add the ears and bow.
Where can I find more crochet patterns like this?
Find more free ideas on the Crochet Lovers Club blog, and printable patterns in the CosyLoopCrochet shop.
Final Thoughts on the Crochet Hello Kitty Headband Pattern
With soft white ears and a bright red bow, this project is as cute as it gets. Save this crochet hello kitty headband pattern, grab your white and red yarn and start stitching today. Once you have made one, you will want a whole collection!


