

Crochet Amigurumi Butterfly: Free Step-by-Step Pattern for Beginners
A crochet amigurumi butterfly is one of the sweetest small projects you can make: a striped, plush little body, a round smiling face, tiny embroidered eyelashes and two soft wings. In this guide you will get the complete written crochet amigurumi butterfly pattern, round by round, plus materials, abbreviations, stuffing tips and finishing advice. Whether you are new to amigurumi or already love making crochet toys, this crochet amigurumi butterfly works up quickly and makes a lovely gift, nursery decoration or baby rattle.
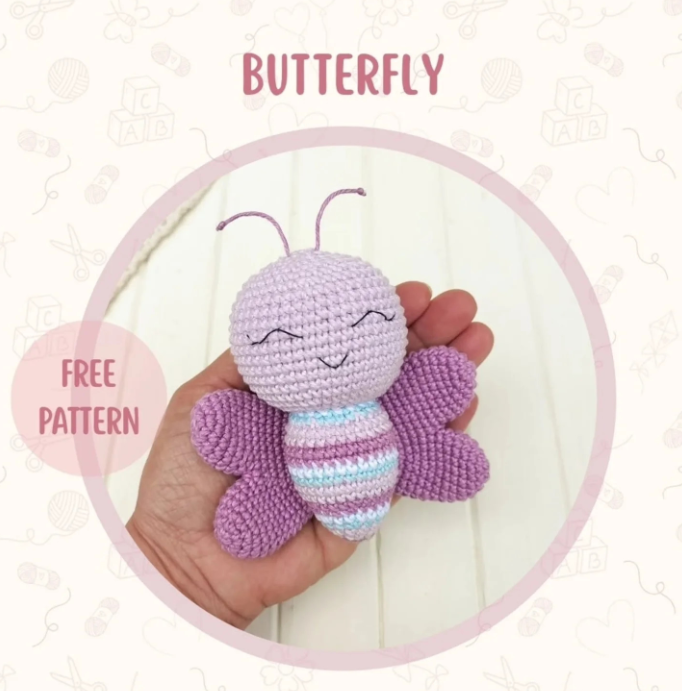
Quick Answer: What Is a Crochet Amigurumi Butterfly?
A crochet amigurumi butterfly is a small stuffed butterfly toy made in the Japanese art of amigurumi, using single crochet stitches worked in continuous spiral rounds with a small hook so the fiberfill stays hidden. This crochet amigurumi butterfly uses a 2.0 mm hook and 100% cotton yarn and measures about 11 cm tall.
Crochet Amigurumi Butterfly at a Glance
| Detail | Info |
|---|---|
| Project | Crochet amigurumi butterfly (free pattern) |
| Skill level | Beginner to advanced beginner |
| Finished size | About 11 cm tall (100% cotton yarn, 2.0 mm hook) |
| Main stitches | Single crochet, increase, decrease, magic ring, front loop only |
| Colors | Dark lilac, light lilac, blue, white, black embroidery thread |
| Parts | Striped body, head, face embroidery, antennas, two wings |
Materials and Tools for Your Crochet Amigurumi Butterfly
Gather these supplies before you start your crochet amigurumi butterfly. Cotton yarn is ideal because it gives crisp stitch definition, and a small 2 mm hook keeps the fabric dense enough for firm stuffing.
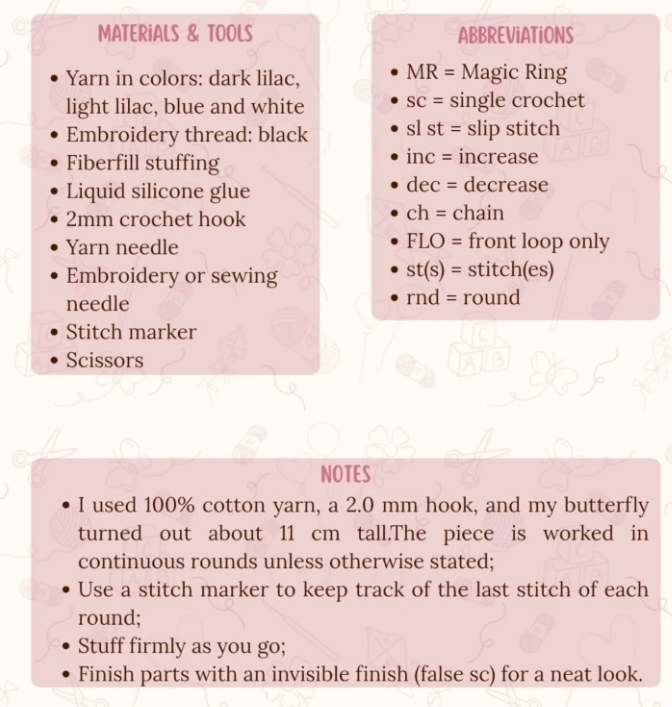
Materials and Tools
- Yarn in colors: dark lilac, light lilac, blue and white
- Embroidery thread: black
- Fiberfill stuffing
- Liquid silicone glue
- 2 mm crochet hook
- Yarn needle
- Embroidery or sewing needle
- Stitch marker
- Scissors
Crochet Abbreviations (US Terms)
- MR = magic ring
- sc = single crochet
- sl st = slip stitch
- inc = increase
- dec = decrease
- ch = chain
- FLO = front loop only
- st(s) = stitch(es)
- rnd = round
Pattern Notes
- The sample crochet amigurumi butterfly used 100% cotton yarn and a 2.0 mm hook, and turned out about 11 cm tall. The piece is worked in continuous rounds unless otherwise stated.
- Use a stitch marker to keep track of the last stitch of each round.
- Stuff firmly as you go.
- Finish parts with an invisible finish (false sc) for a neat look.
Step 1: Crochet the Striped Body of the Amigurumi Butterfly
The body is the signature of this crochet amigurumi butterfly. You will switch between dark lilac, light lilac, blue and white to create the pretty stripes. Start with dark lilac yarn.
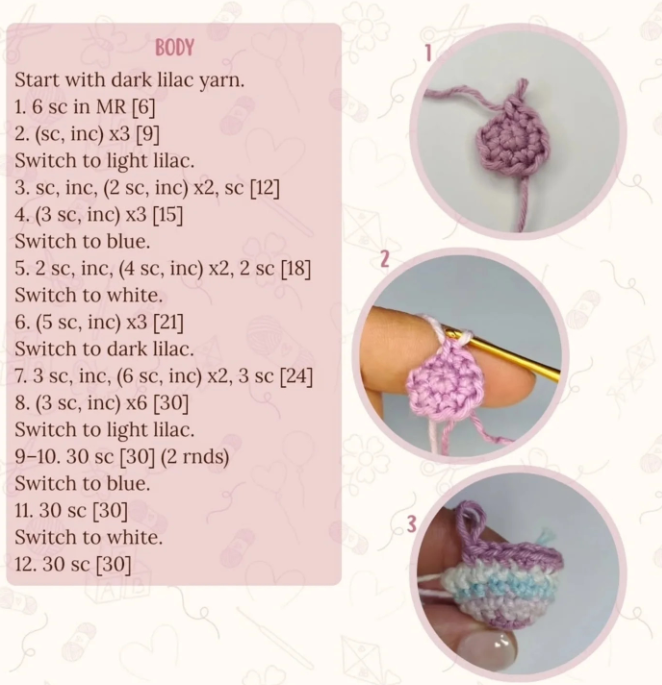
Body (Rounds 1 to 12)
Start with dark lilac yarn.
- 6 sc in MR [6]
- (sc, inc) x3 [9]
Switch to light lilac.
- sc, inc, (2 sc, inc) x2, sc [12]
- (3 sc, inc) x3 [15]
Switch to blue.
- 2 sc, inc, (4 sc, inc) x2, 2 sc [18]
Switch to white.
- (5 sc, inc) x3 [21]
Switch to dark lilac.
- 3 sc, inc, (6 sc, inc) x2, 3 sc [24]
- (3 sc, inc) x6 [30]
Switch to light lilac.
9–10. 30 sc [30] (2 rnds)
Switch to blue.
- 30 sc [30]
Switch to white.
- 30 sc [30]
Body Continuation (Rounds 13 to 18)
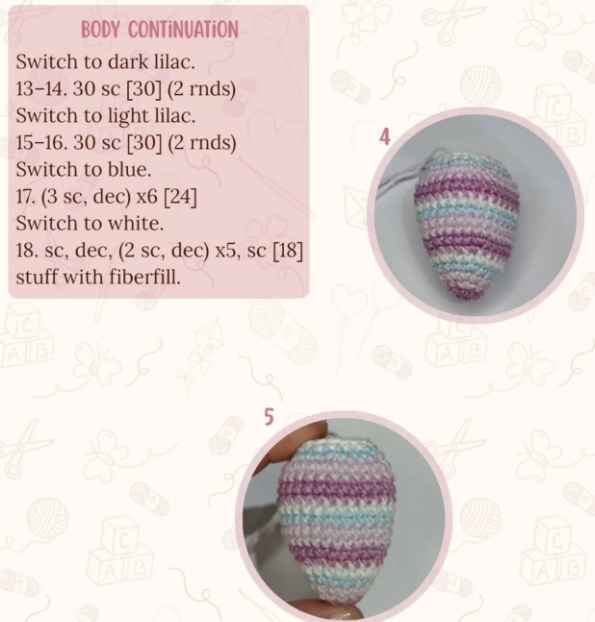
Switch to dark lilac.
13–14. 30 sc [30] (2 rnds)
Switch to light lilac.
15–16. 30 sc [30] (2 rnds)
Switch to blue.
- (3 sc, dec) x6 [24]
Switch to white.
- sc, dec, (2 sc, dec) x5, sc [18] – stuff with fiberfill.
Step 2: Crochet the Head of the Crochet Amigurumi Butterfly
The head is worked directly onto the body in light lilac. Round 19 is worked in the front loop only, which creates a neat ridge where the head meets the body. Stuff firmly so the head keeps a smooth, round shape.
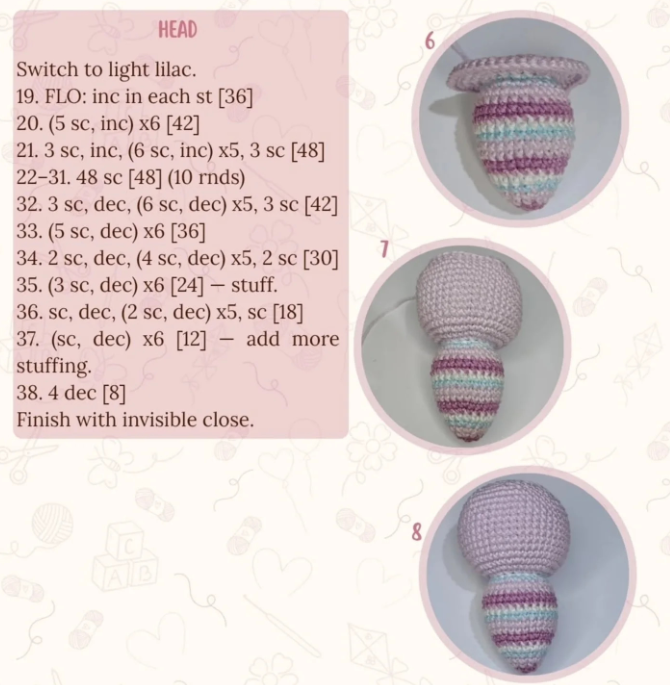
Head (Rounds 19 to 38)
Switch to light lilac.
- FLO: inc in each st [36]
- (5 sc, inc) x6 [42]
- 3 sc, inc, (6 sc, inc) x5, 3 sc [48]
22–31. 48 sc [48] (10 rnds)
- 3 sc, dec, (6 sc, dec) x5, 3 sc [42]
- (5 sc, dec) x6 [36]
- 2 sc, dec, (4 sc, dec) x5, 2 sc [30]
- (3 sc, dec) x6 [24] – stuff.
- sc, dec, (2 sc, dec) x5, sc [18]
- (sc, dec) x6 [12] – add more stuffing.
- 4 dec [8]
Finish with invisible close.
Step 3: Embroider the Eyes, Mouth and Antennas
The face gives your crochet amigurumi butterfly its personality. Closed, smiling eyes with little eyelashes look gentle and safe for babies because there are no plastic parts to come loose.
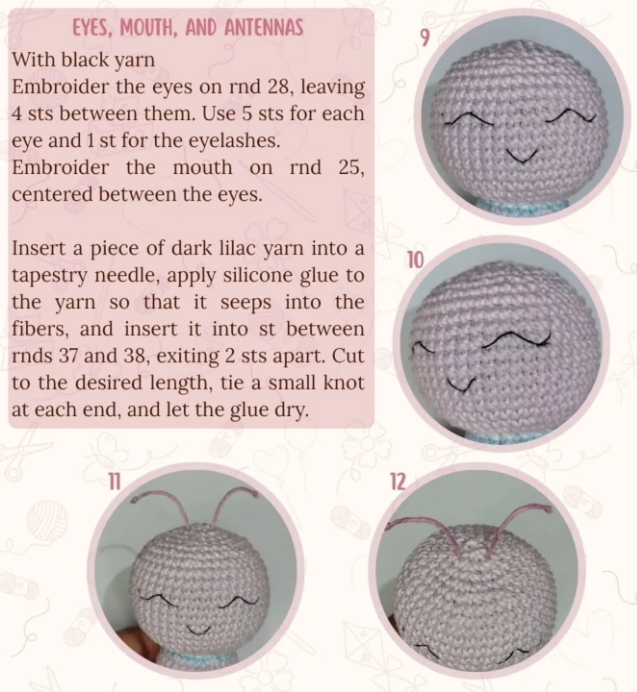
Eyes, Mouth and Antennas
With black yarn: embroider the eyes on rnd 28, leaving 4 sts between them. Use 5 sts for each eye and 1 st for the eyelashes. Embroider the mouth on rnd 25, centered between the eyes.
Antennas: insert a piece of dark lilac yarn into a tapestry needle, apply silicone glue to the yarn so that it seeps into the fibers, and insert it into st between rnds 37 and 38, exiting 2 sts apart. Cut to the desired length, tie a small knot at each end, and let the glue dry.
Step 4: Crochet the Wings (Make 2)
The wings are simple domed shapes in dark lilac that are joined into one piece. Fasten off the first wing with an invisible finish, but do not cut the yarn on the second wing, because you will use it to join both wings together.
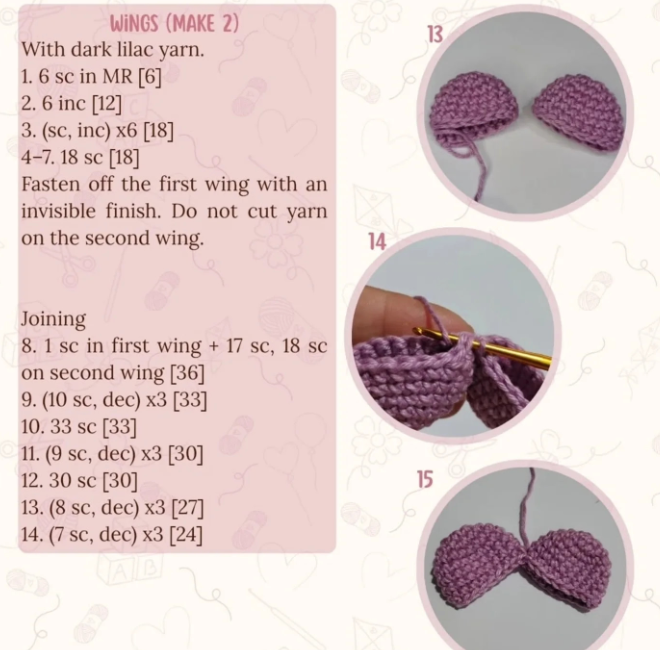
Wings (Make 2)
With dark lilac yarn.
- 6 sc in MR [6]
- 6 inc [12]
- (sc, inc) x6 [18]
4–7. 18 sc [18]
Fasten off the first wing with an invisible finish. Do not cut yarn on the second wing.
Joining the Wings
- 1 sc in first wing + 17 sc, 18 sc on second wing [36]
- (10 sc, dec) x3 [33]
- 33 sc [33]
- (9 sc, dec) x3 [30]
- 30 sc [30]
- (8 sc, dec) x3 [27]
- (7 sc, dec) x3 [24]
Pro Tips for a Perfect Crochet Amigurumi Butterfly
- Keep your tension tight. A 2 mm hook with cotton yarn prevents gaps, so the stuffing never peeks through your crochet amigurumi butterfly.
- Mark every round. A stitch marker saves you from losing count in the long 48-stitch head rounds.
- Stuff as you go. Add fiberfill in small pieces before the opening gets too small, especially at rounds 18, 35 and 37.
- Change colors cleanly. Switch to the new yarn on the last pull-through of the final stitch in each striped round.
- Use an invisible finish. It gives every part of the crochet amigurumi butterfly a neat, professional look.
Why Make a Crochet Amigurumi Butterfly?
A crochet amigurumi butterfly is a perfect stash-buster because it uses only small amounts of four colors. It is also a wonderful craft-fair item, baby shower gift, spring decoration or keepsake. Because the pattern repeats simple increases and decreases, it is a great way to practice amigurumi shaping, color changes and clean embroidery.
Variations to Try With This Crochet Amigurumi Butterfly Pattern
- Swap the lilac for pink, yellow or orange for a rainbow garden of crochet amigurumi butterfly toys.
- Use a fingering or sport weight cotton for a bigger crochet amigurumi butterfly; always go down a hook size from the yarn label for a firm fabric.
- Add a tiny bell inside the body for a soft baby rattle style crochet amigurumi butterfly.
Frequently Asked Questions About the Crochet Amigurumi Butterfly
How big is this crochet amigurumi butterfly?
Made with 100% cotton yarn and a 2.0 mm hook, the finished crochet amigurumi butterfly is about 11 cm tall.
What hook size do I need for an amigurumi butterfly?
Use a 2 mm crochet hook with cotton yarn. The small hook keeps stitches dense so the fiberfill stays hidden.
Is this crochet amigurumi butterfly pattern beginner friendly?
Yes. The pattern uses only single crochet, increases, decreases, a magic ring and front loop only, all worked in continuous rounds.
How do I make the antennas on the crochet amigurumi butterfly?
Coat dark lilac yarn with liquid silicone glue, thread it through the head between rounds 37 and 38, trim to length, and knot both ends. Let the glue dry completely.
Is the crochet amigurumi butterfly safe for babies?
Because the face is embroidered rather than using plastic safety eyes, the design has no hard parts to detach. Always check that all ends are secure and supervise young children.
Final Thoughts on Your Crochet Amigurumi Butterfly
Now you have everything you need to crochet your own amigurumi butterfly: materials, abbreviations, the striped body, the round head, the embroidered face, glued antennas and joined wings. Share a photo of your finished crochet amigurumi butterfly in the comments, and save this free pattern to Pinterest so you can find it again for your next amigurumi project.
Pattern credit: [ADD DESIGNER NAME / LINK HERE]. Please do not resell this pattern or its photos.


![Amigurumi Crochet Pattern HALLOWEEN doll – [finished doll / head and body / legs and shoes / ruffled dress / witch hat / curly wig]](https://crochetloversclub.com/wp-content/uploads/2026/08/Crochet_witch_doll_sitting_202608271734-768x768.jpeg)


