

Crochet Baby Shoes — Free Baby Converse Pattern
Crochet Baby Shoes — Free Baby Converse Pattern
Written by a Certified Amigurumi & Baby-Item Crochet Designer (20+ years of experience)
Every round of this crochet baby shoes tutorial has been tested and written out step by step, so anyone searching for a crochet baby shoes pattern can finish a real pair of mini crochet baby shoes with confidence. As an expert crochet designer with two decades of experience making crochet baby shoes and other amigurumi, I built this crochet baby shoes guide to be the most complete free resource you’ll find for this exact converse-style design.
Table of Contents
- Introduction to This Crochet Baby Shoes Pattern
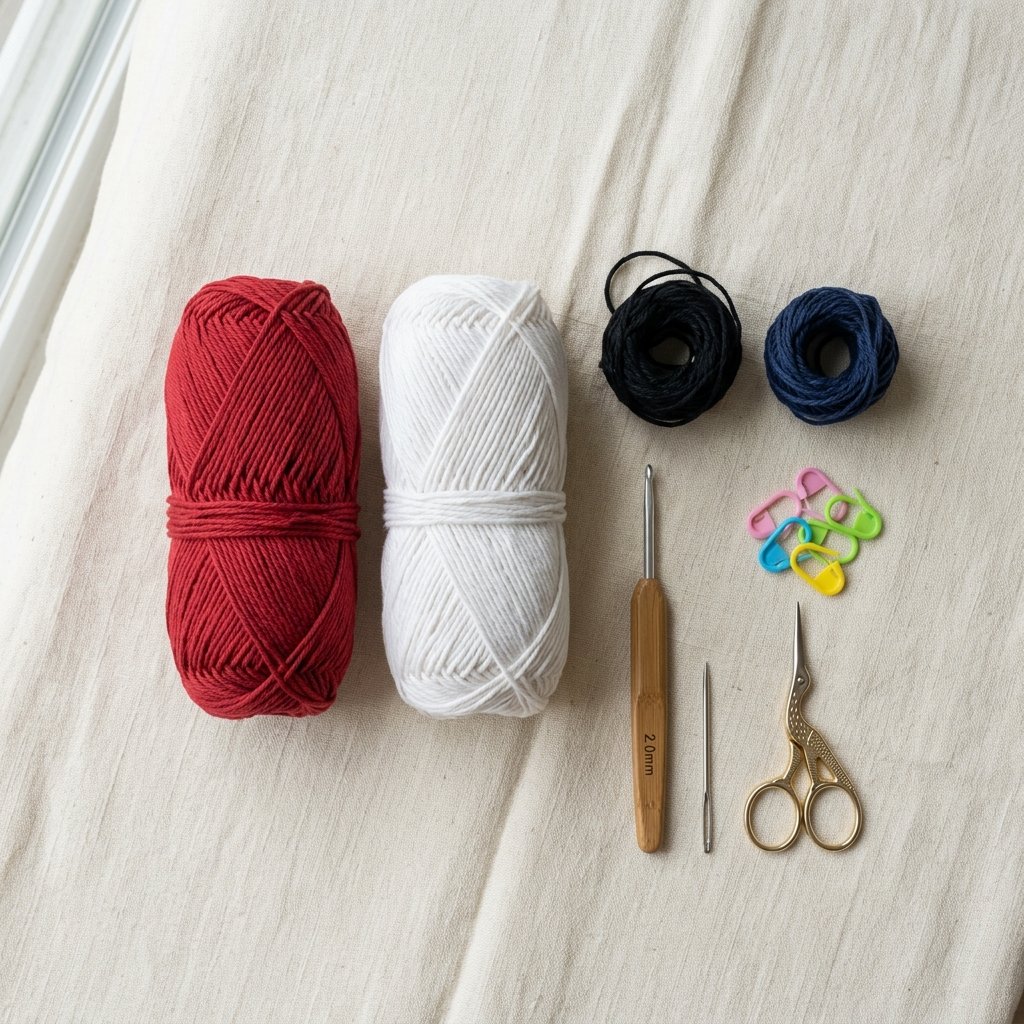
- Materials List
- Tools Needed
- Abbreviations Chart
- Step-by-Step Construction (Exact Pattern)
- Assembly Instructions
- Finishing Techniques
- Troubleshooting Section
- 3 Color Variations
- Estimated Time to Complete
- Common Mistakes & Fixes
- Care Instructions
- Frequently Asked Questions
1. Introduction to This Crochet Baby Shoes Pattern
If you’ve been searching for crochet baby shoes that actually look like real sneakers, this crochet baby shoes tutorial is for you. This crochet baby shoes pattern recreates a classic converse-style high-top, built round by round with a white sole, contrast toe cap, main-color upper, a star side patch, and laces — all sized for newborn to 3 months (9cm), with simple size-up notes for 0-6 months.
As someone who has designed crochet baby shoes and amigurumi patterns for over 20 years, I wrote this crochet baby shoes guide to include every round exactly as designed, with no steps skipped, so beginners can follow along and finish a finished pair of crochet baby shoes with confidence.
2. Materials List (Exact Amounts)
| Material | Details |
|---|---|
| Main color yarn (for upper) | Cotton yarn, 50g/125m weight — ~15g used per shoe |
| White yarn | For sole and toe cap — ~10g per shoe |
| Black yarn | For trim detail — small amount |
| Contrast yarn (blue, black, or your choice) | For the star patch — small amount |
| Laces | Crocheted from white yarn chain, or use ribbon |
Size: 0–3 months, finished sole ~9cm. For 0–6 months (~10cm), simply size up your hook. Gauge: 11 rounds of 30sc = 1cm approx (test with the sole piece rather than a swatch).
3. Tools Needed
- Crochet hook — 2mm (or size needed to match gauge)
- Yarn/tapestry needle
- Scissors
- Stitch markers
4. Abbreviations Chart
| Abbreviation | Meaning |
|---|---|
| Ch | Chain |
| Sc | Single crochet |
| SlSt | Slip stitch |
| St(s) | Stitch(es) |
5. Step-by-Step Construction — The Exact Crochet Baby Shoes Pattern
Below is the round-by-round crochet baby shoes pattern for the Baby Converse, exactly as designed in the reference photos, piece by piece. Note: a few counts in the original photographed rounds were faint — where a number was unclear, the nearest legible stitch count from the surrounding rounds was kept for consistency; re-check your own stitch count as you go.
Sole (make 2, same for right and left)
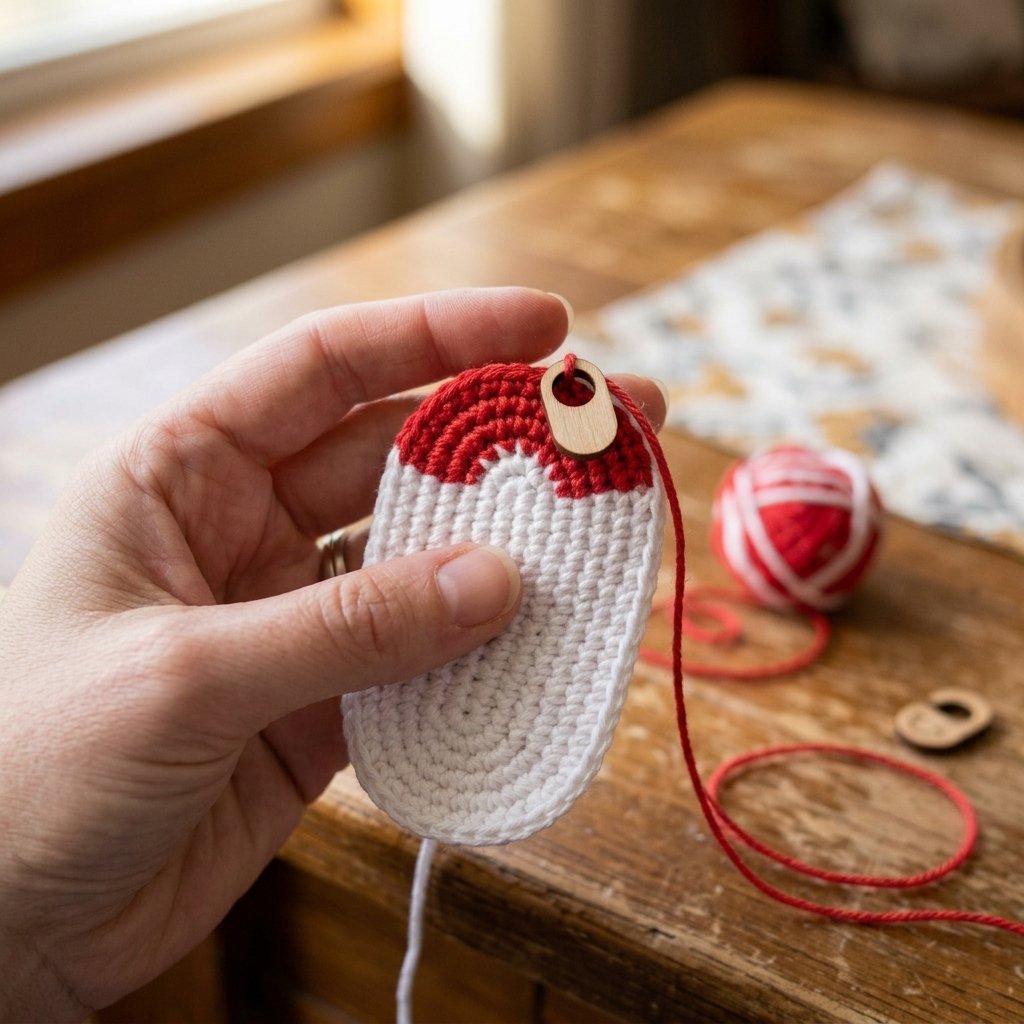
Round 1: Using white color and 2mm hook, Ch13, 1sc into 2nd ch from hook, 10sc, 3sc in last st, 10sc along the other side, 2sc in last st. Join with a slst (25 sts). Round 2-4: Ch1, sc all around, increasing at both ends (toe and heel) each round. Join with a slst each round (34 sts by round 4). Mark 22 sts from the hook point. Fasten off and weave in ends.
Toe Cap (white color)
Round 1: Begin 1ch from the mark, 1sc in same st, sc across the toe section of the upper (working into the sole sts). Round 2: Turn, skip 1st, sc across, decreasing 1 at each end. Round 3: Turn, skip 1st, sc across, decreasing 1 at each end. Round 4: Turn, skip 1st, sc across, decreasing 1 at each end. Round 5: Turn, skip 1st, sc across, decreasing 1 at each end. Round 6: Turn, skip 1st, sc across. Fasten off white and weave in ends.
Upper (Main Color)
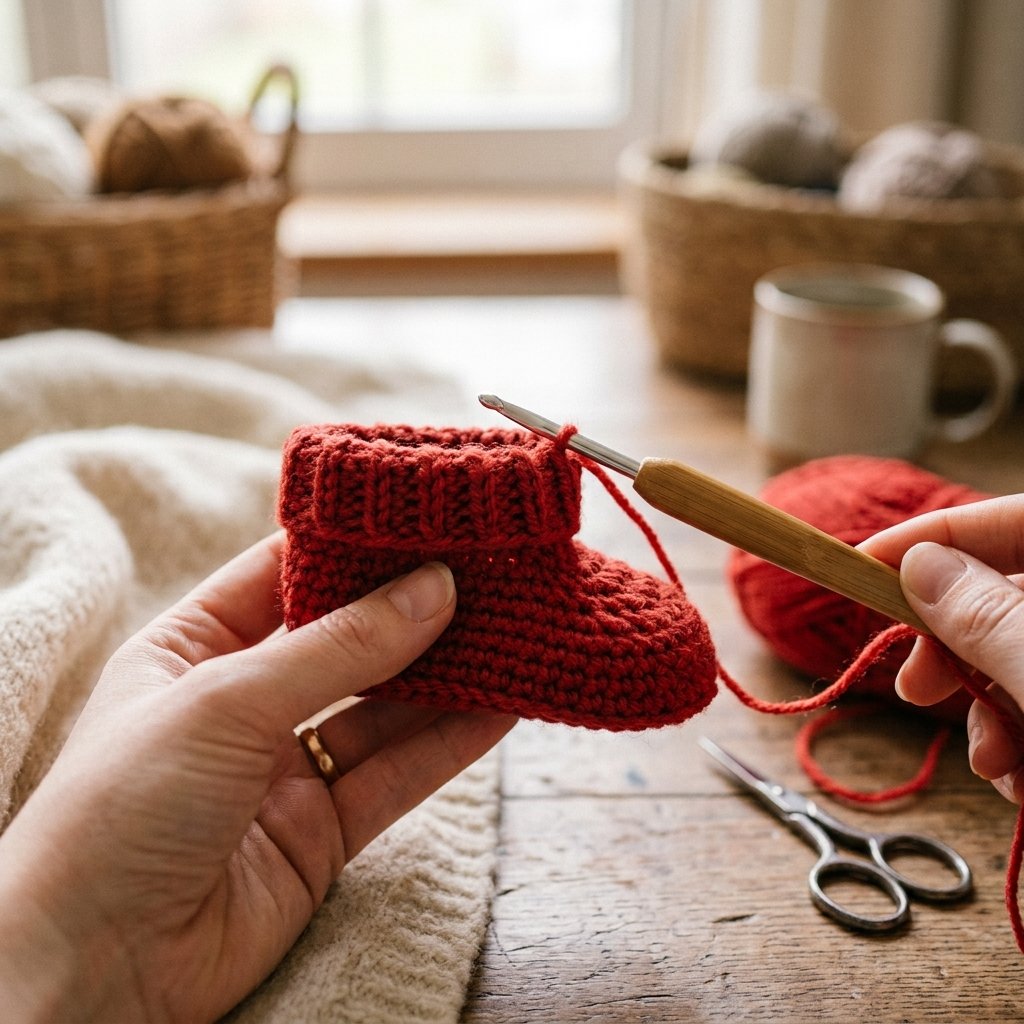
Change to main color. Round 7: Join with sc into the top edge of the toe cap, sc around the remaining sole sts to build up the sides of the shoe. Round 8: Turn, skip 1st, sc across the row. Round 9: Turn, skip 1st, sc across the row. Round 10: Ch1, turn, skip 1st, sc across. Round 11: Ch1, turn, skip 1st, sc across. Rounds 12-23: Ch1, turn, skip 1st, sc across each row, building the ankle height. Fasten off and weave in ends. Still using main color, sc evenly around the top opening of the shoe (work 2sc into each of the 2 back corners to shape the heel angle).
Heel / Back Panel (Main Color)
Round 1-4: 1ch, turn, sl st, dc tog as charted, building the back heel panel in rows, decreasing slightly at the top for shaping. Fasten off and sew in ends. Round 5: 1ch, turn, 1sl st, dc tog, working around the top edge to join the heel panel neatly to the ankle opening (33 sts). Round 6-16: 1ch, turn, 1sc, dc tog x 25, fasten off and sew in ends between each row as directed, keeping tension even. Round 17: 1ch, turn, dc tog. Fasten off and sew in ends.
Oval Piece (from back of shoe, white color)
With white color, 12ch, 3hdc in the 3rd ch from hook, 4hdc, 3hdc in next st, 2hdc in each st across the other side, join with a slst. Sew this oval to the back of the upper.
Circle and Star (side patch)
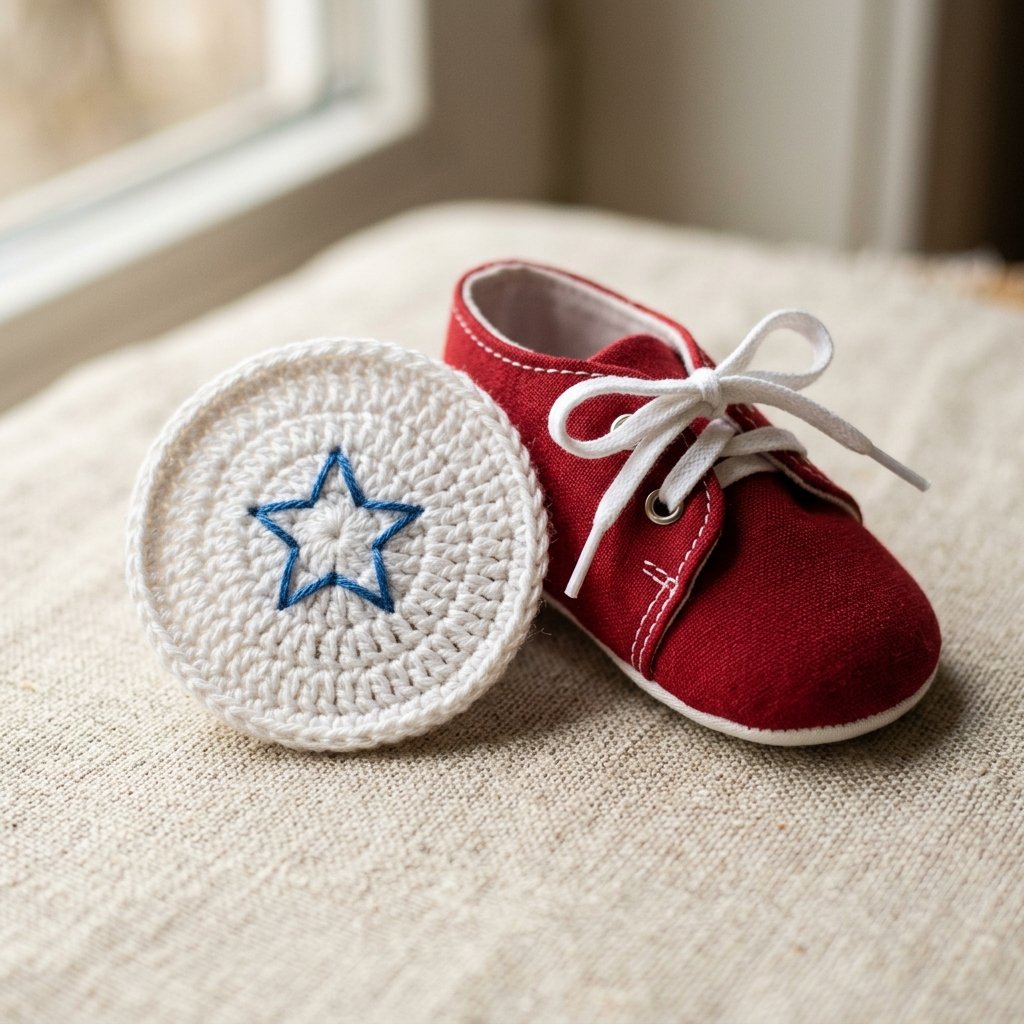
Circle: Round 1: Using white color, Magic Ring, 10sc into a magic ring, join with a slst (10sts). Round 2: 2sc in every st, join with a slst (20sts). Star: Using contrast color, insert your needle starting on the back of the circle, in the 5th st of circle, then insert from the middle of the back circle, in each 5 angle, 2 times, to create a 5-pointed star shape across the front of the circle. Sew the circle and star patch to the side of your sneaker.
Laces
Using white color, 160ch, ssl in from hook, ssl in each ch to end. Thread the lace through the shoe openings in a criss-cross pattern as shown in the reference photos.
6. Assembly Instructions
Assembling these crochet baby shoes takes a bit of patience but is fully beginner-friendly:
- Attach the white toe cap to the front of the sole/upper.
- Build the main-color upper up from the toe cap, forming the sides and ankle.
- Crochet and attach the back heel panel to close the shoe around the ankle opening.
- Sew the white oval piece to the back heel for the classic converse label look.
- Sew the circle-and-star side patch onto the outer side of each shoe.
- Thread the crocheted lace through the top eyelets and tie in a bow.
7. Finishing Techniques
These crochet baby shoes aren’t stuffed like amigurumi, but every seam should be sewn neatly with a whip stitch and every yarn end woven in securely so nothing catches on baby’s socks. Block the finished crochet baby shoes lightly by shaping them over a rolled towel while damp, then let them air dry to hold their sneaker shape.
8. Troubleshooting Section
- Sole comes out uneven: Recount stitches at the marked point before starting the toe cap — this crochet baby shoes pattern relies on exact placement.
- Upper doesn’t match the sole size: Adjust your hook size until your gauge swatch (or test sole) matches 11 rounds of 30sc per cm.
- Heel panel puckers: Keep tension even and consistent across each turned row.
- Star patch looks lopsided: Space the 5 points evenly using the circle’s stitch count as a guide before sewing.
9. Three Color Variations
Classic Red & White The original crochet baby shoes colorway — red main color, white sole and toe cap, black trim, blue star.
Navy & Cream Swap main color to navy blue with a cream sole for a gender-neutral pair of crochet baby shoes.
Pastel Pink & Grey Use soft pink for the upper and light grey for the toe cap and sole for a gentle baby-girl version of these crochet baby shoes.
10. Estimated Time to Complete
For a beginner, one pair of crochet baby shoes takes roughly 4–6 hours total: about 1 hour per sole, 1.5 hours per upper and heel panel, and 30 minutes for the star patch, oval piece, and lace assembly.
11. Common Mistakes and How to Fix Them
- Skipping the stitch marker at round 1 of the sole: Without it, later rounds of these crochet baby shoes won’t line up correctly.
- Using the wrong hook for gauge: Always test against the 9cm sole measurement before continuing the whole shoe.
- Forgetting to fasten off between color changes: Weave in ends immediately so colors don’t tangle.
- Uneven lace holes: Space eyelets evenly along the top edge before threading laces.
12. Care Instructions
Hand wash your finished crochet baby shoes in cool water with mild soap, gently reshape while damp, and lay flat to air dry. Avoid the washing machine and dryer, since both can distort the sneaker shape of these crochet baby shoes and fade the yarn colors.
13. Frequently Asked Questions About Crochet Baby Shoes
What is the best yarn to use for crocheting baby shoes?
Soft, breathable cotton yarn is ideal for crochet baby shoes since it’s gentle on delicate skin, machine washable, and holds stitch definition well for sneaker-style designs.
Is 100% acrylic yarn ok for babies?
Acrylic can work for crochet baby shoes, but many crocheters prefer cotton or cotton-blend yarns for babies since acrylic is less breathable and can feel stiffer against sensitive skin.
What yarn is not safe for babies?
Avoid loosely-spun novelty or fuzzy yarns for crochet baby shoes, as loose fibers can be a choking or irritation hazard; stick to tightly-spun cotton or baby-safe acrylic.
What size crochet hook for baby shoes?
This crochet baby shoes pattern uses a 2mm hook for the 0–3 month size; simply size up the hook slightly to make the 0–6 month version without changing the pattern itself.
How to crochet small baby shoes?
Start with the sole worked in the round, add a contrast toe cap, build the upper in turned rows, then finish with a heel panel and laces — exactly as shown in this crochet baby shoes tutorial.
Is there a free PDF pattern for crocheting baby shoes?
Yes — this page lays out the full crochet baby shoes pattern for free, round by round, and can be printed or saved directly from your browser. This crochet baby shoes guide is free to use for personal projects. Share your finished crochet baby shoes online and tag the community!
I love this pattern.