

If you want crochet flowers behind the wings of a happy little face, this is the free pattern to try. These crochet flowers behind the wings are tiny smiley flowers with six petals that spread like wings around the face, and a secret pocket tucked behind them holds an essential oil scent pad. Clip one onto your car vent and you have a cute handmade air freshener that makes every drive smell and look better.
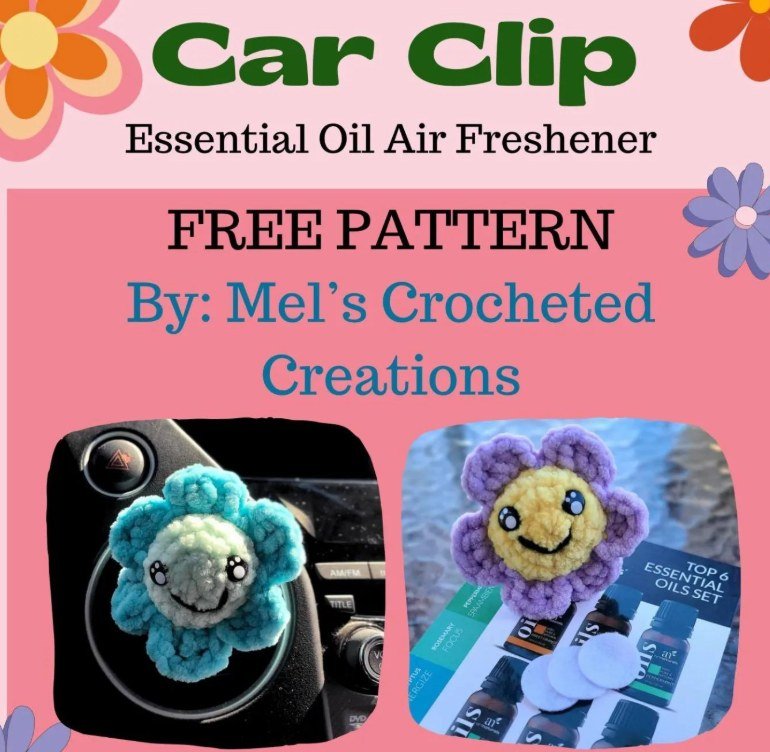
Quick answer: what are crochet flowers behind the wings? They are a free car clip flower pattern from Mel’s Crocheted Creations. You crochet a small round center with eyes and stuffing, add six petals around it, crochet a little pocket, sew the pocket behind the flower, sew a vent clip onto the pocket, and slide in a felt circle with a few drops of essential oil. Embroider a smile and it is ready for your car.
| Project | Car clip essential oil air freshener flower |
|---|---|
| Designer | Mel’s Crocheted Creations |
| Parts | Center/body, 6 petals, pocket |
| Techniques | Magic ring, sc, inc, dec, BLO, dc, slst |
| Extras | Eyes, stuffing, vent clip, felt circle, essential oil |
| Skill level | Beginner friendly |
In this guide
- What are crochet flowers behind the wings?
- Materials
- Abbreviations
- Center/body
- Petals
- Finishing and adding the clip
- Tips and variations
- FAQ
What Are Crochet Flowers Behind the Wings?
Crochet flowers behind the wings is a playful way to describe this design. The petals open like soft wings around a smiley face, and the hidden pocket sits behind them, ready to hold a scented pad. It is a tiny amigurumi-style project, so you only need a few yards of yarn and an evening to finish one.
These crochet flowers behind the wings also make quick gifts, stocking stuffers and craft fair items. Make a whole bouquet of colors, such as blue, purple and yellow, and give your crochet flowers behind the wings to every driver you know.
Materials for Your Crochet Flowers Behind the Wings
The original pattern images do not list yarn weight or hook size, so choose a hook that suits your yarn and gives a firm fabric. For these crochet flowers behind the wings you will need:
- Yarn in two colors, one for the center and one for the petals and pocket
- A crochet hook that matches your yarn
- Safety eyes or small black beads for the face
- Stuffing (polyester fiberfill)
- A car vent clip
- A small felt circle or piece of fabric
- Your favorite essential oil
- Yarn needle, black yarn or thread for the mouth, and scissors
Abbreviations for These Crochet Flowers Behind the Wings
| Abbreviation | Meaning |
|---|---|
| Rnd | Round |
| MR | Magic ring |
| sc | Single crochet |
| inc | Increase (2 sc in one stitch) |
| dec | Decrease (2 sc together) |
| BLO | Back loop only |
| dc | Double crochet |
| ch | Chain |
| slst | Slip stitch |
| FO | Fasten off |
Step 1: Center/Body of the Crochet Flowers Behind the Wings
Work the round center of your crochet flowers behind the wings first. The front loops left free on Rnd 4 are where you will attach the petals later, so do not skip the BLO round.
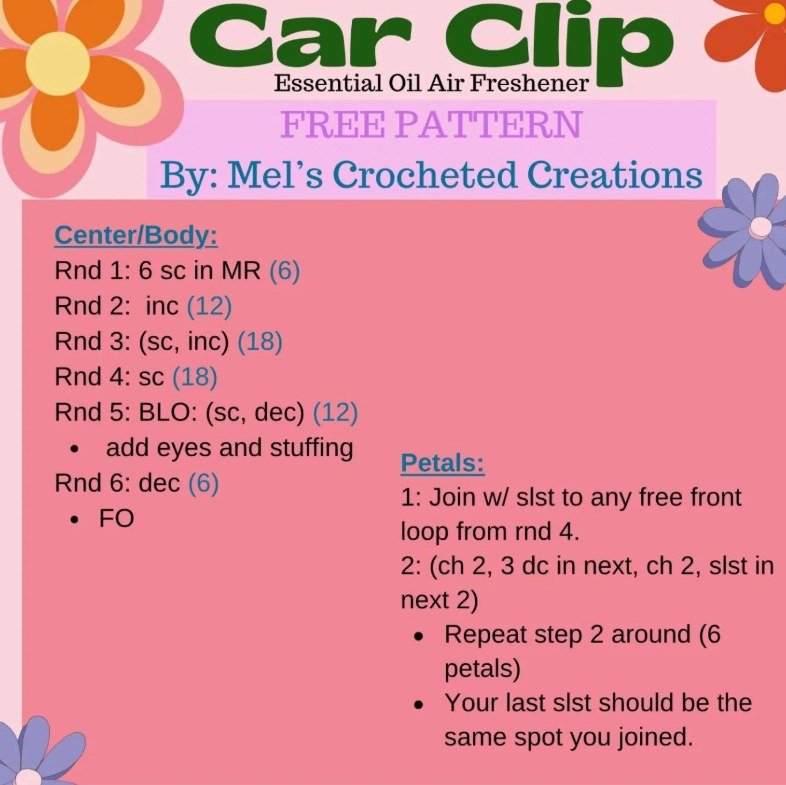
- Rnd 1: 6 sc in MR (6)
- Rnd 2: inc (12)
- Rnd 3: (sc, inc) (18)
- Rnd 4: sc (18)
- Rnd 5: BLO: (sc, dec) (12)
- Add the eyes and stuffing.
- Rnd 6: dec (6)
- FO.
Step 2: Petals for the Crochet Flowers Behind the Wings
Now make the petals that spread like wings around the face of your crochet flowers behind the wings.
- 1: Join with a slst to any free front loop from Rnd 4.
- 2: (ch 2, 3 dc in next, ch 2, slst in next 2).
- Repeat step 2 around (6 petals).
- Your last slst should be in the same spot you joined.
You should end with six rounded petals framing the center. If your petals look uneven, check that you worked 3 dc in the same stitch and that each ch 2 is snug.
Step 3: Pocket for the Crochet Flowers Behind the Wings
The pocket is what makes this one of the most useful crochet flowers behind the wings you can crochet, because it holds the scent.
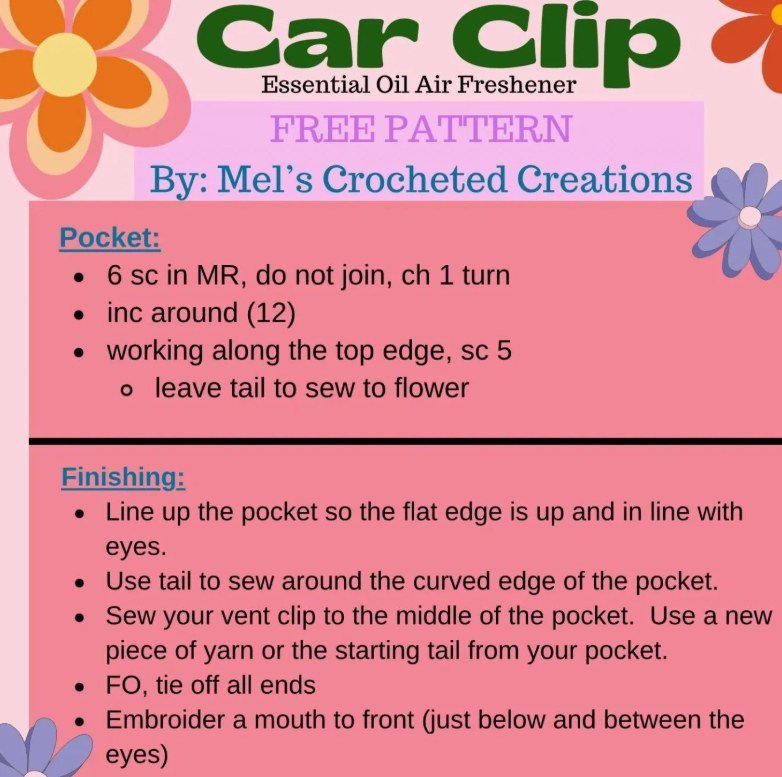
- 6 sc in MR, do not join, ch 1, turn.
- inc around (12).
- Working along the top edge, sc 5.
- Leave a tail to sew to the flower.
Step 4: Finishing and Adding the Clip to Your Crochet Flowers Behind the Wings
- Line up the pocket so the flat edge is up and in line with the eyes.
- Use the tail to sew around the curved edge of the pocket.
- Sew your vent clip to the middle of the pocket. Use a new piece of yarn or the starting tail from your pocket.
- FO, tie off all ends.
- Embroider a mouth to the front, just below and between the eyes.
Attach the vent clip and add the scent
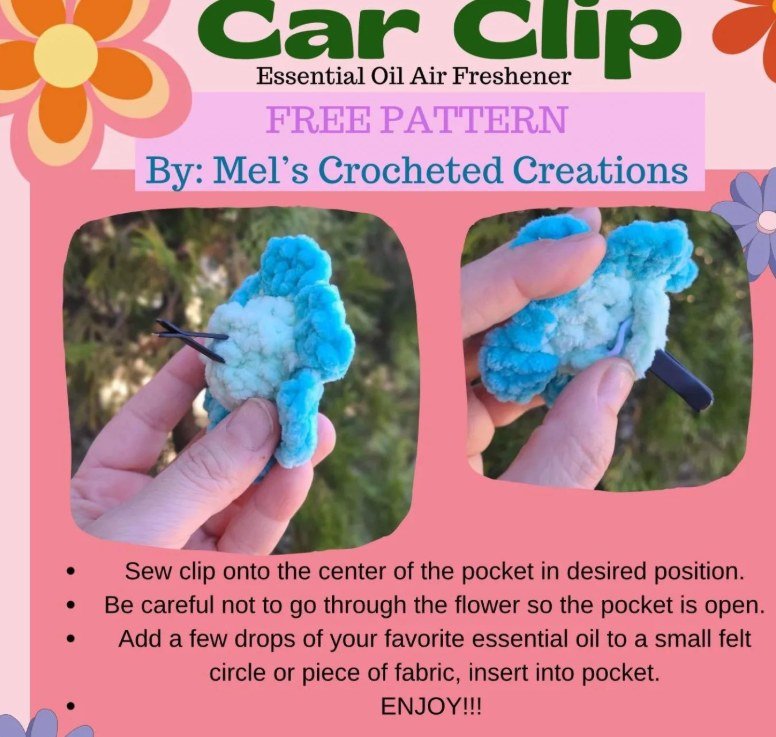
- Sew the clip onto the center of the pocket in your desired position.
- Be careful not to go through the flower so the pocket stays open.
- Add a few drops of your favorite essential oil to a small felt circle or piece of fabric and insert it into the pocket.
- Enjoy!
Tips and Variations for Crochet Flowers Behind the Wings
- Keep the pocket open. Stitch the clip only through the pocket, not through the flower, so you can still slide the scent pad in and out.
- Use a felt circle. In crochet flowers behind the wings, felt holds essential oil well, and you can refresh it with a few new drops whenever you like.
- Try plush yarn. A soft, fluffy yarn gives your crochet flowers behind the wings a cuddly look, as in the blue example.
- Mix the colors. For crochet flowers behind the wings, use one shade for the center and a different one for the petals, like the yellow and purple version.
- Place the mouth carefully. Embroider the smile just below and between the eyes for the sweetest expression.
- Keep scent away from kids’ mouths. Essential oils are not for chewing, so use this clip as a car accessory only.
Once you master these crochet flowers behind the wings, try making a bouquet or turning the same flower into a bag charm, keychain or brooch.
Crochet Flowers Behind the Wings FAQ
What is the crochet flowers behind the wings pattern?
It is a free pattern for a smiley crochet flower car clip. The six petals spread like little wings around the face, and a small pocket worked behind the flower holds a felt circle with a few drops of essential oil.What is the easiest crochet flower pattern?
A flower worked from a magic ring with a simple petal round is one of the easiest. This pattern uses a small round center, then six petals made with ch 2, 3 dc and slip stitches, which only needs sc, inc, dec, dc and slst.How to make a wing crochet?
Wings are usually small flat pieces: start with a magic ring or a short chain, increase to a rounded shape, then fold or flatten the piece and sew it to the body. In this design, the petals play the part of wings framing the smiley face.How to crochet fluffy flowers?
Use a soft, plush yarn with a hook that matches it, keep your tension relaxed, and work simple rounds so the fluffy texture shows. The same center-and-petals method here works in plush or regular yarn.How to crochet a bouquet of flowers easily?
Make several small flowers in different colors using one easy formula, then join them with stems or tie them together with ribbon. You can reuse the center and petal rounds from this pattern for every flower.How do I add the essential oil?
Put a few drops of your favorite essential oil on a small felt circle or piece of fabric and slide it into the pocket behind the flower. Refresh the drops whenever the scent fades.Where does the vent clip go?
Sew the vent clip onto the center of the pocket. Be careful not to stitch through the flower, so the pocket stays open for the felt scent pad.
Loved these crochet flowers behind the wings?
Save the pattern, make a few in your favorite colors, and tag Mel’s Crocheted Creations when you share your finished flowers.
Final Thoughts on Crochet Flowers Behind the Wings
Small, cheerful and useful, these crochet flowers behind the wings turn a few scraps of yarn into a car accessory people notice. Follow the center, petal, pocket and finishing steps above, add your essential oil, and enjoy the sweet scent on every drive. Share your finished crochet flowers behind the wings and inspire another crafter to start.
Credit: this Car Clip Essential Oil Air Freshener pattern is by Mel’s Crocheted Creations. The free pattern is shared here with credit to the designer; please tag her when you share your finished work, and do not sell or redistribute the pattern as your own.


