Cute Halloween Ghost Patterns: 2 Free Crochet Makes You’ll Love
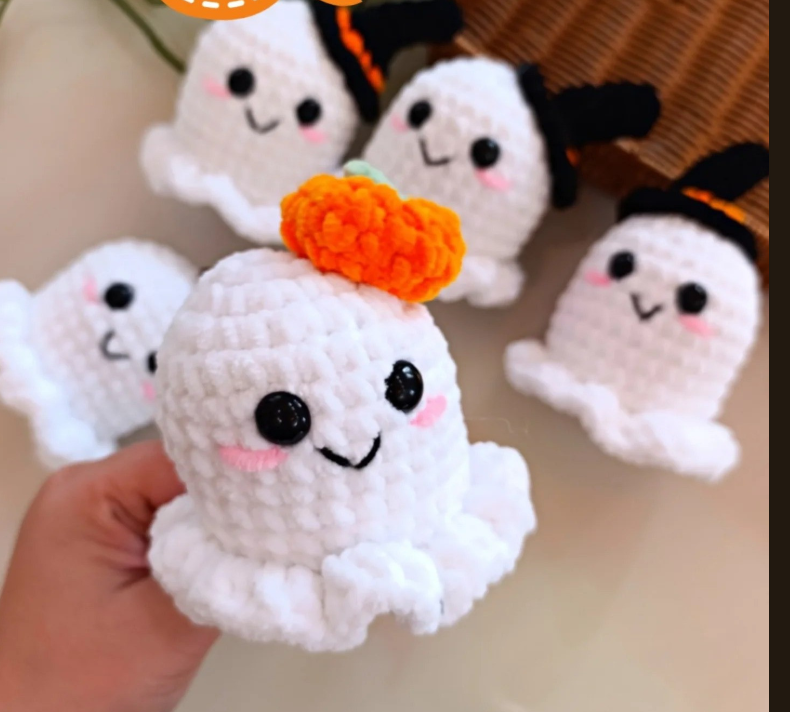
These cute halloween ghost patterns pair a soft white crochet ghost with a tiny orange pumpkin topper. The smiling face and flouncy hem give this Halloween amigurumi a friendly look. Below, find the supplied ghost and pumpkin instructions rewritten into readable US crochet terms, with round counts, finishing guidance, and the original reference images.
This guide covers one ghost body and one pumpkin accessory. The black witch hats in the photo are styling inspiration; their instructions were not supplied. The pattern has not been physically test-crocheted for this article. Ambiguous source wording is identified where it affects construction, so you can distinguish the transcription from added guidance.
Jump to ghost pattern · Pumpkin topper · FAQs
Cute halloween ghost patterns: what you will make
The body starts with seven single crochet stitches in a magic ring, increases to 28 stitches, and continues straight before a double-crochet ruffle is added. The underside then narrows to close the stuffed body. The small pumpkin uses a separate six-round shape and an optional stem.
If you are browsing cute halloween ghost patterns for a compact seasonal decoration, this construction gives you two useful options: a plain smiling ghost or the same ghost with an orange pumpkin on top. Keep the face simple so the white velvet yarn and wavy hem remain the focus.
New to stuffed crochet toys? This overview of amigurumi explains the small, stuffed style used for projects like this one.
Materials and tools
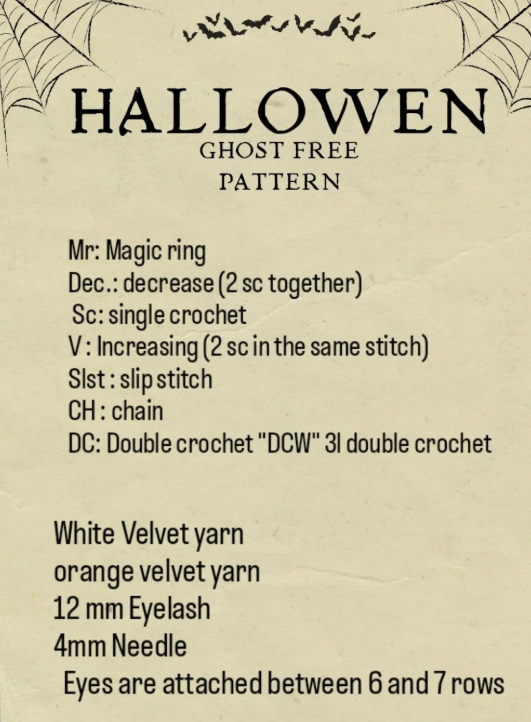
- White velvet yarn for the ghost.
- Orange velvet yarn for the pumpkin.
- A 4 mm crochet hook: the source says “4mm Needle,” interpreted here as a crochet hook.
- Eyes: the source says “12 mm Eyelash,” interpreted as 12 mm toy eyes; confirm your preferred eye treatment.
- Added finishing supplies: stuffing, stitch marker, yarn needle, scissors, and black embroidery thread.
- Optional pink thread for cheeks and a small amount of green yarn for a stem like the photograph.
For these cute halloween ghost patterns, the supplied materials list does not specify yarn brand, exact yarn weight, yardage, gauge, or finished height. Velvet yarns vary, so do not assume every yarn paired with a 4 mm hook will produce the same size. Make a small sample and check that the fabric holds stuffing without large gaps.
Before you begin
Work with a marker in the first stitch of each round and count before moving it. This guide assumes continuous rounds for the single-crochet sections, because joins are not specified in the source. The ruffle transition is explained separately. Keep your tension consistent rather than pulling the soft yarn excessively tight.
These cute halloween ghost patterns are easier to follow if you already know a magic ring, single crochet, increases, decreases, and double crochet. The ruffle also requires front-loop and back-loop work. A beginner can practice those skills first; the reference does not provide a tested difficulty rating or completion time.
US crochet abbreviations
| Term | Meaning |
|---|---|
| MR / mg | Magic ring |
| sc / x | Single crochet |
| inc / V | Two single crochet stitches in one stitch |
| dec | Decrease: single crochet two stitches together |
| dc | Double crochet |
| sl st | Slip stitch |
| ch | Chain |
| FLO | Front loop only |
| BLO | Back loop only |
| dcw | Interpreted as three double crochets in one stitch, consistent with 28 becoming 84 |
Most of these terms follow the Craft Yarn Council’s standard crochet abbreviations, although the source also uses its own shorthand. When reading cute halloween ghost patterns with shorthand such as “x” and “V,” translate one whole round before you crochet it. Here, “(1 sc, 1 V) × 7” becomes “(sc, inc) seven times.” The number after the equals sign is the final stitch count, not another instruction to work.
Cute halloween ghost patterns: the white ghost body
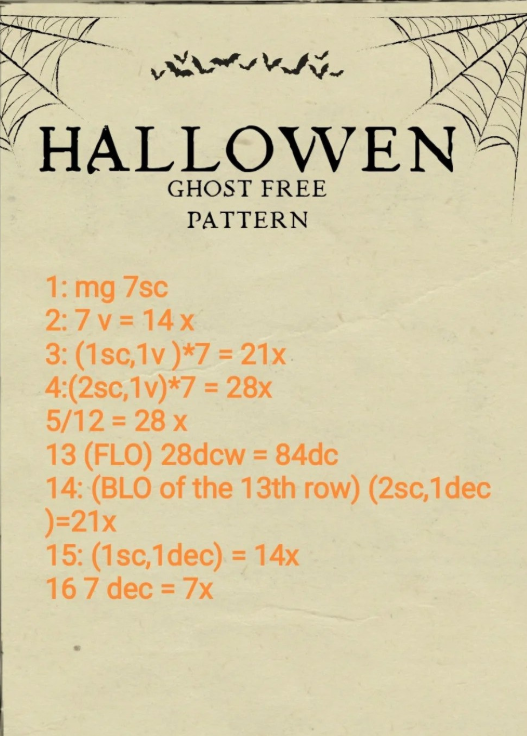
Use white yarn. Counts in the final column are the number of stitches after completing that round. The source’s “5/12” is interpreted as rounds 5 through 12 inclusive, giving eight straight rounds at 28 stitches each.
| Round | Instruction | Count |
|---|---|---|
| 1 | Work 7 sc into a magic ring. | 7 |
| 2 | Inc in every stitch. | 14 |
| 3 | (Sc in next stitch, inc in next stitch) × 7. | 21 |
| 4 | (Sc in next 2 stitches, inc in next stitch) × 7. | 28 |
| 5–12 | Sc in each stitch around for eight rounds. | 28 each round |
| 13: ruffle | FLO: work 3 dc into each of the 28 body stitches. | 84 dc |
| 14: underside | Into the 28 reserved back loops beneath the ruffle: (sc in next 2 loops, dec over next 2 loops) × 7. | 21 |
| 15 | (Sc in next stitch, dec over next 2 stitches) × 7. | 14 |
| 16 | Dec seven times. | 7 |
The crown of these cute halloween ghost patterns grows in multiples of seven: 7, 14, 21, and 28 stitches. If your count differs, correct it before starting the straight rounds. A missing increase near the top can shift the face and leave too few foundation stitches for the ruffle.
Place the face before closing the body
The source places the eyes between rounds 6 and 7. It does not give their horizontal spacing. Position both eyes provisionally, view the ghost from the front, and check their balance before securing them. Add a small embroidered smile and optional cheeks to echo the photograph; the source does not provide a mouth or cheek stitch chart.
The expression is one of the most appealing parts of cute halloween ghost patterns. A simple curved smile and gently spaced eyes create the friendly look without adding much visual clutter. Treat this version as decorative; use embroidered features instead of detachable eyes when making for young children, and assess the whole finished item for its intended use.
Understand the ruffle and reserved loops
Source clarification: Round 13 says “(FLO) 28dcw = 84dc.” The count supports three double crochets in the front loop of each of the 28 body stitches. Round 14 says “BLO of the 13th row,” but decreasing over all 84 ruffle stitches would not produce the stated 21 stitches. The practical interpretation used here is to work the underside into the 28 unused back loops of the body round beneath the ruffle.
For these cute halloween ghost patterns, mark a reserved back loop before beginning the ruffle so it is easy to find later. Do not work round 14 around the outer tips of the 84 double crochets. You should have 28 foundation loops available under the hem, which support seven repeats of the decrease sequence.
Added transition method: To make the loop change clear, join the final ruffle dc to the first dc with a slip stitch and fasten off. Rejoin white yarn in a reserved back loop underneath. Work the first sc of round 14 there, then continue the sequence. A starting chain, if used for positioning, is not counted as a stitch. This joining method is editorial guidance; it is not specified in the original image.
Stuff and close
Add stuffing gradually before the opening becomes small, then top it up after round 15. Shape the crown and body without packing the filling so tightly that it shows between stitches. After round 16, fasten off with a tail, thread through the front loops of the remaining seven stitches, draw closed, and secure the end inside.
A gentle amount of stuffing helps cute halloween ghost patterns keep a soft silhouette. If the base bulges, remove a little filling before closing. Smooth the hem with your fingers so the ruffle falls around the bottom instead of being trapped beneath the body.
Cute halloween ghost patterns: tiny pumpkin topper
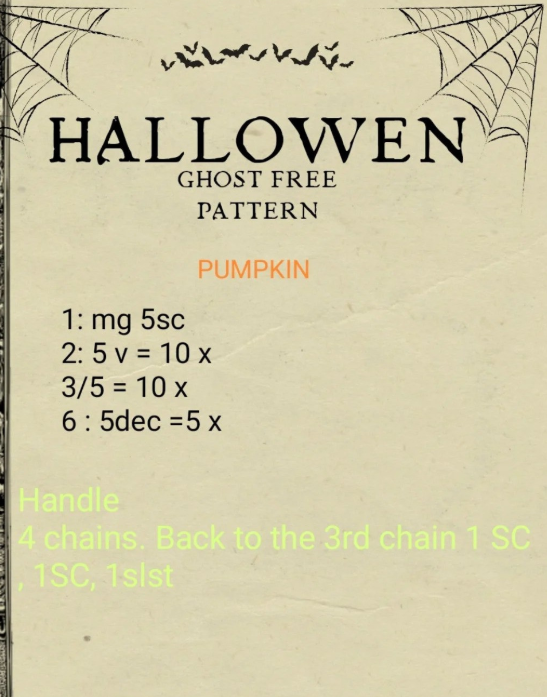
Use orange yarn and work this small pumpkin separately. Its source notation “3/5” is interpreted as rounds 3 through 5 inclusive. Add a little stuffing before the last decrease round; the stuffing and closure instructions here are added finishing guidance.
- Round 1: Work 5 sc into a magic ring. (5)
- Round 2: Inc in each stitch. (10)
- Rounds 3–5: Sc in every stitch for three rounds. (10 each round)
- Round 6: Dec five times. (5)
- Fasten off with a long tail and gather the remaining stitches closed.
The pumpkin makes these cute halloween ghost patterns easy to personalize with a small change of color. The written rounds create a compact rounded shape. They do not include the deep pumpkin grooves visible in the photograph, so those grooves should not be presented as part of the supplied instructions.
Optional pumpkin shaping
Added finishing suggestion: If you want shallow pumpkin lobes, use a sturdy matching yarn tail to wrap from the top to the base and back through the center at several evenly spaced points. Tighten gently to indent the surface, then secure the tail. Plush yarn can fray or break under strong tension, so stop if it resists. This shaping step has not been test-crocheted for this guide.
Stem: original wording and a usable alternative
The source labels the stem “Handle” and says: “4 chains. Back to the 3rd chain 1 SC, 1SC, 1slst.” Counting from the hook, starting in the third of four chains leaves only two chains, so the three placements are unclear.
For a clearly counted stem on these cute halloween ghost patterns, an editorial alternative is: ch 4, sc in the 2nd chain from the hook, sc in the next chain, and sl st in the final chain. Fasten off with a sewing tail. This uses all three available chains and is not a verbatim transcription of the ambiguous line. Green yarn matches the photograph, although the source materials list does not mention it.
Attach the topper
Sew the stem to the pumpkin, then position the pumpkin on the ghost’s crown. Stitch through several points so the topper does not pivot on a single attachment. Keep the face facing forward while you check placement. Weave in the ends after you are satisfied with the angle.
With these cute halloween ghost patterns, a small topper should complement the face rather than hide it. Place it slightly back from the forehead if it starts to cover the eyes in a front view. You can also leave the ghost plain and display the pumpkin alongside it.
Troubleshooting velvet-yarn ghosts
- You cannot see the stitches: use good side lighting, feel the top loops, and move your marker after counting each round.
- The ruffle looks narrow: check for three dc in each of 28 front loops, totaling 84 dc.
- The underside has too many stitches: return to the 28 reserved body loops, not the ruffle edge.
- Stuffing shows: check tension and hook compatibility before adding more filling.
- The face looks uneven: compare eye positions before fixing any eye backs.
- The pumpkin is round rather than ridged: that is consistent with the plain round instructions; lobes require extra shaping.
When adapting cute halloween ghost patterns, change one variable at a time. Different yarn thickness changes the size, texture, and eye proportions. Keep the stated stitch counts for your first version, then record your own hook, yarn, and finished measurements so you can repeat the result.
Display ideas and gentle care
Arrange a plain ghost and a pumpkin-topped ghost on an indoor shelf, a desk, or a Halloween table. Keep the display away from candles and other heat sources. A small card with “Hey, boo!” or “Too cute to spook” adds a playful touch without needing another crochet accessory.
These cute halloween ghost patterns suit a friendly Halloween palette: white bodies, orange pumpkins, and a little pink on the cheeks. Check your yarn label before cleaning. Surface-clean carefully when appropriate and let the piece dry fully; the pattern images do not specify a tested washing method.
Want more spooky makes? Try the ghost bear keychain pattern or the crochet halloween ghost free pattern with a top hat.
Questions about cute halloween ghost patterns
How do you make a crochet ghost for Halloween?
For this version, crochet a rounded white body from a seven-stitch magic ring, increase to 28 stitches, add eight straight rounds, then make a front-loop double-crochet ruffle. Decrease beneath the hem, stuff, and close. Finish with a face and the optional pumpkin topper.
What are ghost patterns?
Ghost patterns are instructions or templates for making ghost-shaped projects. In crochet, cute halloween ghost patterns usually describe yarn choices, stitch sequences, shaping, and finishing. This page provides crochet directions rather than a sewing template or paper cutout.
Is there a free crochet ghost pattern for beginners?
The instructions on this page are free to read. Beginners exploring cute halloween ghost patterns should practice increases, decreases, and loop placement before attempting the ruffle. The source contains ambiguities, so this is best approached with the clarification notes rather than treated as a beginner-tested pattern.
Does this include the black witch hat?
No. The photograph shows hats, but the supplied written pages cover only the ghost body and pumpkin. The hat needs a separate pattern; it is not reconstructed here from the photograph.
How big will my ghost be?
There is no verified finished measurement in the supplied instructions. Yarn thickness, hook choice, tension, and stuffing affect size. Measure your completed sample instead of relying on the apparent scale of the photograph.
What are some cute ghost sayings?
Try “Hey, boo!”, “A little boo for you,” or “Too cute to spook” on a display card. These cute halloween ghost patterns already have expressive faces, so a short message is enough to complete a cheerful seasonal display.
Ready to crochet your little ghost?
Choose your white yarn, mark the first stitch, and keep the round-count table nearby. Start with the plain body, then add the pumpkin once the ghost is finished. Bookmark these cute halloween ghost patterns so the ruffle notes and pumpkin instructions are easy to find when you need them.