

Halloween Pumpkin Crochet Pattern (Free & Easy) Jack-O’-Lantern Amigurumi Tutorial
Halloween Pumpkin Crochet Pattern: The Cutest Amigurumi Jack-O’-Lantern You’ll Ever Make 🎃
A complete, beginner-friendly Halloween pumpkin crochet tutorial every round, every stitch count, every “wait, what do I do here?” moment answered.
⏱️ ~4-5 hrs (beginner)🧶 Plush super bulky yarn📏 22 cm (8.5″)🪝 9mm / 5mm / 2mm hooks
What’s Inside This Halloween Pumpkin Crochet Guide
- Why This Halloween Pumpkin Crochet Pattern Works
- Materials for Your Halloween Pumpkin Crochet Project
- Tools & Abbreviations
- Crocheting the Pumpkin Body
- Stuffing & Shaping
- Adding the Pumpkin Ribs
- Making the Peduncle (Stem)
- Face & Spider Web Details
- Troubleshooting Common Mistakes
- Color & Yarn Variations
- Caring for Your Finished Pumpkin
- Frequently Asked Questions
If you’ve typed Halloween pumpkin crochet into Google more times this week than you’d like to admit, welcome you’ve landed exactly where you need to be. I’ve been designing amigurumi for over two decades, and this Halloween pumpkin crochet pattern is, hands down, one of the most requested projects I get every autumn. There’s something about a plush, squishy jack-o’-lantern grinning up at you from the couch that just says “fall is here.”
This isn’t a vague, half-finished pattern. This is a full Halloween pumpkin crochet walkthrough materials, tools, abbreviations, round-by-round instructions with stitch counts, photos at every stage, assembly, troubleshooting, and even care instructions. Whether you’re a total beginner who just learned to single crochet last week, or a seasoned maker looking for a fast Halloween pumpkin crochet project to whip up for a craft fair, this guide has you covered.
Let’s talk about why people love a Halloween pumpkin crochet pattern like this one so much. It’s fast (you’re working with super bulky plush yarn, so rounds fly by), it’s forgiving (lumps and bumps just add to the “hand-stitched charm”), and it’s endlessly customizable swap the black yarn face for a cuter smile, or go with a different variegated orange for a “heirloom pumpkin” look. By the end of this post, you’ll have a finished Halloween pumpkin crochet jack-o’-lantern sitting proudly on your mantel, your porch, or wrapped up as a gift.
This pattern was tested by an amigurumi designer with 20+ years of experience, so every stitch count and round has been checked for accuracy before it reached you.
Materials You’ll Need for This Halloween Pumpkin Crochet Pattern
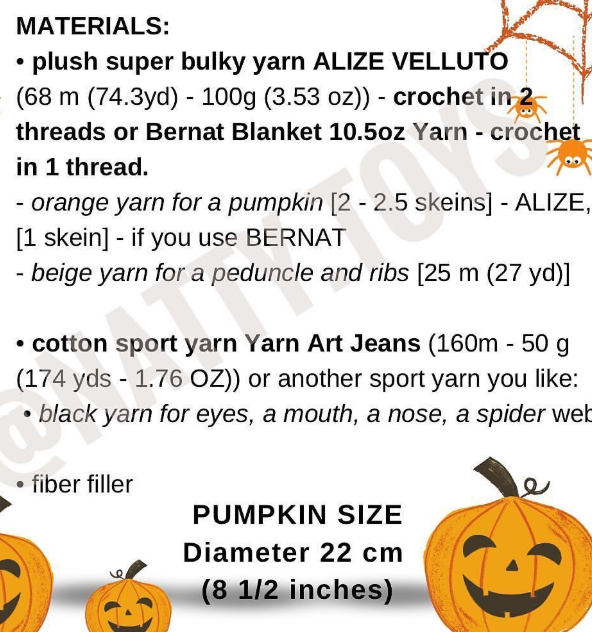
Getting your materials exactly right is the difference between a lumpy, floppy pumpkin and a plush, professional-looking Halloween pumpkin crochet centerpiece. Here’s exactly what the original designer used:
| Material | Amount / Weight | Notes |
|---|---|---|
| Plush super bulky yarn — Alize Velluto | 68m (74.3yd) per 100g (3.53oz) skein | Crochet in 2 threads held together, OR use Bernat Blanket 10.5oz and crochet in 1 thread |
| Orange yarn (pumpkin body) | 2–2.5 skeins Alize / 1 skein Bernat | Main color for the whole pumpkin |
| Beige yarn (peduncle & ribs) | 25m (27yd) | Used for the stem and decorative ribs |
| Cotton sport yarn — Yarn Art Jeans | 160m (174yd) per 50g (1.76oz) | Used for facial details |
| Black yarn | Small amount | Eyes, mouth, nose, spider web |
| Fiber filler (polyester stuffing) | Enough to firmly fill a 22cm sphere | Don’t skimp — under-stuffing is the #1 mistake |
Final size: this Halloween pumpkin crochet pumpkin measures roughly 22 cm (8.5 inches) in diameter — a perfect statement piece for a shelf, table, or porch display.
Tools & Abbreviations for Halloween Pumpkin Crochet
Tools
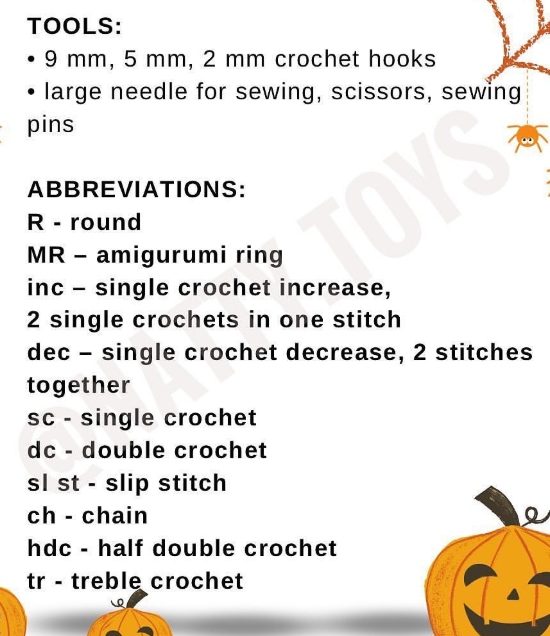
- 9 mm crochet hook (pumpkin body & peduncle)
- 5 mm crochet hook (ribs)
- 2 mm crochet hook (face details)
- Large needle for sewing
- Scissors
- Sewing pins
- Stitch markers (recommended, though not listed in the original — very helpful for tracking rounds on bulky yarn)
Abbreviations
| Abbreviation | Meaning |
|---|---|
| R | Round |
| MR | Amigurumi ring (magic ring) |
| inc | Single crochet increase — 2 single crochets in one stitch |
| dec | Single crochet decrease — 2 stitches crocheted together |
| sc | Single crochet |
| dc | Double crochet |
| sl st | Slip stitch |
| ch | Chain |
| hdc | Half double crochet |
| tr | Treble crochet |
| BLO | Back loop only |
Step-by-Step: Crocheting the Halloween Pumpkin Crochet Body
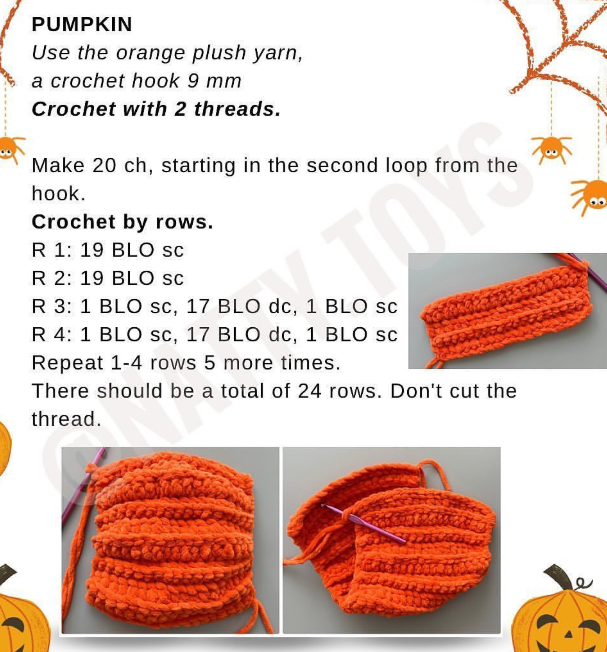
This is the heart of the whole Halloween pumpkin crochet project — the segmented, ridged body that gives the pumpkin its classic shape. You’re working flat, in rows, then joining the piece into a ring later. Use the orange plush yarn, held in 2 threads, with your 9mm hook.
Foundation: Make 20 ch, starting in the second loop from the hook.
R1: 19 BLO sc 19 sts
R2: 19 BLO sc 19 sts
R3: 1 BLO sc, 17 BLO dc, 1 BLO sc 19 sts
R4: 1 BLO sc, 17 BLO dc, 1 BLO sc 19 sts
Repeat Rows 1–4 five more times, for a total of 24 rows. Don’t cut the thread — you’ll need it for assembly.
Working in BLO (back loop only) creates raised ridges: ___ ___ ___ ___ <- front loop left unworked [___][___][___][___] <- back loop = where you stitch Row 1-2: sc flat Row 3-4: sc, dc…dc, sc (creates the puffed segment)
Working in the back loop only (BLO) is what creates the ribbed, pumpkin-like ridges. Don’t accidentally crochet into both loops — it’s the most common way a Halloween pumpkin crochet piece ends up looking flat instead of segmented.
Once you have all 24 rows, join the short ends of the strip together (sl st or sew) to form a tube, then gather one end closed. This tube-and-gather technique is what gives this Halloween pumpkin crochet pattern its signature pumpkin-shaped segments without any complex round shaping.
Stuffing & Shaping Your Halloween Pumpkin Crochet Piece
Now for the step that turns a flat crocheted tube into an actual pumpkin. Stuffing technique matters just as much as stitch count in any Halloween pumpkin crochet project.
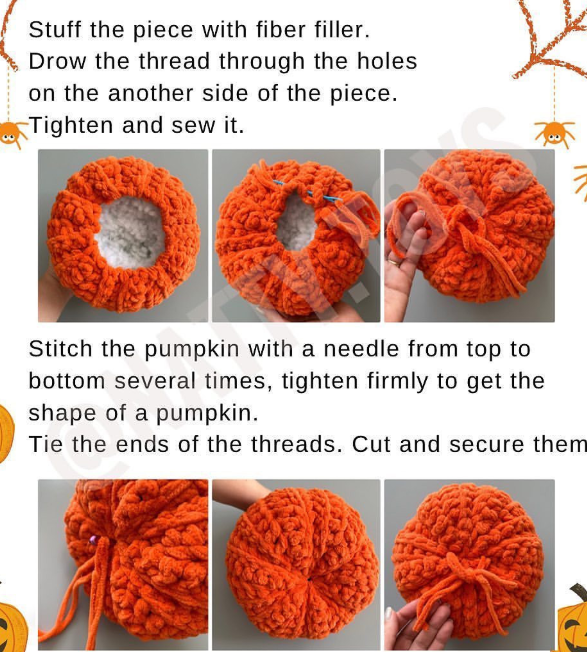
- Stuff the piece firmly with fiber filler — push it into the edges and corners, not just the middle.
- Draw the working thread through the holes on the opposite side of the piece.
- Tighten and sew closed.
- Stitch the pumpkin with a needle from top to bottom several times, pulling tight each pass — this is what creates the classic pumpkin “segments” or lobes.
- Tie off the ends of the threads, then cut and secure them.
Don’t rush the stuffing step. Under-stuffing is the single biggest reason a Halloween pumpkin crochet piece ends up looking saggy instead of round and plump.
Adding Ribs to Your Halloween Pumpkin Crochet Pumpkin
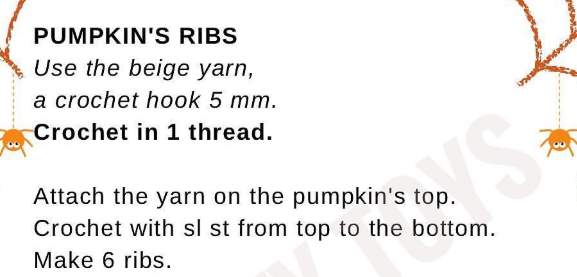
The decorative ribs are what elevate a basic Halloween pumpkin crochet pumpkin into something that looks store-bought. Switch to the beige yarn and your 5mm hook, crocheting with a single thread this time.
Attach the yarn at the pumpkin’s top.
Crochet with sl st from top to bottom, following one of the natural ridge lines.
Repeat to make a total of 6 ribs, evenly spaced around the pumpkin.
Making the Peduncle (Stem) for Halloween Pumpkin Crochet
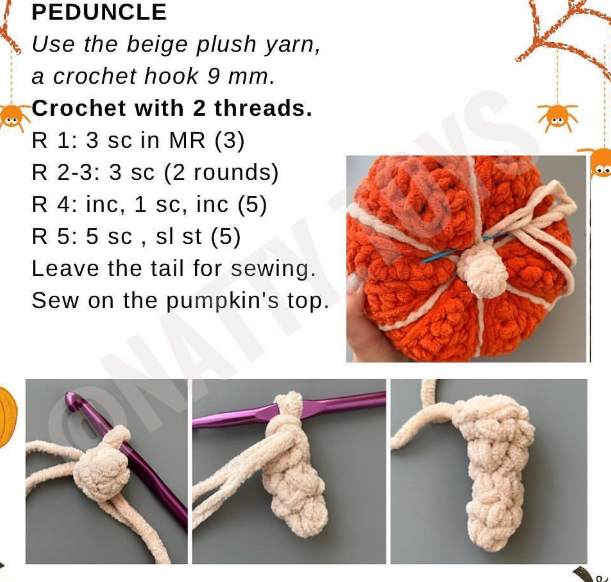
No Halloween pumpkin crochet pumpkin is complete without its stem! Use the beige plush yarn, held double, with your 9mm hook.
R1: 3 sc in MR 3 sts
R2–3: 3 sc (worked even for 2 rounds) 3 sts
R4: inc, 1 sc, inc 5 sts
R5: 5 sc, sl st 5 sts
Leave a long tail for sewing. Sew the peduncle onto the top of the pumpkin.
Face & Spider Web Details
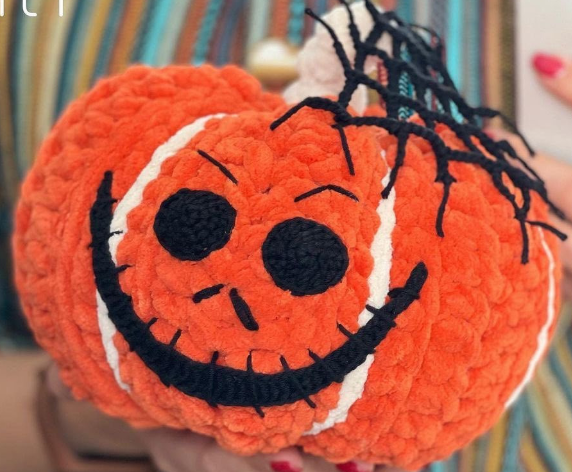
This is where your Halloween pumpkin crochet pumpkin gets its personality. Using your 2mm hook and black cotton sport yarn, embroider a jack-o’-lantern face directly onto the front of the pumpkin: two round eyes, small triangle-shaped brows, a curved nose line, and a wide toothy grin with a white outline for contrast.
For the spooky touch, add a spider web in black yarn cascading from the stem down one side, and a tiny spider for extra character — exactly as shown in the finished sample photo below.
Ready to Start Your Halloween Pumpkin Crochet Project?
Grab your plush yarn, your 9mm hook, and a cozy spot on the couch — this Halloween pumpkin crochet pattern comes together faster than you’d think.Jump Back to Materials List
Troubleshooting Your Halloween Pumpkin Crochet Pattern
My pumpkin looks flat, not ridged
You’re likely crocheting into both loops instead of BLO (back loop only). Every row in the body section of this Halloween pumpkin crochet pattern relies on BLO to create the raised ridge texture.
My pumpkin is lopsided
Uneven stuffing is the usual culprit. Redistribute the filler by pressing gently from the outside before you sew the final seam closed.
The segments aren’t defined enough
Pull your top-to-bottom cinching stitches tighter. This step is what carves the tube into pumpkin-shaped lobes, and it’s easy to under-tighten on your first try.
My stitch count is off
Bulky plush yarn hides stitches easily. Use a stitch marker at the start of every row, and count out loud as you go — especially through rows 3 and 4 where dc stitches are mixed in with sc.
Color & Yarn Variations for Halloween Pumpkin Crochet
| Variation | Swap |
|---|---|
| Classic Orange | Original Alize Velluto orange (as written) |
| White “Ghost” Pumpkin | Swap main color to ivory or cream plush yarn |
| Heirloom Pumpkin | Use a mottled green/orange variegated bulky yarn |
| Black Cat Pumpkin | Swap orange for black, keep white facial outline |
| Budget-Friendly | Use Bernat Blanket 10.5oz in a single thread instead of Alize doubled |
Care Instructions
- Spot clean only — plush super bulky yarn amigurumi should not be machine washed.
- Keep away from direct sunlight for long periods to prevent color fading.
- Fluff and reshape gently after storage to restore the pumpkin’s rounded silhouette.
- Store flat or upright in a breathable bag, not compressed under heavy items.
Frequently Asked Questions About Halloween Pumpkin Crochet
How long does this Halloween pumpkin crochet pattern take?
For a confident beginner, expect around 4–5 hours total, spread across the body, ribs, stem, and face details. Experienced crocheters can finish in 2–3 hours thanks to the bulky yarn working up quickly. What yarn weight is best for Halloween pumpkin crochet?
Plush super bulky yarn (like Alize Velluto or Bernat Blanket) is ideal because it crochets up fast and gives the pumpkin its soft, chenille-like texture. Can I make this Halloween pumpkin crochet pattern smaller?
Yes — switch to a worsted weight yarn and a smaller hook (around 4-5mm), and reduce the chain and row counts proportionally. Expect the finished size to shrink accordingly. Is this Halloween pumpkin crochet pattern beginner-friendly?
Absolutely. It uses only basic stitches — sc, dc, sl st, inc, and dec — plus simple embroidery for the face. If you can single crochet, you can make this pumpkin. What can I use instead of fiber filler?
Clean, cut-up fabric scraps or old stuffing from a worn-out pillow can work in a pinch, though proper polyester fiber filler gives the best shape retention for a Halloween pumpkin crochet piece.
Your Halloween Pumpkin Crochet Patch Awaits 🎃
Save this pattern, gather your materials, and start stitching your own Halloween pumpkin crochet collection today. Tag us with your finished pumpkins — we love seeing your spooky creations!
Halloween Pumpkin Crochet Pattern © — Original pattern design credit: @NATTY TOYS. Written and adapted for crocheters of every skill level.


