
![Amigurumi Crochet Pattern HALLOWEEN doll – [finished doll / head and body / legs and shoes / ruffled dress / witch hat / curly wig]](https://crochetloversclub.com/wp-content/uploads/2026/08/Crochet_witch_doll_sitting_202608271734.jpeg)
Amigurumi Crochet Pattern HALLOWEEN Doll: Free Witch Doll Tutorial
Free Pattern · Beginner Friendly
Amigurumi Crochet Pattern HALLOWEEN Doll: The Complete Little Witch Tutorial
Everything you need to crochet a soft, sittable Halloween witch doll from scratch — materials, abbreviations, round-by-round instructions, and finishing tips.
By Elena Marchetti, Amigurumi Designer & Crochet Technical Editor (20+ years)
If you’ve been searching for a well-written Amigurumi Crochet Pattern HALLOWEEN doll that actually explains every round instead of skipping steps, you’re in the right place. This tutorial walks you through building a 9–10 inch (23–25 cm) seated witch doll — pointy hat, ruffled candy-corn dress, curly wig, and all — using nothing but basic amigurumi stitches. I designed this pattern the way I wish more Amigurumi Crochet Pattern HALLOWEEN doll tutorials were written: with exact stitch counts after every round, so you never lose your place.
A quick note on originality: This is an original pattern written for this post. It is not a reproduction of any purchased or copyrighted commercial pattern (including any pattern sold by independent designers such as Gorbunova_dolls). If you’ve bought a designer’s PDF pattern for a similar witch doll, that pattern’s exact wording and photos remain their copyright — please support designers by purchasing their patterns directly rather than sharing scans. This post gives you a complete, free alternative you’re welcome to use, remix, and sell finished dolls from.
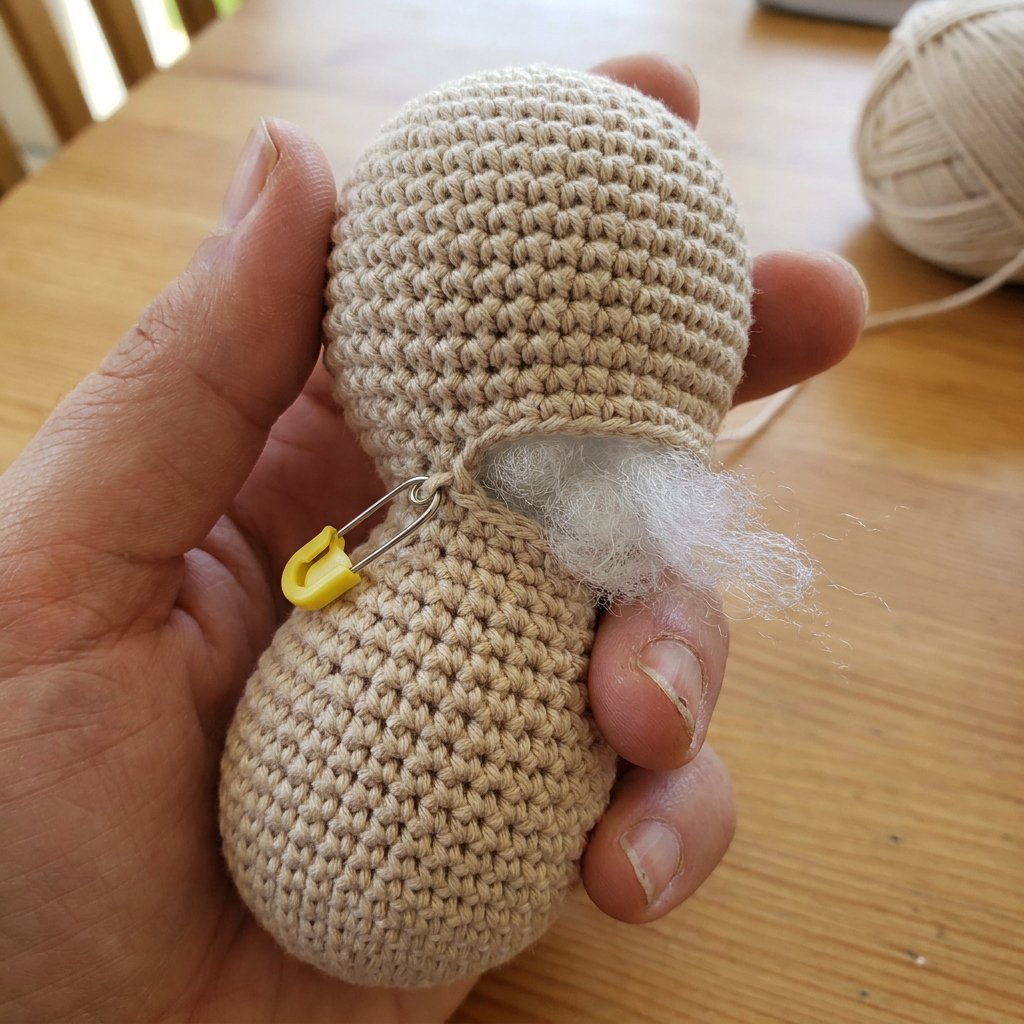
Table of Contents
- About This Amigurumi Crochet Pattern HALLOWEEN Doll
- Materials & Tools
- Abbreviations & Notes
- Head & Body
- Arms
- Legs & Shoes
- Ruffled Dress
- Witch Hat
- Curly Wig
- Assembly & Finishing
- 3 Color Variations
- Troubleshooting
- Care Instructions
- Frequently Asked Questions
1. About This Amigurumi Crochet Pattern HALLOWEEN Doll
This Amigurumi Crochet Pattern HALLOWEEN doll makes a seated witch, roughly 9–10 inches (23–25 cm) tall including her hat, with jointed-look bendable legs, a layered ruffle dress, and long crocheted curls. It’s rated advanced beginner — you should already be comfortable with single crochet (sc), increases, and decreases in continuous rounds (no joining, no turning).
- Estimated time: 10–14 hours total, spread over several sessions
- Skill level: Advanced beginner / early intermediate
- Finished size: ~9–10 in (23–25 cm) seated
- Hook size: 2.0 mm (US steel B/1 equivalent)
2. Materials & Tools
| Item | Amount / Spec |
|---|---|
| Cotton yarn, skin tone | 1 skein (approx. 40 g) |
| Cotton yarn, black | 1 skein (approx. 40 g) |
| Cotton yarn, orange | 1 skein (approx. 30 g) |
| Cotton yarn, yellow/gold | 1 skein (approx. 20 g) |
| Cotton yarn, brown (hair) | 1 skein (approx. 25 g) |
| Crochet hook | 2.0 mm steel hook |
| Polyester fiberfill | 50–60 g |
| Safety eyes or black embroidery floss | 2 x 6mm (optional) |
| Stitch markers | 2–3 |
| Tapestry / yarn needle | 1 |
| Small buttons | 2 (for strap details) |
| Scissors | 1 |
3. Abbreviations & Notes
| Abbreviation | Meaning |
|---|---|
| ch | chain |
| sc | single crochet |
| inc | increase (2 sc in one stitch) |
| dec | invisible decrease (2 sts worked as 1) |
| st(s) | stitch(es) |
| BLO | back loop only |
| MR | magic ring |
| sl st | slip stitch |
| ( ) | repeat instructions inside brackets the stated number of times |
| [ ] | total stitch count at end of round |
All rounds are worked in a continuous spiral — do not join or chain 1 unless stated. Use a stitch marker to track the start of each round.
4. Head & Body (worked in one piece, skin tone)
Rnd 1: 6 sc in MR [6]
Rnd 2: inc x6 [12]
Rnd 3: (sc, inc) x6 [18]
Rnd 4: (2 sc, inc) x6 [24]
Rnd 5: (3 sc, inc) x6 [30]
Rnd 6: (4 sc, inc) x6 [36]
Rnd 7: (5 sc, inc) x6 [42]
Rnds 8–15: sc even [42] — work 8 rounds straight. Insert safety eyes between rounds 11–12, spaced 8–9 sts apart.
Rnd 16: (5 sc, dec) x6 [36]
Rnd 17: (4 sc, dec) x6 [30]
Rnd 18: (3 sc, dec) x6 [24]. Begin stuffing head firmly.
Rnd 19: (2 sc, dec) x6 [18]
Rnd 20: switch to white/body color, sc BLO around [18] — this creates the neck ridge.
Rnds 21–28: sc even [18] — body
Rnd 29: inc x18 [36]
Rnd 30: sc even [36]
Rnd 31: (4 sc, dec) x6 [30]. Finish stuffing body firmly, fasten off leaving a long tail for closing.
5. Arms (make 2, skin tone)
Rnd 1: 6 sc in MR [6]
Rnd 2: inc x6 [12]
Rnds 3–4: sc even [12]
Rnd 5: (2 sc, dec) x3 [9]
Rnds 6–16: sc even [9] — lightly stuff only the hand end
Fasten off leaving a tail for sewing to the body at the shoulder.
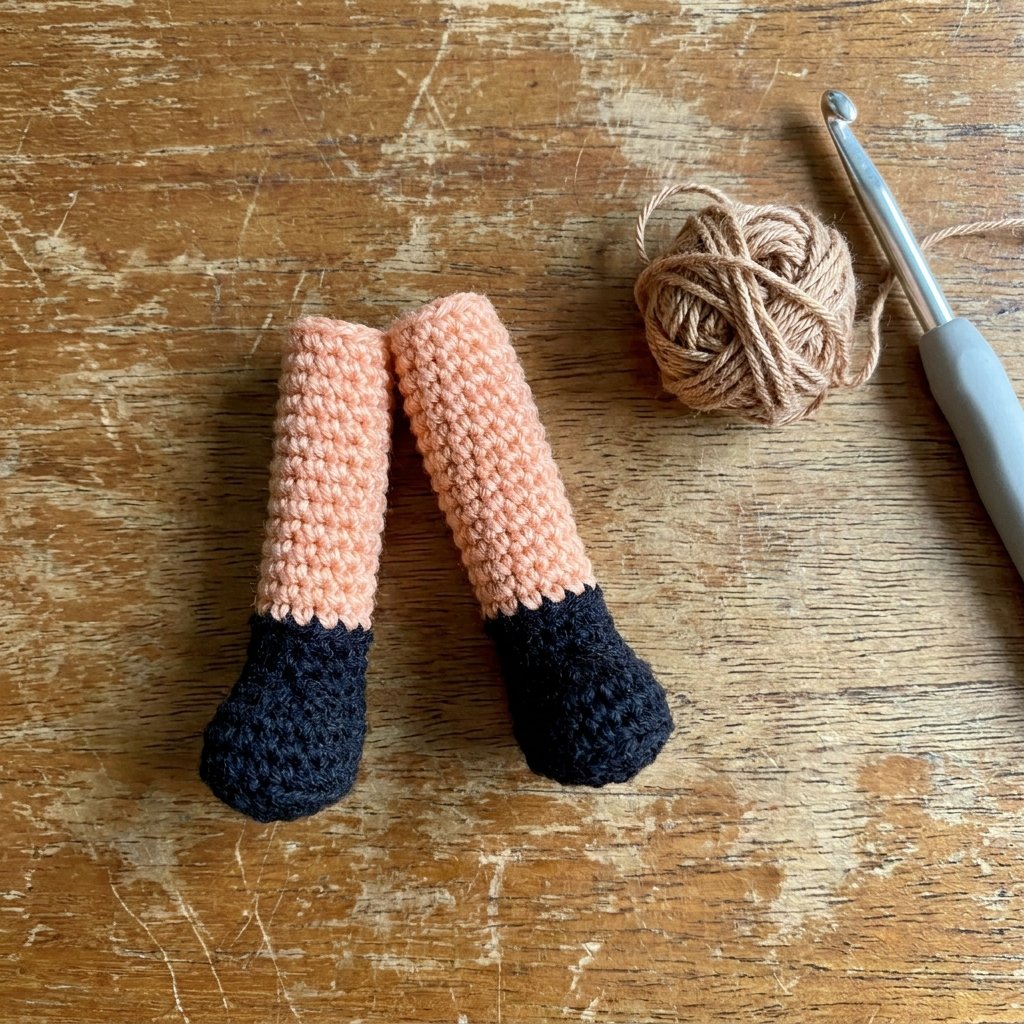
6. Legs & Shoes (make 2)
Rnd 1 (shoe color): 6 sc in MR [6]
Rnd 2: inc x6 [12]
Rnd 3: (sc, inc) x6 [18]
Rnds 4–5: sc even [18]
Rnd 6: (1 sc, dec) x6 [12]
Rnd 7: switch to skin tone, sc BLO [12]
Rnds 8–18: sc even [12] — stuff as you go, lightly
Fasten off leaving a tail. Legs are sewn to the underside of the body so the doll can sit.
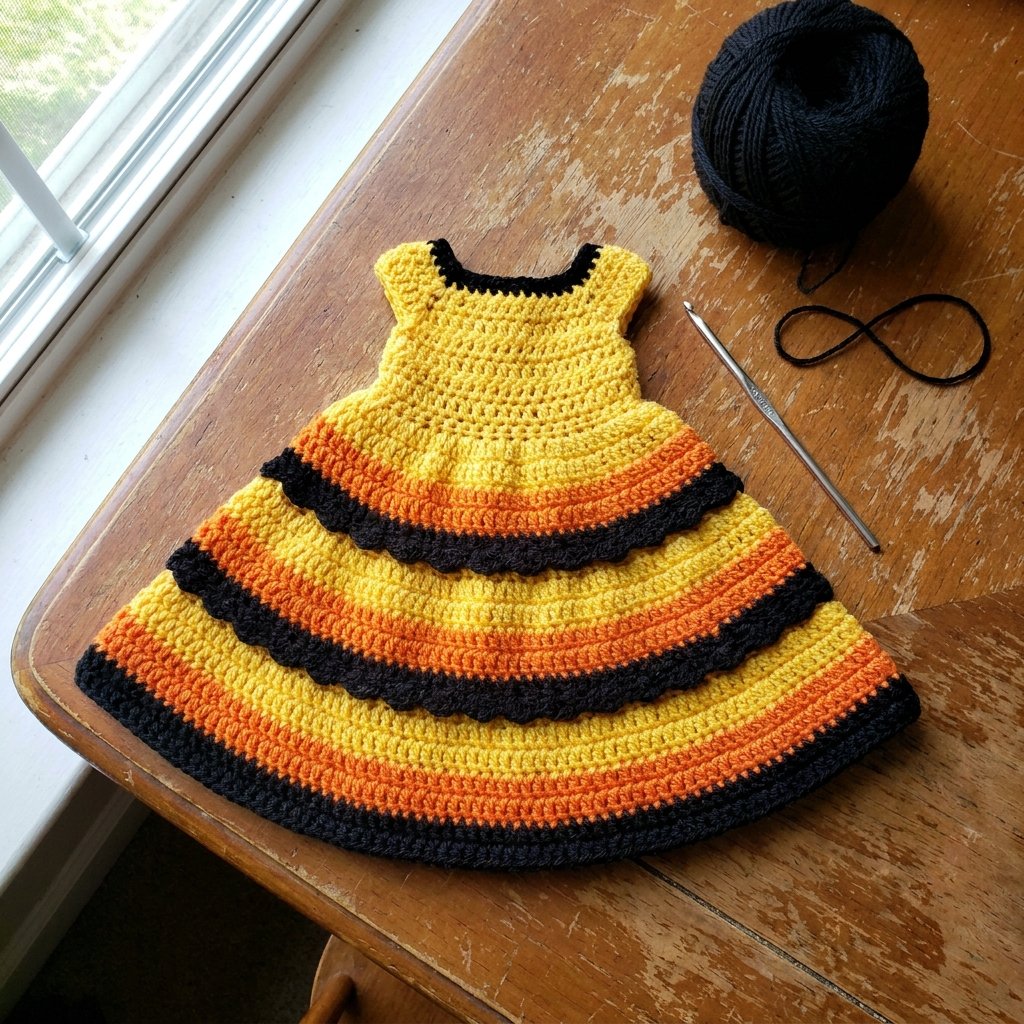
7. Ruffled Candy-Corn Dress
Worked directly around the body, bottom-up, in three ruffle tiers.
Tier 1 (yellow): join around the lower body, ch 1, work 2 sc in every stitch around for a full ruffle. Fasten off.
Tier 2 (orange): join one round above tier 1, repeat the same full-ruffle round.
Bodice (black): join at the top of tier 2, sc even for 4 rounds, then add two narrow crossed straps up to the shoulders. Sew a small button where each strap meets the bodice front.
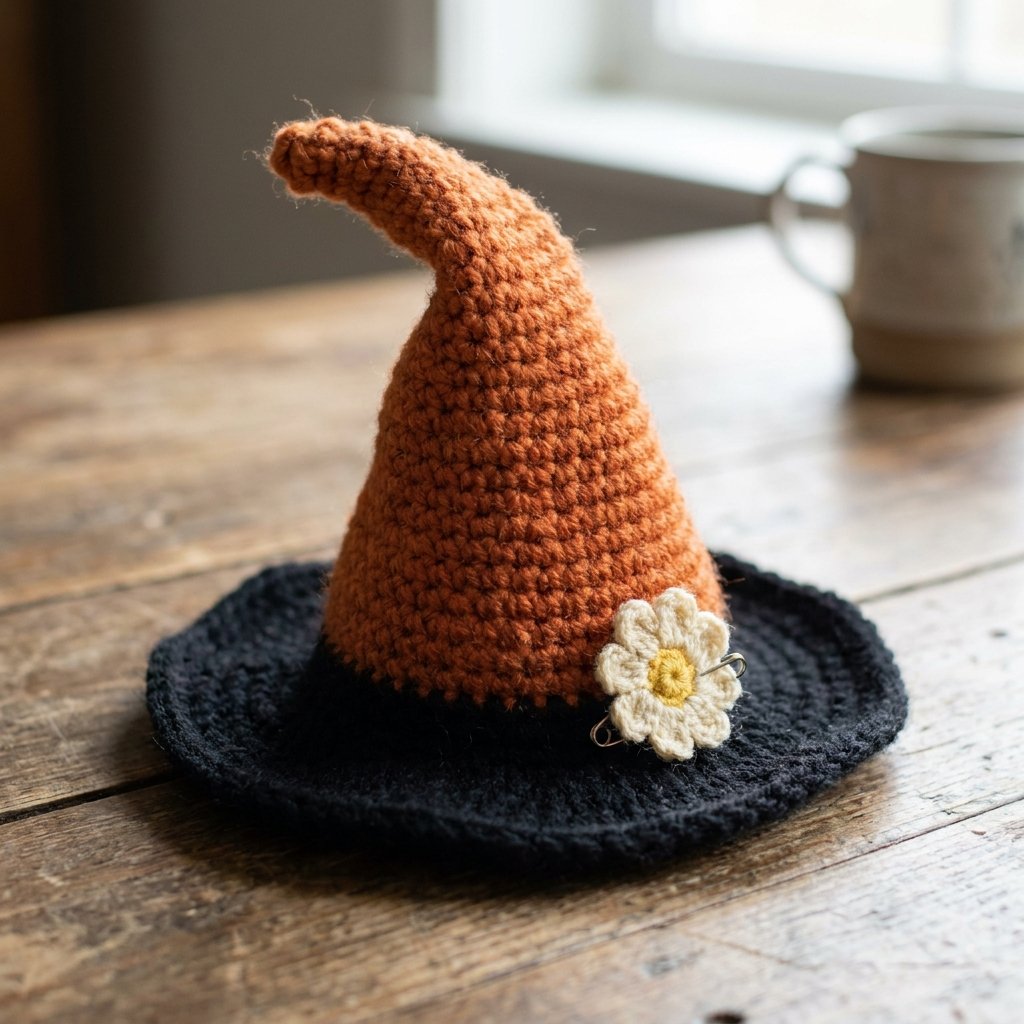
8. Pointed Witch Hat
Crown (orange), Rnd 1: 6 sc in MR [6]
Rnd 2: inc x6 [12]
Rnds 3–14: sc even, decreasing 1 st every 2 rounds to taper the point, ending around [6–8] at the tip.
Brim (black): join at the base of the cone. Rnd 1: sc even. Rnd 2: inc x every stitch to flare the brim wide. Rnds 3–4: sc even to finish the edge.
Sew a small fabric or crocheted flower to the hat band for a finishing touch, and secure the hat to the wig once the wig is complete.
9. Curly Wig
Rnd 1: 6 sc in MR [6]
Rnd 2: inc x6 [12]
Rnd 3: (sc, inc) x6 [18]
Rnd 4: (2 sc, inc) x6 [24]
Rnds 5–11: sc even [24] to form a cap shape that fits the head snugly.
For curls, cut 10–12 in (25–30 cm) lengths of brown yarn, fold and knot them through the cap in rows using a latch-hook or crochet-hook method, then gently twist each strand around a pencil and steam or dampen to set the curl.
10. Assembly & Finishing
- Sew arms to the sides of the body at the shoulder line, angled slightly forward.
- Sew legs to the underside/front of the body so the doll balances in a seated position.
- Slip the dress bodice over the body and tack the straps at the shoulders.
- Sew the wig onto the head, covering the neck ridge seam.
- Embroider a small mouth and rosy cheeks in pink thread if desired.
- Fit the witch hat over the wig and tack in place with a few discreet stitches.
11. Three Color Variations
Classic Black Witch
Swap the orange dress tiers for solid black, keep the hat orange for contrast. Yarn swap: replace “orange” with “black” in the dress section only.
Candy Corn (as shown)
Yellow → orange → black tiers exactly as written above, orange hat, black brim.
Purple Mystic Witch
Replace orange throughout (dress tier 2 and hat crown) with a deep purple; keep black bodice and brim unchanged.
12. Troubleshooting
| Problem | Fix |
|---|---|
| Head looks lumpy | Add fiberfill in small pinches, not one big clump; push into the neck first. |
| Stitch count is off | Recount at the end of each round before starting the next — a stitch marker prevents this. |
| Hat won’t stand up straight | Stuff the very tip lightly and use a firmer tension on the crown rounds. |
| Curls fall out of the wig | Knot each strand twice through the cap and dab a spot of fabric glue at the base. |
| Doll won’t sit upright | Recheck leg placement — legs should attach further forward than you’d expect, near the front-underside seam. |
13. Care Instructions
- Spot clean only with a damp cloth and mild soap — avoid machine washing.
- Air dry flat, away from direct heat, to preserve the hat’s shape.
- Store away from direct sunlight to prevent yarn color fading.
- Keep away from young children if safety eyes are used, unless secured with washers and glue.
14. Frequently Asked Questions
What are some good Halloween amigurumi patterns?
Beyond a witch doll, popular Amigurumi Crochet Pattern HALLOWEEN doll designs include pumpkin-head dolls, tiny ghosts, black cats, skeletons, and candy-corn amigurumi. Witch dolls tend to be the most requested because the hat and dress give beginners a satisfying “costume” element to design around.
What is the difference between crochet and amigurumi?
Crochet is the general technique of creating fabric with a hook and yarn. Amigurumi is a specific style of crochet — originally Japanese — used to make stuffed, three-dimensional toys and dolls, almost always worked in a continuous spiral of single crochet rather than in rows.
Is amigurumi easier than crochet?
Amigurumi is a subset of crochet, so the comparison isn’t really “easier,” but amigurumi does rely on fewer stitch types (mostly sc, inc, dec) than garment or lace crochet, which makes it approachable for beginners even though shaping and finishing take practice.
Why do amigurumi not have mouths?
Many amigurumi designers skip embroidered mouths to keep the toy’s expression neutral and “cute” rather than fixed on one emotion — it’s a stylistic choice, not a rule. This Amigurumi Crochet Pattern HALLOWEEN doll includes an optional embroidered mouth if you prefer one.
What is the best yarn for amigurumi?
100% cotton yarn is the most popular choice for amigurumi because it has little stretch, holds stitch definition well, and doesn’t split like some acrylics — all of which keep small stitches tight and tidy.
What are some common mistakes to avoid in amigurumi?
The most common mistakes are losing track of the round (fix with a stitch marker), under-stuffing joints so the doll flops, and using a hook that’s too large for the yarn, which leaves visible gaps between stitches.
What is the easiest thing to crochet in amigurumi?
A simple round ball or a small pumpkin (just increases, straight rounds, then decreases) is typically the easiest amigurumi project for a first attempt, since it only uses three stitch types.
15. Final Thoughts on This Amigurumi Crochet Pattern HALLOWEEN Doll
Whether this is your first attempt or your tenth, this Amigurumi Crochet Pattern HALLOWEEN doll is designed to be a pattern you can return to every October. I wrote every round of this Amigurumi Crochet Pattern HALLOWEEN doll tutorial the way I’d want it explained to me: no skipped stitch counts, no guessing where a decrease goes, and no vague “continue as established” instructions that leave beginners stuck.
If you make your own version of this Amigurumi Crochet Pattern HALLOWEEN doll, I’d love to see it — tag your finished witch doll with the hashtag #AmigurumiCrochetPatternHalloweenDoll so other makers following this Amigurumi Crochet Pattern HALLOWEEN doll guide can find your version for inspiration. This Amigurumi Crochet Pattern HALLOWEEN doll also makes a lovely handmade gift, a craft-fair item, or a seasonal decoration that outlasts a store-bought Halloween decoration by years.
Save this Amigurumi Crochet Pattern HALLOWEEN doll post to your crochet board now, and check back — I’ll be adding a pumpkin-doll and black-cat companion pattern to go with this Amigurumi Crochet Pattern HALLOWEEN doll series soon.


