Crochet Bandana Pattern | Crochet Lovers ClubCrochet Lovers Club
Free amigurumi & crochet patterns for every skill level
Crochet Bandana Pattern
A free floral motif crochet bandana pattern with a modern, minimal feel
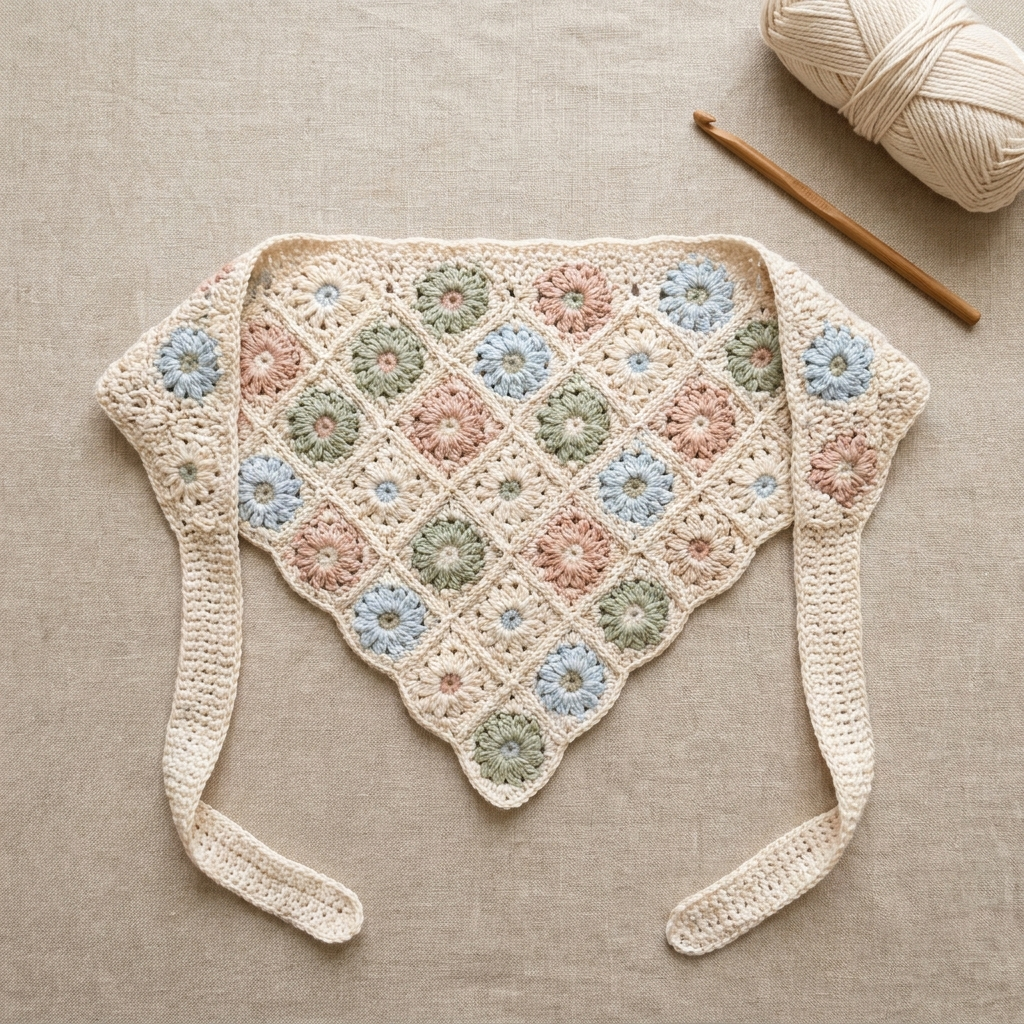
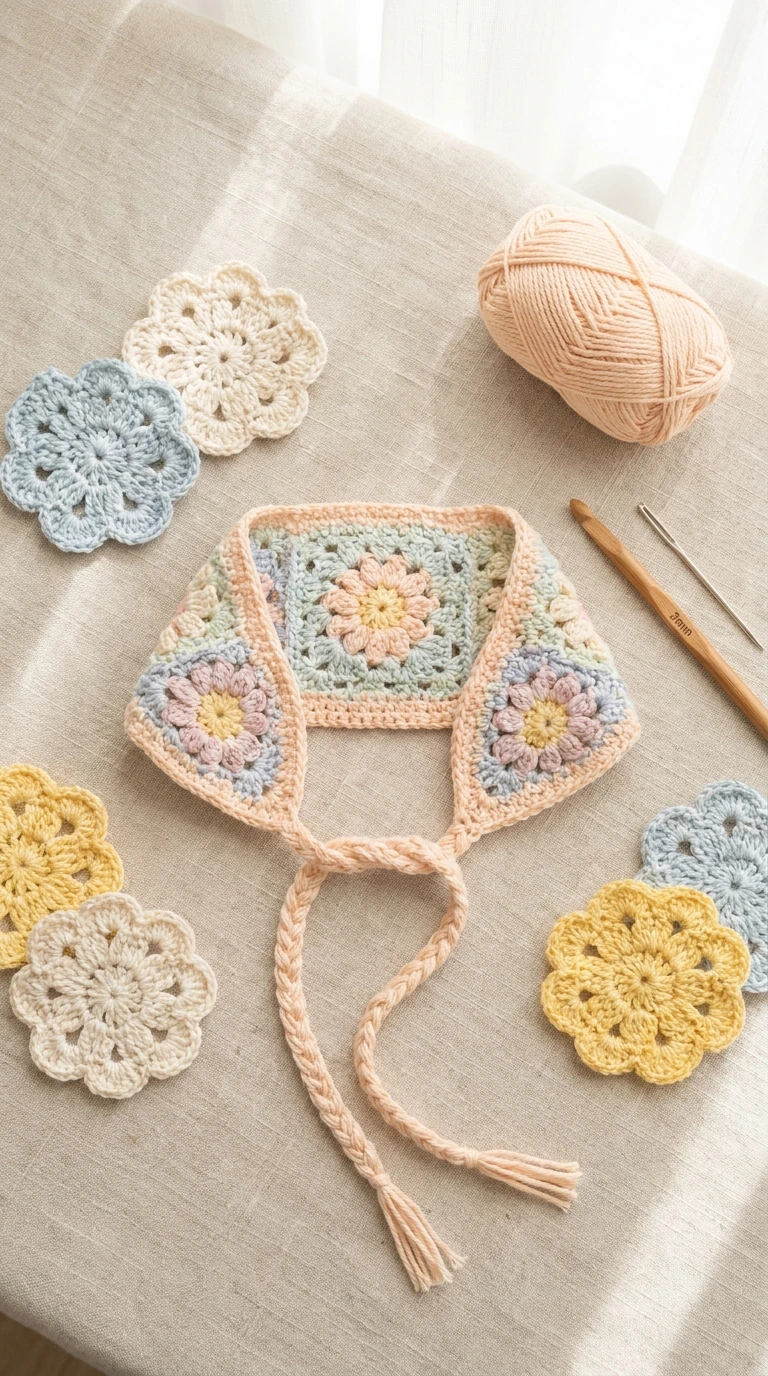
This crochet bandana pattern is one of my favorite quick-accessory makes — it’s built entirely from small floral motifs joined together as you go, so there’s no bulky seaming at the end. If you love the look of granny-square style projects but want something lighter and more wearable, this crochet bandana pattern is exactly that.
I designed this crochet bandana pattern to be worn as a headscarf, tied around the neck, or even used as a decorative trim on a bag. It comes together from a handful of full motifs and a couple of half motifs along one edge, giving it that soft triangular shape a bandana needs.
Want the printable, ad-free PDF of this crochet bandana pattern? Join the Crochet Lovers Club for instant access to the full pattern library.
Crochet Bandana Pattern Details
Difficulty: Beginner–Intermediate
Finished size: Adjustable, medium ~2″ motifs
Crochet language: US terms
Hook: 3mm
Yarn weight: Lightweight cotton
Gauge: 1 full motif ≈ 2″ diameter
Before we get into the stitches, here’s a quick overview of what this crochet bandana pattern needs and how the pieces come together.
Materials for This Crochet Bandana Pattern
- Lightweight cotton yarn, 1–2 colors
- 3mm crochet hook
- Yarn needle
- Stitch markers
- Scissors
Quantity Needed
For a medium-sized crochet bandana pattern: 6 full motifs and 2 half motifs, following the layout below.
How to Make the Crochet Bandana Pattern
Step 1: Full Motif (Base Circle)
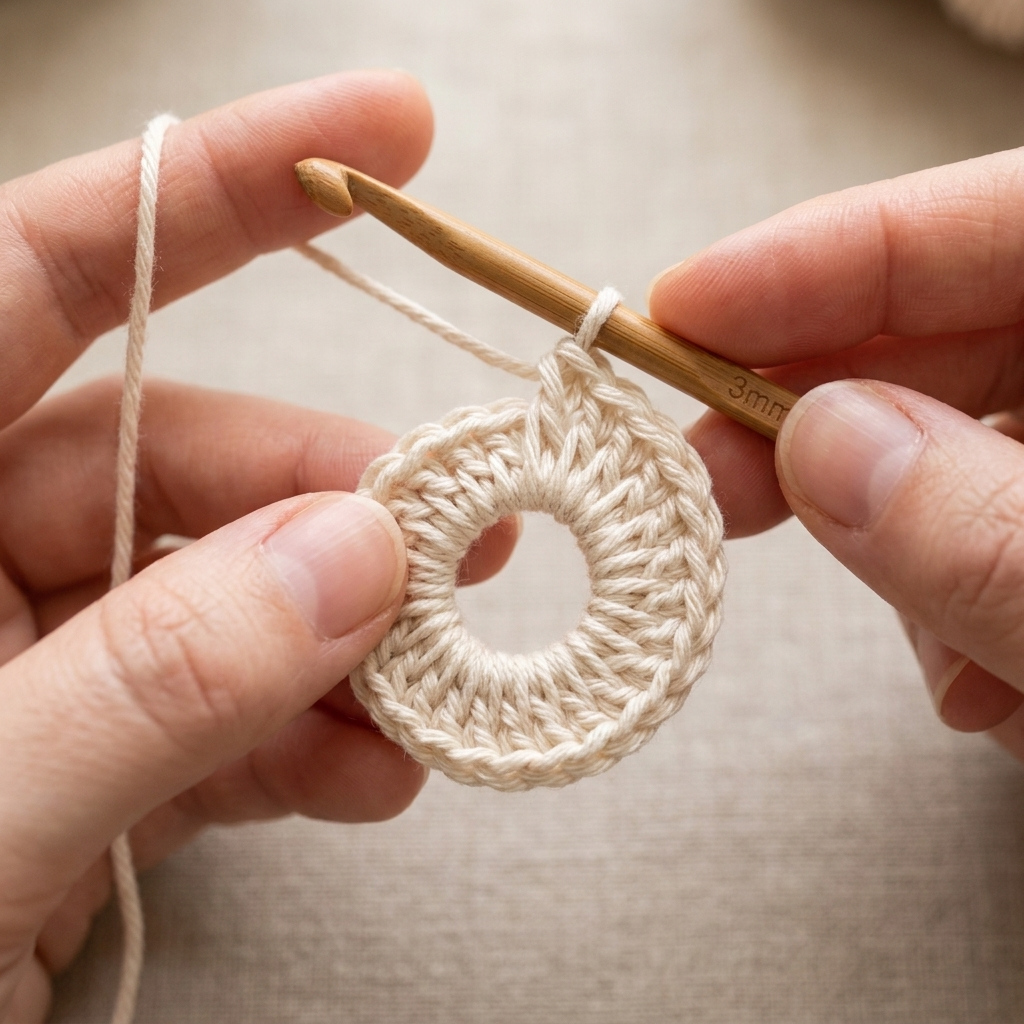
Round 1: Make a magic ring, ch 3 (counts as first dc). Work (1 dc, ch 2) six times into the ring. You’ll have 7 dc total and 7 ch-2 spaces.
Pull the tail tight to close the ring, then sl st into the top of the starting ch-3 to join.
Stitch count: 7 dc, 7 chain-2 spaces.
Step 2: Forming the Petals
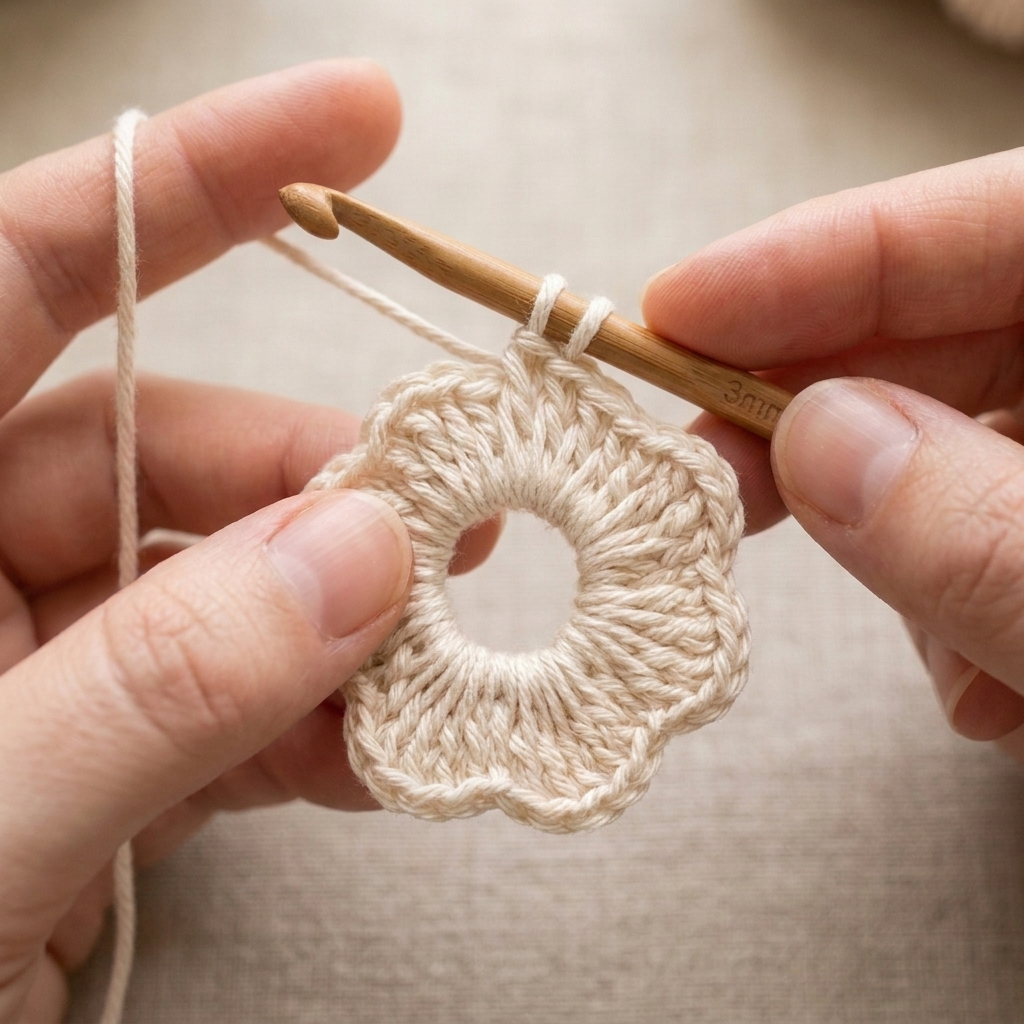
Round 2: Sl st into the first ch-2 space, ch 4 (counts as first petal base).
Work a cluster stitch in the same space: (yarn over, insert hook into space, pull up a loop, yarn over, pull through 2 loops) three times, then yarn over and pull through all remaining loops. Ch 1 to close the cluster.
Ch 3, move to the next ch-2 space, and repeat the cluster + ch-3 in every remaining space around.
Sl st into the top of the first cluster to close the round.
Stitch count (finished motif): 7 petal clusters with 7 chain-3 spaces between them.
Fasten off and weave in ends, or leave a tail if this motif will be joined to the next as you go — this join-as-you-go method is what makes this crochet bandana pattern come together so quickly.
Step 3: Joining Motifs
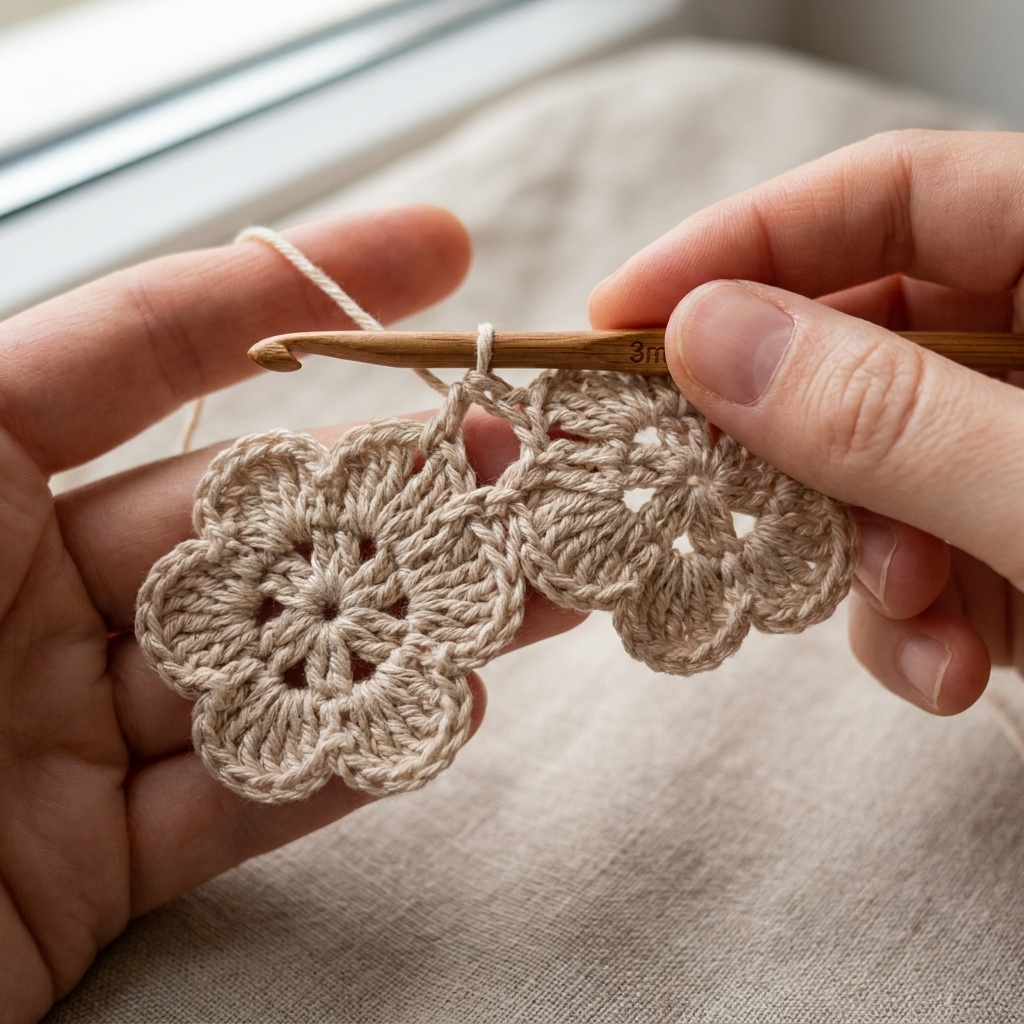
Single edge join: While working the final petal of a new motif, replace the ch-3 with: ch 1, sl st into the corresponding ch-3 space of the neighboring motif, ch 1. Then complete the cluster as usual.
Double edge (corner) join: Where two motifs meet at a corner, insert your hook through both motifs’ shared ch-3 space, pull up a loop, and sl st to join before continuing the cluster stitch.
Step 4: Half Motif (For the Bandana Point)
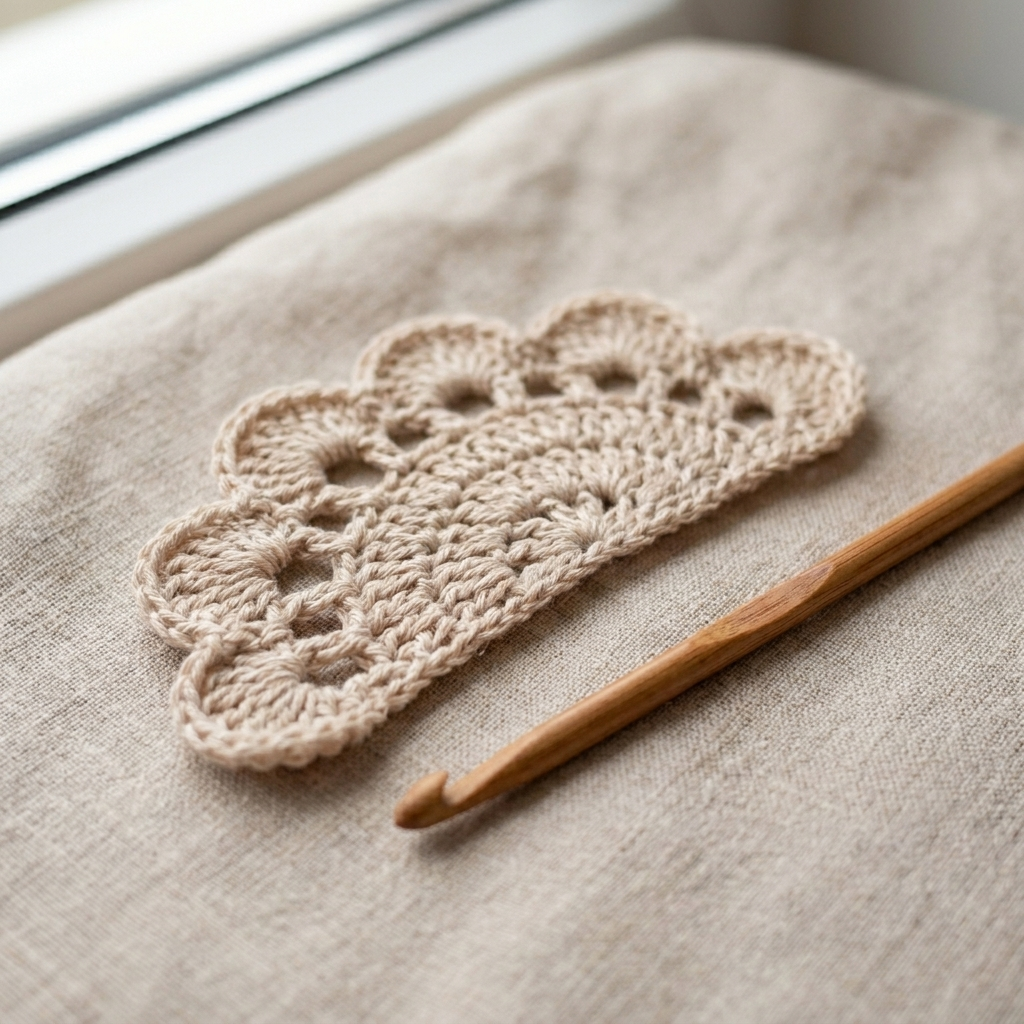
Round 1: Make a magic ring, ch 3. Work (1 dc, ch 2) five times into the ring. Fasten the ring and sl st to join. (6 dc, 6 ch-2 spaces)
Round 2: Work petals the same way as the full motif, but only across 5 of the 6 ch-2 spaces, leaving the last one open so the piece lies flat as a half-shape.
After the last petal, ch 2 and sl st into the corner of the adjoining full motif to attach it in place.
Fasten off and weave in the ends. This half motif is what gives the crochet bandana pattern its signature pointed edge.
Step 5: Assembling the Crochet Bandana Pattern
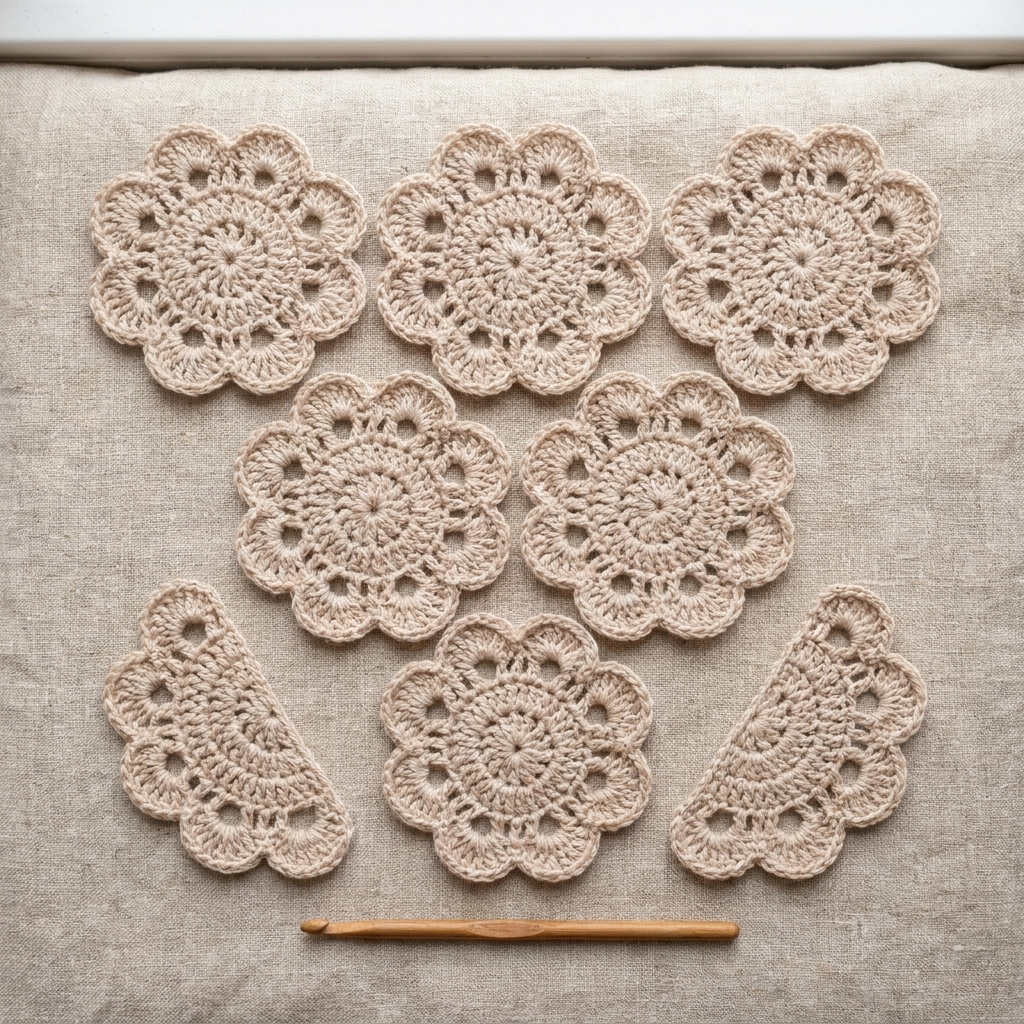
Lay your motifs out before joining the final few, so you can check the triangular shape of the crochet bandana pattern is coming together evenly. A simple layout for a medium size:
| Row | Full Motifs | Half Motifs | Join Type |
|---|---|---|---|
| Top Row | 3 | 0 | Single edge |
| Middle Row | 2 | 0 | Double edge (corner) |
| Bottom Row | 1 | 2 | Double edge (corner) |
Step 6: Edging & Ties
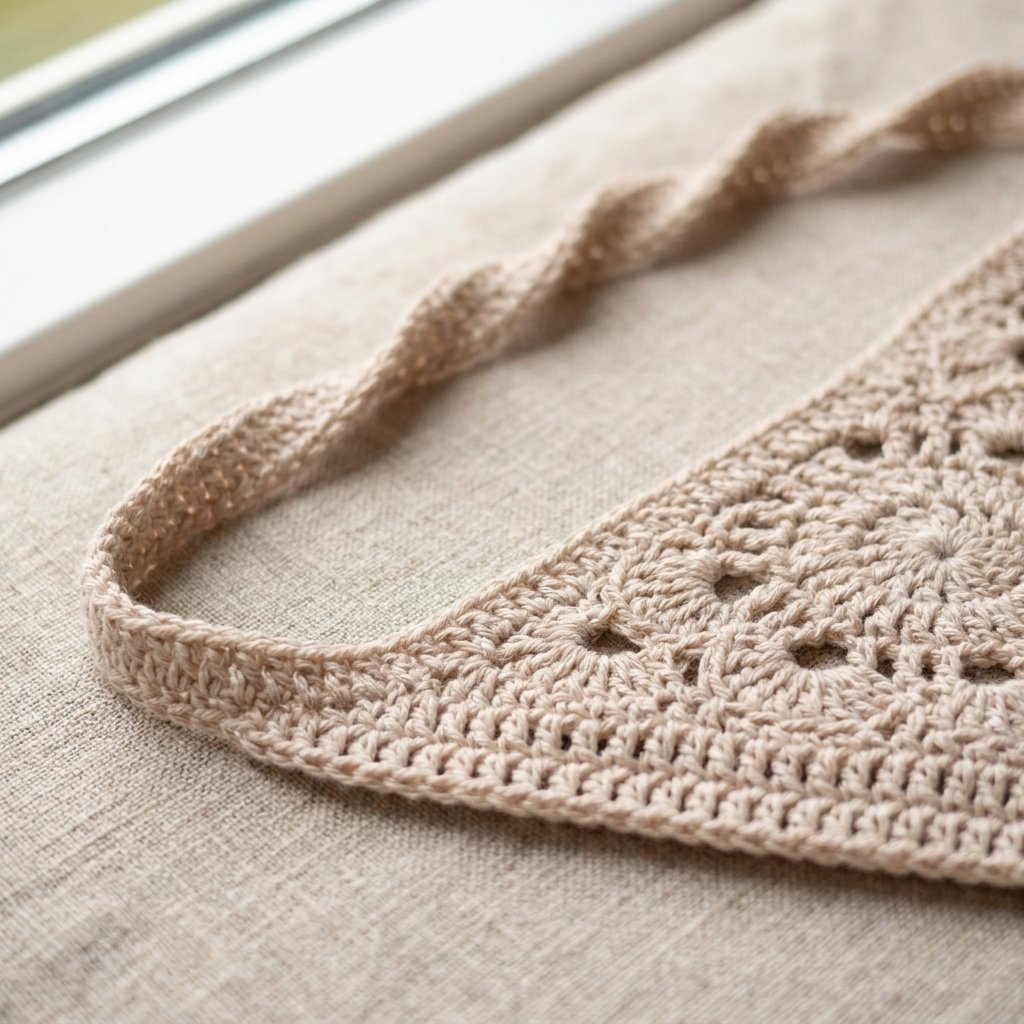
Join yarn anywhere along the outer edge of your assembled crochet bandana pattern, then work 2–3 dc into every chain space around the entire perimeter to create a clean, unified border.
At the two top corners, chain 55–60 to form ties, then work a slip stitch back down each chain to thicken it. These ties are what let you knot the crochet bandana pattern comfortably around your head or neck.
Finishing Your Crochet Bandana Pattern
Once your crochet bandana pattern is fully assembled and edged, give it a light steam block or gentle iron (on a low, yarn-safe setting) so the motifs sit flat and the floral texture really stands out. This step makes a noticeable difference in how polished the finished piece looks.
And that’s it — your very own crochet bandana pattern is ready to wear! I’d love to see how yours turns out.
Happy hooking 🧶
Tips for This Crochet Bandana Pattern
- Join as you go: It saves time later and keeps your seams practically invisible.
- Play with color: Alternating colors between motifs gives this crochet bandana pattern a fun, vibrant look.
- Keep your edging even: Adjust the stitch count in the border slightly if your motifs pull the edge uneven.
© Crochet Lovers Club — crochetloversclub.com
Free crochet & amigurumi patterns for makers of every level