
Crochet Cat Bag Charm Pattern: Free & Easy Kitty Flower You Can Finish Today
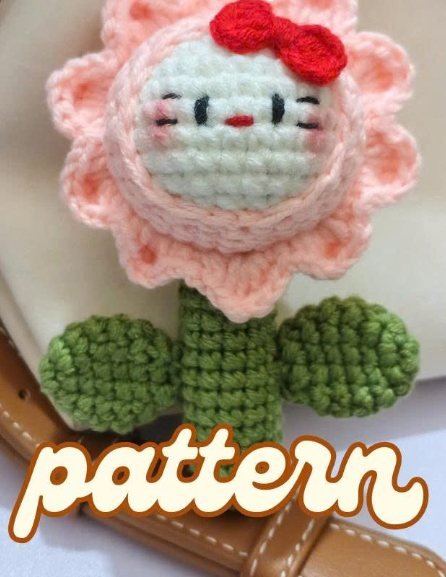
This crochet cat bag charm pattern turns a few yards of yarn into a pocket-sized kitty flower with a cream face, soft pink petals, a green stem, two leaves and a little red bow. If you have been searching for a free crochet cat bag charm pattern that is simple, cute and fast, you are in the right place. Every round of this easy crochet cat bag charm pattern is written out below, with a photo for each part.
Quick answer: A crochet cat bag charm pattern is a small amigurumi project worked in the round with single crochet. This version takes about 2-3 hours, needs under 50 g of yarn in four colors, and finishes at roughly 7-8 cm wide (depending on your yarn and hook). It is ideal for beginners, market stalls and handmade gifts.
In this crochet cat bag charm pattern guide
- Crochet Cat Bag Charm Pattern: Quick Overview
- Why You’ll Love This Crochet Cat Bag Charm Pattern
- Materials for the Crochet Cat Bag Charm Pattern
- Stitch Abbreviations (US Terms)
- Step 1: Crochet the Cat Head
- Step 2: Crochet the Pink Petal Base
- Step 3: Work the Flower Petals
- Step 4: Crochet the Stem
- Step 5: Crochet the Two Leaves
- Step 6: Make the Tiny Red Bow
- Step 7: Assemble Your Crochet Cat Bag Charm
- Pro Tips for a Perfect Crochet Cat Bag Charm Pattern
- Variations and Gift Ideas
- Crochet Cat Bag Charm Pattern FAQ
Why You’ll Love This Crochet Cat Bag Charm Pattern
Bag charms are one of the fastest-growing corners of the amigurumi world. Crafters on Pinterest, Etsy, Instagram and Ravelry are decorating totes, backpacks, keys and lunch boxes with tiny crochet critters, and a cat-themed bag charm is always a bestseller. Here is why this particular crochet cat bag charm pattern works so well:
- Beginner friendly: the cat head, stem and leaves use only a magic ring, single crochet, increases and decreases.
- Quick to finish: a complete crochet cat bag charm in one afternoon.
- Small and scrap-friendly: perfect for leftover cotton or acrylic yarn.
- Gift and market ready: a handmade bag charm cat is easy to batch-make for birthdays, teacher gifts and craft fairs.
- Totally free: every stitch of this free crochet cat bag charm pattern is written below, no email signup required.
Materials for the Crochet Cat Bag Charm Pattern
Gather these supplies before you start. Yarn and hook sizes are suggestions; the key is to crochet tightly so the stuffing never shows through.
- Yarn: smooth cotton or acrylic (DK / light worsted) in cream or white, pink, green and red.
- Hook: 2.5-3.0 mm, or one to two sizes smaller than your yarn label suggests.
- Polyfill stuffing for the head and stem.
- Black embroidery thread for the eyes and whiskers, plus a touch of pink for the cheeks.
- Yarn needle, stitch marker and scissors.
- Keyring, lobster clasp or small metal ring to turn the finished piece into a bag charm.
Stitch Abbreviations (US Terms)
| Abbreviation | Meaning |
|---|---|
| MR | Magic ring (magic circle) |
| sc | Single crochet |
| inc | Increase (2 sc in the same stitch) |
| dec | Decrease (sc 2 stitches together) |
| hdc | Half double crochet |
| dc | Double crochet |
| tr | Treble crochet |
| ch | Chain |
| sl st | Slip stitch |
| ( )*6 | Repeat the instructions inside the brackets 6 times |
| (6) | Total stitch count at the end of the round |
Step 1: Crochet the Cat Head (Cream Yarn)
The head is the star of the project. Work in continuous rounds without joining, and use a stitch marker to track the start of each round. Rounds 1-5 build the flat circle, rounds 6-9 form the sides, and rounds 10-13 close the ball.
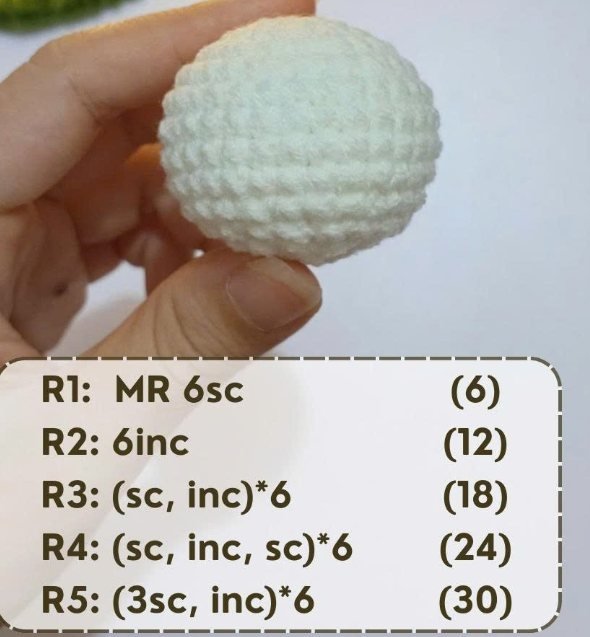
Head rounds 1-5
| Round | Stitch instructions | Stitch count |
|---|---|---|
| R1 | MR 6sc | (6) |
| R2 | 6inc | (12) |
| R3 | (sc, inc)*6 | (18) |
| R4 | (sc, inc, sc)*6 | (24) |
| R5 | (3sc, inc)*6 | (30) |
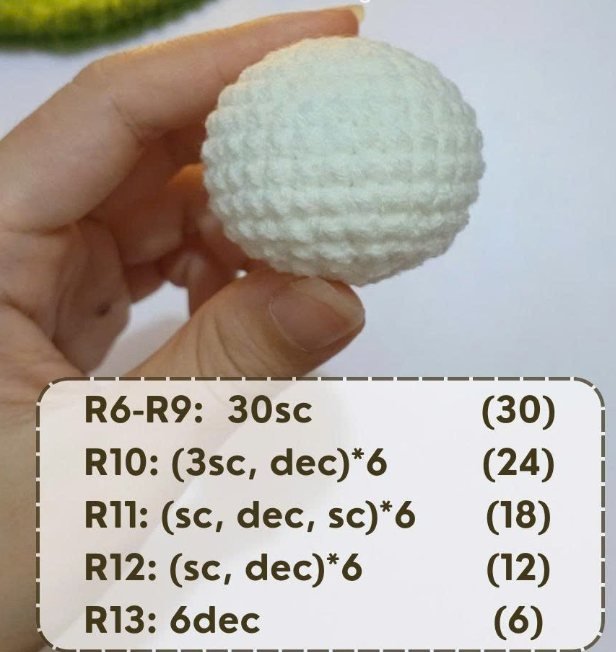
Head rounds 6-13
| Round | Stitch instructions | Stitch count |
|---|---|---|
| R6-R9 | 30sc | (30) |
| R10 | (3sc, dec)*6 | (24) |
| R11 | (sc, dec, sc)*6 | (18) |
| R12 | (sc, dec)*6 | (12) |
| R13 | 6dec | (6) |
Tip: stuff the head firmly before round 12 and finish with a small, neat closure. Leave a tail to sew the head onto the base later. A smooth, round head is what makes the charm look professional.
Step 2: Crochet the Pink Petal Base
The pink base cradles the head like a flower center. Start the base exactly like the head, then keep going until round 10 so the petals have a solid foundation. This is where the simple ball turns into a flower.
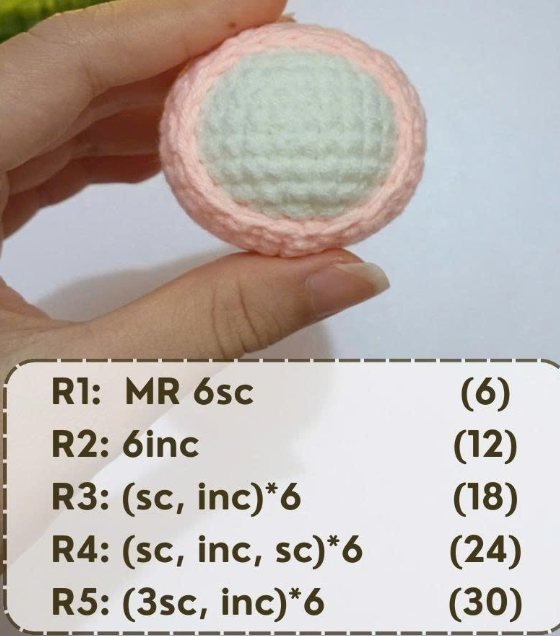
Pink base rounds 1-5
| Round | Stitch instructions | Stitch count |
|---|---|---|
| R1 | MR 6sc | (6) |
| R2 | 6inc | (12) |
| R3 | (sc, inc)*6 | (18) |
| R4 | (sc, inc, sc)*6 | (24) |
| R5 | (3sc, inc)*6 | (30) |
Pattern note: the source pattern shows rounds 1-5 of the base and then works the petals on R10. Rounds 6-9 are not pictured, so continue the base without increases (30sc per round, as with the head) until you reach round 10. Test-fit the cream head in the base as you go and adjust if needed.
Step 3: Work the Flower Petals on Round 10
This is the only section that uses taller stitches. Work the petal sequence below into round 10 of the pink base. Each petal ramps up from sc and hdc, peaks with dc, 2tr, dc, and ramps back down. Ten repeats give a full, frilly flower around your cat face.
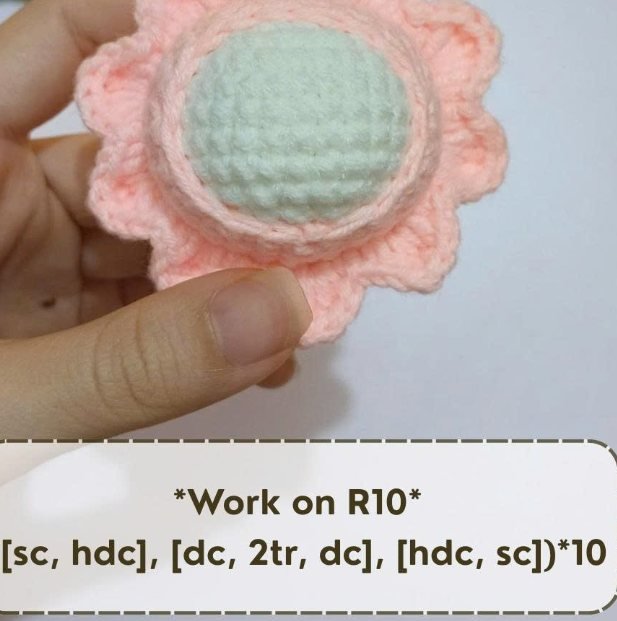
Petal instruction (work on R10):
[sc, hdc], [dc, 2tr, dc], [hdc, sc] *10
Fasten off and weave in the end. Your charm now has a soft pink flower frame ready for the stem.
Step 4: Crochet the Stem (Green Yarn)
The stem is a small tube, so it works up fast. Stuff lightly as you go and leave a long tail so you can sew it to the back of the flower base.
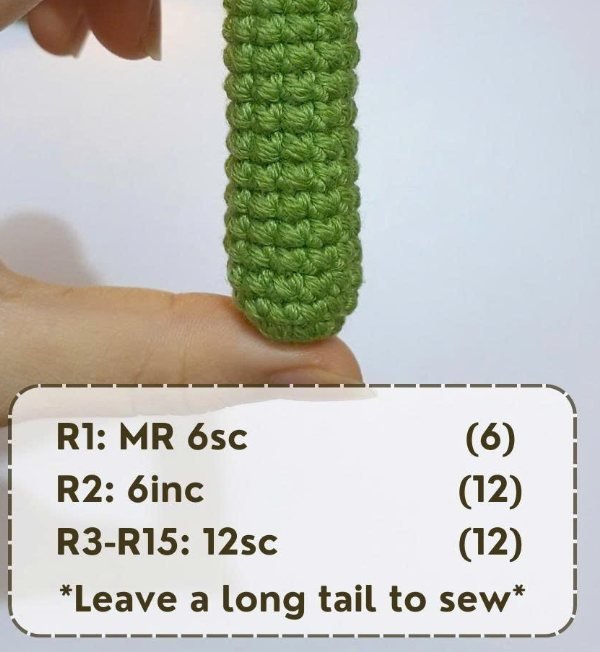
| Round | Stitch instructions | Stitch count |
|---|---|---|
| R1 | MR 6sc | (6) |
| R2 | 6inc | (12) |
| R3-R15 | 12sc | (12) |
Leave a long tail to sew.
Step 5: Crochet the Two Leaves (Make 2)
The leaves add the finishing touch. Make two identical leaves in green, and leave a long tail on each to sew onto the stem.
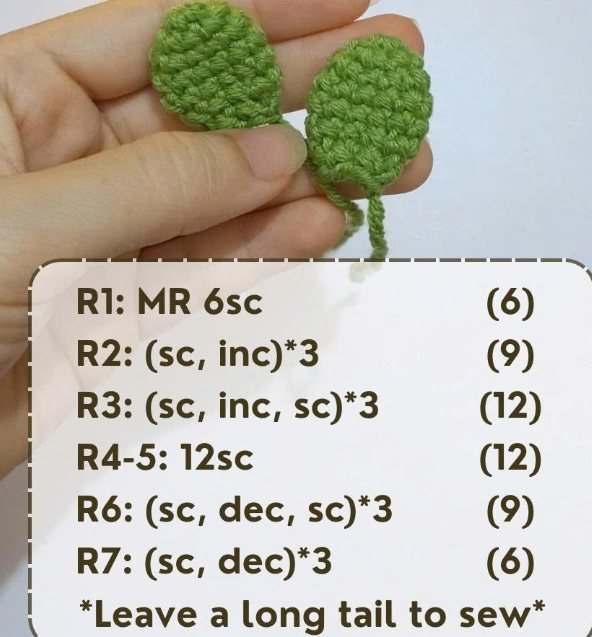
| Round | Stitch instructions | Stitch count |
|---|---|---|
| R1 | MR 6sc | (6) |
| R2 | (sc, inc)*3 | (9) |
| R3 | (sc, inc, sc)*3 | (12) |
| R4-R5 | 12sc | (12) |
| R6 | (sc, dec, sc)*3 | (9) |
| R7 | (sc, dec)*3 | (6) |
Leave a long tail to sew.
Step 6: Make the Tiny Red Bow
The little red bow is what makes this look like a kawaii kitty. Hold two strands of red yarn together and work the bow as a chain-based loop on each side:
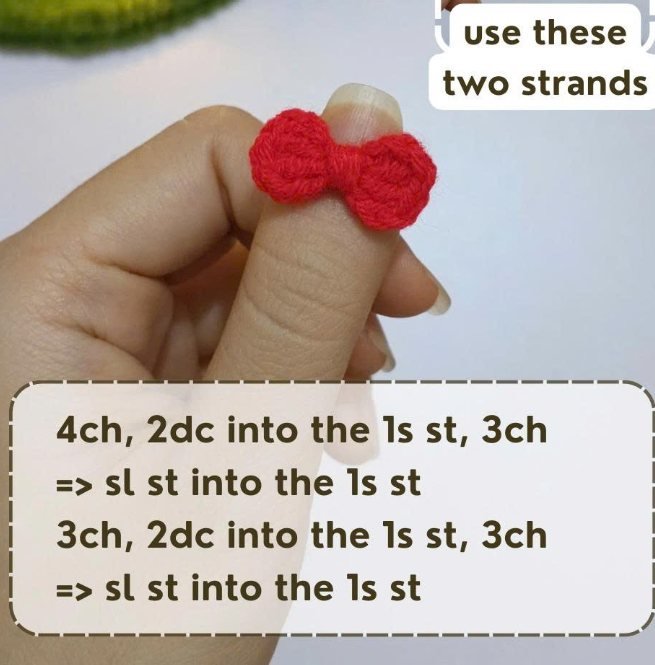
Left loop: 4ch, 2dc into the 1st st, 3ch => sl st into the 1st st
Right loop: 3ch, 2dc into the 1st st, 3ch => sl st into the 1st st
Wrap a short piece of red yarn around the middle to cinch the two loops into a bow shape, then secure the ends.
Step 7: Assemble Your Crochet Cat Bag Charm
- Embroider the face on the cream head with black thread: two small eyes and whiskers on each side, plus a tiny nose. Add soft pink cheeks.
- Sew the head into the pink petal base so it sits slightly raised, like a flower center.
- Attach the red bow to the top corner of the head.
- Sew the leaves to the left and right of the stem, using the long tails.
- Sew the stem to the back of the flower base so the cat looks like it is growing on a stalk.
- Add the hardware: sew a yarn loop or metal ring to the back of the base or top of the stem and clip on a lobster clasp.
That’s it. Your finished crochet cat bag charm is ready to clip onto a tote, school bag, keys or camera strap.
Pro Tips for a Perfect Finish
- Go down a hook size. Tight stitches are the secret to a clean finish.
- Use a stitch marker on every round; amigurumi has no visible seam.
- Count your stitches. The number in brackets at the end of each round keeps the shape perfectly round.
- Use cotton for a crisp look and acrylic for a fluffier, softer charm.
- Secure the clasp twice. Bags get a lot of wear, so sew the ring through both the base and the stem.
- Take bright, natural-light photos if you plan to sell your finished bag charms.
Variations and Gift Ideas
Once you have the basics down, try these ideas:
- Change the colors: a lavender, yellow or mint flower base creates a whole bouquet of cat charms.
- Swap the bow: try a blue, white or polka-dot bow for different cat personalities.
- Make it a keychain or car mirror charm by adding a longer chain and a swivel clasp.
- Craft-fair bundles: package three charms in a gift box for an easy bestseller.
Crochet Cat Bag Charm Pattern FAQ
What is a crochet cat bag charm pattern?
A crochet cat bag charm pattern is a set of written stitch instructions for making a small amigurumi cat that clips onto a handbag, backpack or keychain. This free crochet cat bag charm pattern builds a kitty face, a pink petal base, a stem, two leaves and a tiny red bow.Is this crochet cat bag charm pattern beginner friendly?
Yes. This easy crochet cat bag charm pattern only uses a magic ring, single crochet, increases and decreases for the head, stem and leaves. The petals use half double, double and treble crochet, so they are the only slightly advanced part.What yarn is best for a crochet cat bag charm?
Smooth cotton or acrylic DK / light worsted yarn works best. Choose a hook one or two sizes smaller than the yarn label suggests so the stitches stay tight and the stuffing never shows.How long does this crochet cat bag charm pattern take?
Most crocheters finish this simple crochet cat bag charm pattern in two to three hours, including the face embroidery and assembly.How do I attach the charm to a bag?
Sew a small loop of yarn or a metal ring to the back of the flower base, then clip a lobster clasp or keyring onto it. Sew it through the stem as well for extra strength.Can I sell items made from this crochet cat bag charm pattern?
Check the original designer’s terms before selling finished items. If you adapt this crochet cat bag charm pattern into your own design, credit the source and use original photos.
Final Thoughts on This Crochet Cat Bag Charm Pattern
This crochet cat bag charm pattern gives you a free, easy and adorable project that works for first-time amigurumi makers and experienced crocheters alike. Save the pin, share your finished crochet cat bag charm with friends, and tag your makes so the community can see your version. Happy crocheting!