
Crochet Phone Bag Free Pattern Tutorial: Cute Honey Bear Pouch
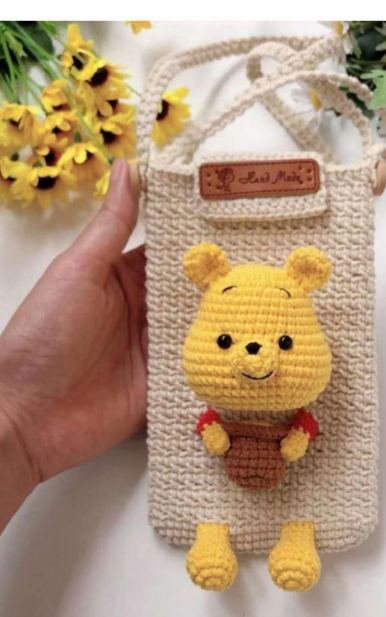
Welcome to this crochet phone bag free pattern tutorial for a cozy cream pouch with a smiling honey bear, tiny dangling legs and a honey pot. In this crochet phone bag free pattern tutorial you will make a flap-closure phone pouch with a long crossbody strap, then add the amigurumi character on the front. It is a great project for crocheters who want a handmade gift or a daily accessory.
In This Crochet Phone Bag Free Pattern Tutorial
- Materials, abbreviations and size
- Crochet the bag body
- Lid of the pouch
- Shoulder strap
- Honey bear parts
- Assembling
- Tips and FAQ
Why This Crochet Phone Bag Free Pattern Tutorial Is Worth Making
A crochet phone bag is one of the most useful small makes: it holds your phone, keeps hands free and shows off your handmade skills. This crochet phone bag free pattern tutorial uses plain single crochet in a textured “spiral” stitch, so the fabric is dense and sturdy. It is also a friendly crochet phone bag free pattern tutorial for confident beginners, because the bag body is just repeated rounds, and the amigurumi parts are small.
If you searched for a free crochet crossbody phone bag pattern, a crochet phone pouch with strap or a simple phone holder with a button closure, this crochet phone bag free pattern tutorial covers all three in one design.
Materials for the Crochet Phone Bag Free Pattern Tutorial
- Yarn: sport yarn (the designer used Jeans from YarnArt)
- Hook: size 2.3 mm
- Two 6 mm safety eyes, two 15 mm buttons
- Polyester fiberfill
- Stitch markers
Abbreviations: rnd = round, ch = chain, sc = single crochet, inc = increase, dec = decrease, slst = slip stitch.
Size: with the same yarn, the phone pouch measures 17 cm in length and 10 cm in width.

Step 1: Crochet the Bag Body
There are two ways to make a single crochet: the v-stitch (yarn over single crochet) and the x-stitch (yarn under single crochet). This crochet phone bag free pattern tutorial uses the x-stitch. Work in spirals, without joining the rounds.
Make 24 ch, start in the second ch from the hook.
- Rnd 1: 22 sc, 3 sc in the last stitch, continue on the other side of the foundation chain, 21 sc, inc (48)
- Rnd 2: inc, 21 sc, 3 inc, 21 sc, 2 inc (54)
- Rnd 3: inc, 24 sc, 3 inc, 24 sc, 2 inc (60)
- Rnd 4: 60 sc (60)
- Rnd 5: (1 ch, skip 1 stitch, 1 sc in the next stitch)*30 (60)
- Rnd 6: (1 sc in the space of 1 ch, 1 sc in the next stitch)*30 (60)
From here, the odd rounds (7, 9, 11, 13, 15…) are made the same as round 5, and the even rounds (8, 10, 12, 14, 16…) are made the same as round 6. Stop after finishing the 48th round.
Step 2: Lid of the Pouch
Identify the 14 stitches in the middle of the 46th round.
- Rnd 1: 14 sc, turn
- Rnd 2-13: 14 sc. Cut and weave in the yarn. Sew the button onto the lid of the pouch.

Step 3: Shoulder Strap for Your Crochet Phone Bag
A long strap turns this crochet phone bag free pattern tutorial project into a real crossbody bag.
- Make 3 ch, start in the second ch from the hook: 2 sc, turn
- Rnd 2: 2 sc, turn
- Repeat 2 sc until the shoulder strap is about 113 cm. Fasten off and weave in the yarn. Sew the shoulder strap and the button onto the pouch.

Step 4: Honey Bear Parts
Head (start in yellow)
- Rnd 1: 6 sc in the magic ring (6)
- Rnd 2: 6 inc (12)
- Rnd 3: (1 sc, inc)*6 (18)
- Rnd 4: (inc, 2 sc)*6 (24)
- Rnd 5: (3 sc, inc)*6 (30)
- Rnd 6: 1 sc, inc, (4 sc, inc)*5, 3 sc (36)
- Rnd 7-10: 36 sc (36)
- Rnd 11: 7 sc, 7 inc, 7 sc, 7 inc, 8 sc (50)
- Rnd 12-15: 50 sc (50)
- Rnd 16: 7 sc, dec, 10 sc, dec, 7 sc, dec, 10 sc, dec, 8 sc (46)
- Rnd 17: 7 sc, dec, 8 sc, dec, 7 sc, (dec, 8 sc)*2 (42)
- Rnd 18: 7 sc, (dec, 2 sc)*2, dec, 7 sc, (dec, 2 sc)*2, dec, 8 sc (36)
- Rnd 19: (dec, 4 sc)*6 (30)
- Rnd 20: (3 sc, dec)*6 (24)
Stuff the head.
- Rnd 21: 12 dec (12)
- Rnd 22: 6 dec, slst (6)
Stuff the head. Fasten off and weave in the yarn. Put in the eyes between rows 11-12, leaving 6 stitches of space between them. Use fabric glue to attach the head to the pouch.

Ear (make 2, start in yellow)
- Rnd 1: 6 sc in the magic ring (6)
- Rnd 2: 6 inc (12)
- Rnd 3-4: 12 sc (12)
- Rnd 5: (1 sc, dec)*4, slst (8)
Fasten off, leaving a long tail for sewing. Do not stuff the ear; flatten and fold the top of the ear. Sew the ears on between rows 3-7.
Muzzle (start in yellow)
- Rnd 1: 6 sc in the magic ring (6)
- Rnd 2: 6 inc (12)
- Rnd 3: 12 sc, slst (12)
Fasten off, leaving a long tail for sewing. Sew the nose between rows 1-3 and the mouth between rows 2-3 of the muzzle with black yarn. Sew the muzzle on between rows 11-16. Sew the eyebrows between rows 5-7 with black.
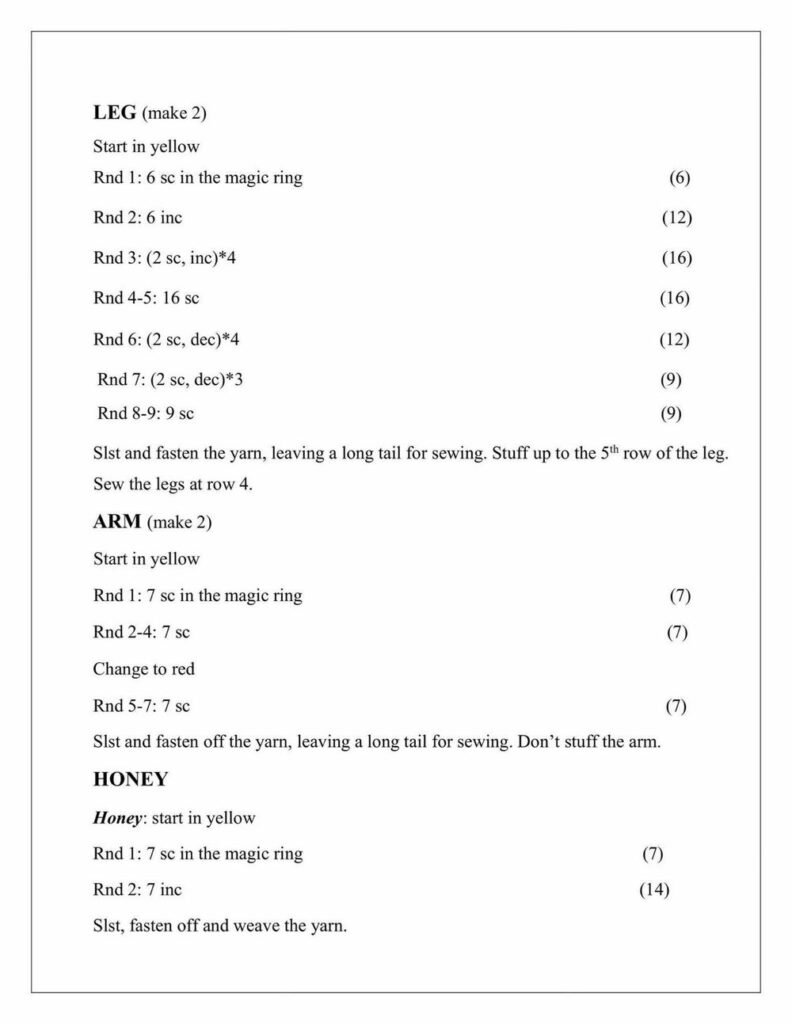
Leg (make 2, start in yellow)
- Rnd 1: 6 sc in the magic ring (6)
- Rnd 2: 6 inc (12)
- Rnd 3: (2 sc, inc)*4 (16)
- Rnd 4-5: 16 sc (16)
- Rnd 6: (2 sc, dec)*4 (12)
- Rnd 7: (2 sc, dec)*3 (9)
- Rnd 8-9: 9 sc (9)
Slst and fasten off, leaving a long tail for sewing. Stuff up to the 5th row of the leg. Sew the legs on at row 4.
Arm (make 2, start in yellow)
- Rnd 1: 7 sc in the magic ring (7)
- Rnd 2-4: 7 sc (7)
- Change to red
- Rnd 5-7: 7 sc (7)
Slst and fasten off, leaving a long tail for sewing. Do not stuff the arm.
Honey (start in yellow)
- Rnd 1: 7 sc in the magic ring (7)
- Rnd 2: 7 inc (14)
Slst, fasten off and weave in the yarn.
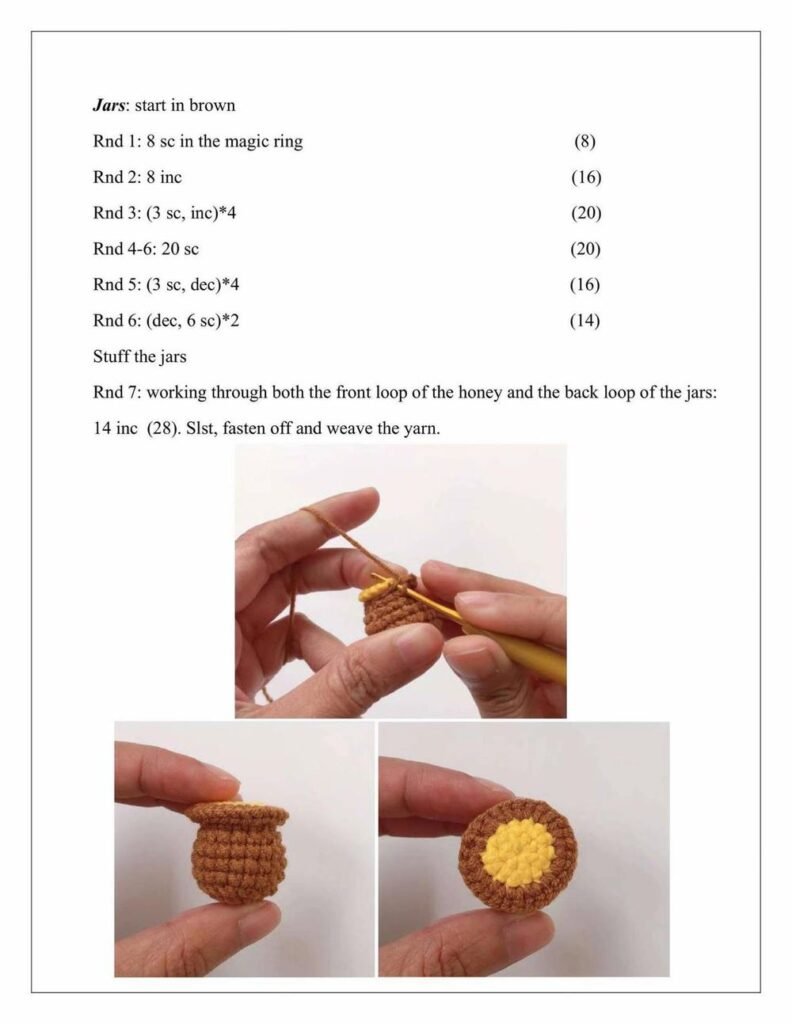
Jar (start in brown)
- Rnd 1: 8 sc in the magic ring (8)
- Rnd 2: 8 inc (16)
- Rnd 3: (3 sc, inc)*4 (20)
- Rnd 4-6: 20 sc (20)
- Rnd 5: (3 sc, dec)*4 (16)
- Rnd 6: (dec, 6 sc)*2 (14)
Stuff the jar.
- Rnd 7: working through both the front loop of the honey and the back loop of the jar: 14 inc (28). Slst, fasten off and weave in the yarn.
Step 5: Assembling the Crochet Phone Bag
- Sew the legs on at row 4.
- Use fabric glue to attach the honey to the pouch.
- Sew the arms to the pouch and the honey.
- Use fabric glue to attach the head to the pouch.


Crochet Phone Bag Free Pattern Tutorial Tips and FAQ
- Keep tension even: a tight, consistent gauge makes the crochet phone bag sturdy and helps the pouch hold its shape.
- Test your phone first: measure your phone before starting this crochet phone bag free pattern tutorial and adjust the chain count or rounds if needed.
- Choose yarn colors: try gray, pink or black for a different look.
Is this crochet phone bag free pattern tutorial beginner friendly?
Yes, for confident beginners. You need chains, single crochet, increases, decreases and a magic ring.
How long should the crossbody strap be?
The pattern strap is about 113 cm; shorten or lengthen it to fit your height.
Can I make the bag without the bear?
Absolutely. The bag body, lid and strap work as a plain crochet phone bag on their own.
Final Thoughts
We hope this crochet phone bag free pattern tutorial helps you make a bag you will love to carry. Save this crochet phone bag free pattern tutorial, share your finished bag, and come back for more free crochet patterns.