

Pink Panther Crochet Pattern Free: Full Amigurumi Tutorial (35″ Tall)
Pink Panther Crochet Pattern Free: The Complete Amigurumi Guide
If you’ve been hunting for a Pink Panther crochet pattern free tutorial that actually walks you through every stage — not just a vague overview — you’re in the right place. I’m a crochet pattern designer with over 20 years of experience writing amigurumi patterns, and in this guide I’ll break down exactly how a large-scale, poseable Pink Panther crochet pattern free doll like the one shown below comes together, from yarn selection to the final glued-on toes.
This finished piece stands an impressive 35 inches tall, making it one of the more ambitious Pink Panther crochet pattern free projects you can take on — but don’t let the size intimidate you. Every component (head, body, arms, legs, tail, ears, eyes) is built from simple amigurumi basics: single crochet, increases, and decreases. If you can single crochet in the round, you can make this Pink Panther crochet pattern free design.
What You’ll Learn in This Pink Panther Crochet Pattern Free Tutorial
- The exact materials and tools used for this Pink Panther crochet pattern free build
- A full abbreviations chart so beginners aren’t lost
- Round-by-round construction guidance for each body part
- How to assemble and stuff the pieces for a soft, poseable finish
- Troubleshooting tips for the most common mistakes crocheters make on this Pink Panther crochet pattern free pattern
- Care instructions to keep your finished doll looking new
Materials List
Gather these before you start your Pink Panther crochet pattern free project:
- Worsted weight yarn (4-ply), Pink shade: approx. 380–420 grams total (this is the dominant color, used for the body, head, limbs, ears, and tail)
- Worsted weight yarn (4-ply), Dark Pink: approx. 15 grams (nose shading and accents)
- Worsted weight yarn (4-ply), Black: approx. 10 grams (eye pupils and eyebrows)
- Worsted weight yarn (4-ply), Yellow: approx. 20 grams (eyeballs)
- Worsted weight yarn (4-ply), Cream/Off-White: approx. 60 grams (tummy panel, inner ears, muzzle base)
- Black crochet thread: a small amount, for fine detail stitching (eyelids/mouth line)
- Polyester fiberfill stuffing: approx. 300–400 grams, enough to firmly fill a 35″ finished doll
Tools Needed
- Crochet hook, size 4.00mm — for worsted weight yarn sections
- Crochet hook, size 1.50mm — for the black crochet thread detail work
- Yarn needle (tapestry needle) for sewing pieces together and weaving in ends
- Stitch markers (a locking marker or scrap yarn works well) to track the start of each round
- Sharp fabric scissors
- Hot glue gun (for securing eyes, toes, and small finishing touches)
Abbreviations Chart
| Abbreviation | Meaning |
|---|---|
| ch | chain |
| sc | single crochet |
| inc | increase (2 sc in same stitch) |
| dec | decrease (invisible/standard sc2tog) |
| st(s) | stitch(es) |
| rnd | round |
| sl st | slip stitch |
| BLO | back loop only |
| FLO | front loop only |
Step-By-Step Construction — Pink Panther Crochet Pattern Free
Below is how I approach building each piece of this Pink Panther crochet pattern free design. Stitch counts are approximate targets based on the finished proportions shown in the reference photos — adjust your hook tension so your piece matches these checkpoints.
1. Eyeballs (Make 2)
Start with a magic ring in yellow and work standard amigurumi increase rounds until the sphere reaches roughly 18–20 stitches around, then hold steady for a couple of rounds before decreasing back down to close the ball. Stuff lightly with fiberfill before closing.
   Rnd 1: 6 sc in magic ring        -> 6 sts
   Rnd 2: inc around                -> 12 sts
   Rnd 3: (sc, inc) around          -> 18 sts
   Rnd 4-6: sc around (even)        -> 18 sts
   Rnd 7: (sc, dec) around          -> 12 sts
   Rnd 8: dec around, stuff, close  -> 6 sts
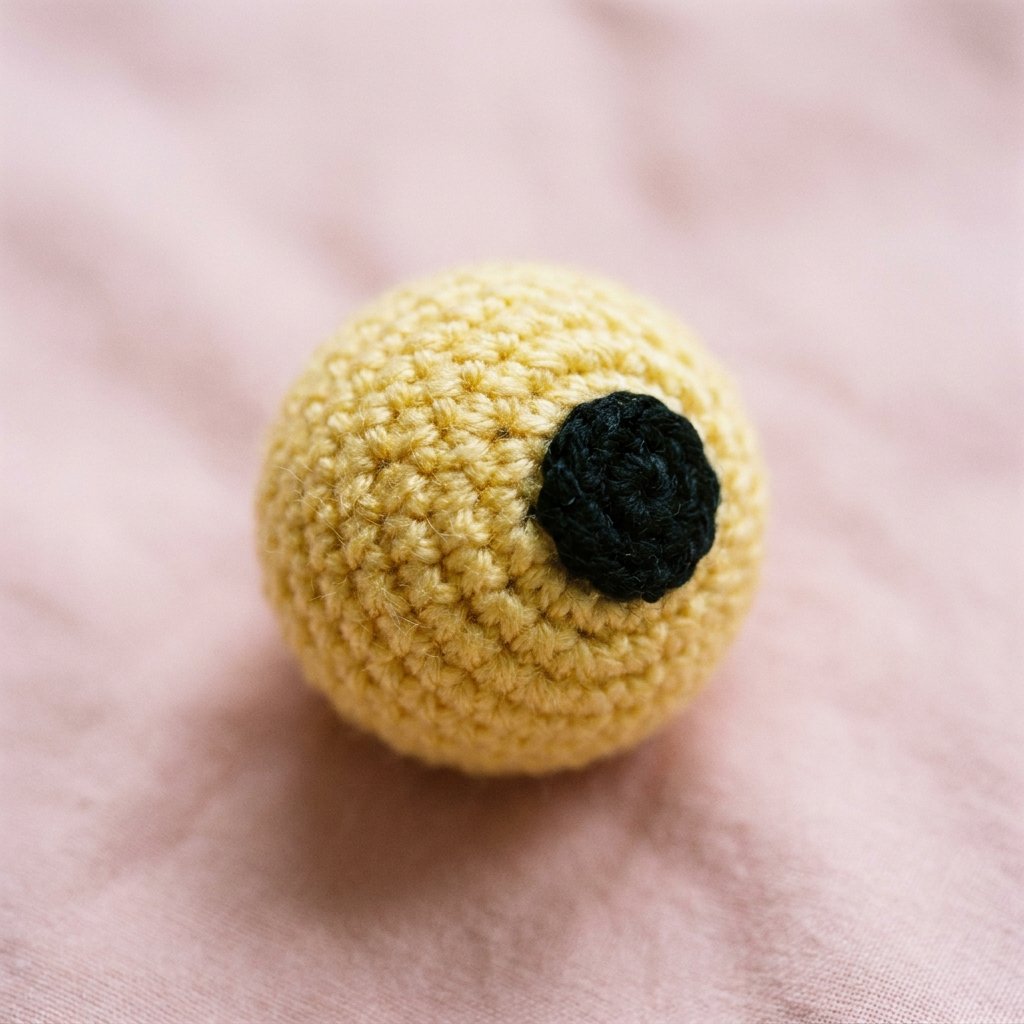
2. Black Pupils
Crochet a small black disc (started in a magic ring, worked flat for 2–3 rounds) and sew it onto the front of each stuffed eyeball, slightly off-center to give the classic sideways Pink Panther gaze.
3. Eyebrows and Eyelids
Two small black crescent shapes worked in a few rows of single crochet, then sewn above each eye. A thin black thread edge stitched just under the eyeball gives the sleepy-eyed eyelid look.
4. Ears (Make 2 outer, 2 inner)
The outer ear is worked in pink starting from a magic ring, increasing to about 24 stitches around before working even rows and folding flat to close. The inner ear is a smaller cream/pink piece worked the same way at a reduced stitch count, then sewn inside the outer ear before the ear is attached to the head.
   Outer ear:  6 -> 12 -> 18 -> 24 sts, even rows, fold & close
   Inner ear:  6 -> 12 -> 18 sts, even rows, fold & close
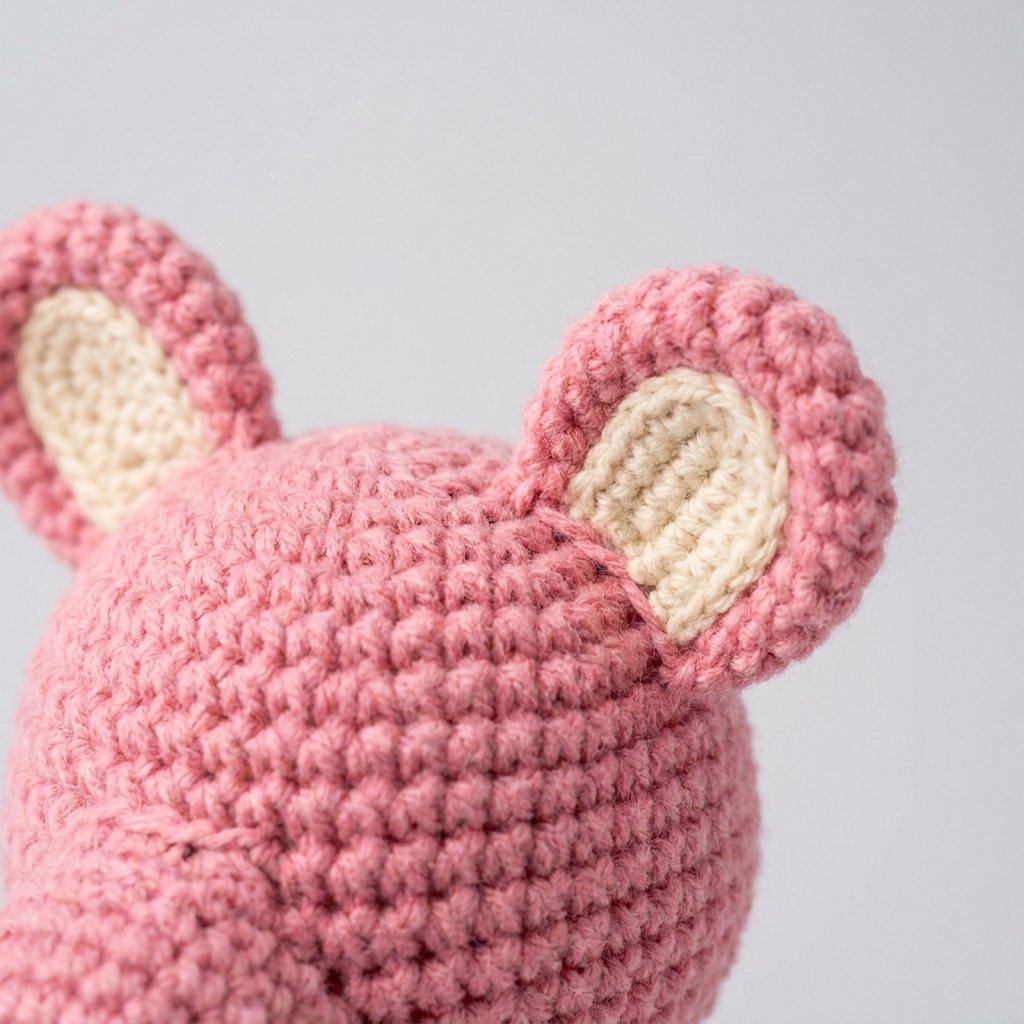
5. Head
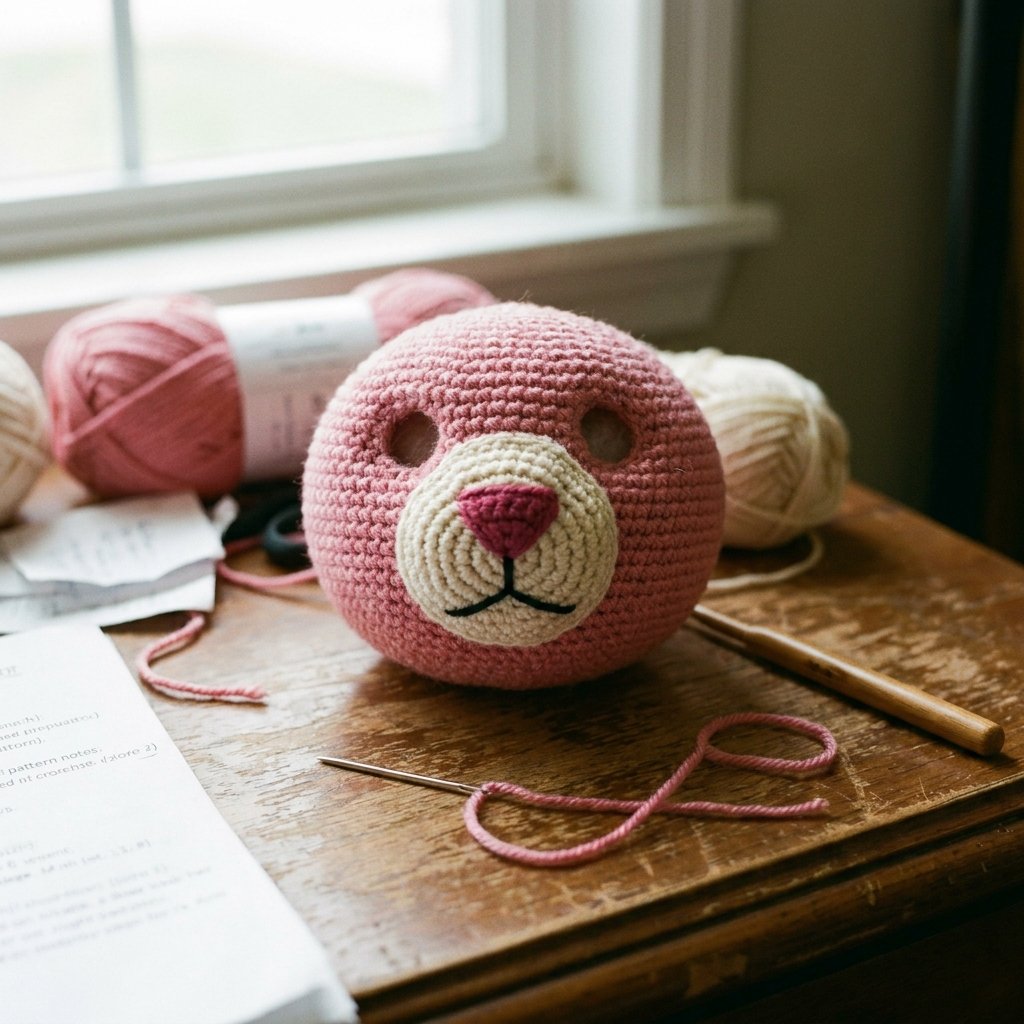
The head begins as a sphere worked from the crown downward: increase steadily every round until you reach the widest point of the face (roughly 40–48 stitches around), then work several even rounds to build the muzzle area before decreasing to shape the jaw and neck. The nose, muzzle, and mouth are worked as separate smaller pieces and stitched on afterward.
6. Muzzle, Nose, and Mouth
The mouth base is a cream disc worked flat, with a dark pink triangular nose piece layered on top, and a thin embroidered line for the closed-mouth smile. This gets glued and stitched securely onto the lower front of the head before the ears go on.
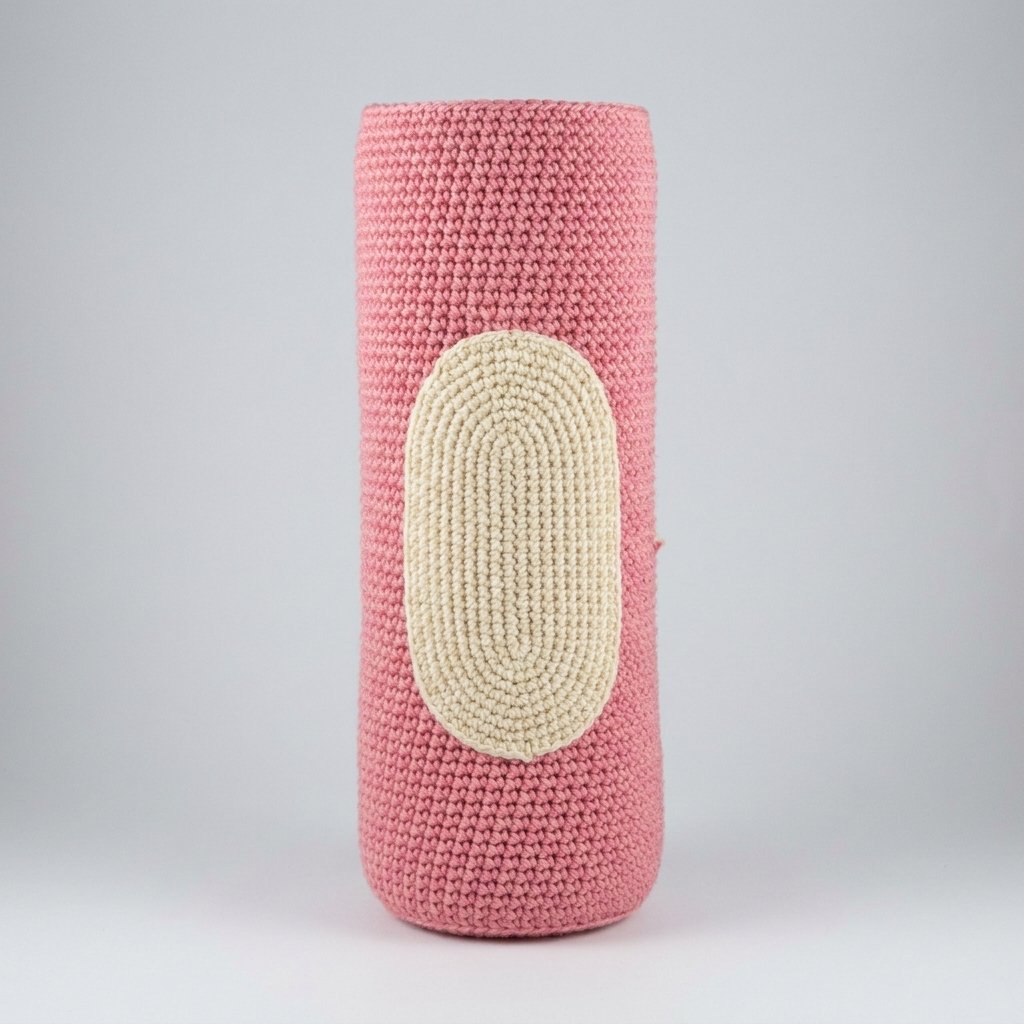
7. Body
Worked from the neck down as a long cylinder: start narrow, increase gradually to the chest width, work the bulk of the torso in even rounds, then taper slightly toward the hips. A separate oval cream panel is crocheted and sewn down the center front as the tummy patch.
8. Arms (Make 2) and Hands
Each arm is a long pink tube worked in continuous rounds, narrower at the wrist and slightly wider at the shoulder. The hand is built with individual finger loops (worked as small tubes joined at the base) plus a separate thumb — this is what gives the Pink Panther’s signature articulated, crossed-arm pose.
9. Legs and Feet (Make 2)
Legs are worked as long pink tubes similar to the arms but wider, since they carry the weight of a 35″ doll. Feet are shaped with a flatter sole and rounded toe box; three toe lines are added afterward with a few strands of glued or stitched contrast thread.
10. Tail
A very long, gradually tapering tube — this is one of the most time-consuming pieces simply due to length, worked in plain single crochet with no shaping until the last several rounds, where you decrease down to a point.
Assembly Instructions
- Stuff the head firmly, keeping the front flatter and the back rounder.
- Attach the ears to the sides of the head first, positioning them per the head round guide in your photos.
- Glue or sew the eyeballs into the eye sockets, then attach the eyebrows above them.
- Sew the finished muzzle/mouth/nose assembly onto the lower face.
- Join the head to the neck opening of the body, matching stitch-for-stitch around the seam.
- Attach arms at the shoulder points and legs at the hip points — check that both sides are symmetrical before sewing permanently.
- Sew the tummy panel down the center front of the body.
- Attach the tail at the base of the spine/lower back.
- Add the glued toe lines to the feet as a final detail.
Stuffing and Finishing Techniques
For a doll this large, stuff in small handfuls rather than large clumps — this avoids lumps and keeps the surface smooth. Stuff the head and body firmly enough to hold shape, but keep the arms and tail slightly softer so the finished piece can still be posed. Always stuff and shape as you go rather than waiting until a piece is fully closed.
Troubleshooting
- My piece is curling or cupping: your tension is too tight, or you increased too aggressively — check your stitch counts against the round guide above.
- Visible gaps between rounds: switch to the invisible decrease method rather than standard sc2tog.
- Doll won’t stand up: add a bit more stuffing density to the feet and lower legs for a stable base.
- Ears look floppy: add a small stiff interfacing disc or extra rounds of stuffing between the outer and inner ear layers.
Common Mistakes and How to Fix Them
- Mistake: Losing track of the round start. Fix: always use a stitch marker and move it up every round.
- Mistake: Mismatched arm/leg lengths. Fix: count rows, not just “eyeballing” length, and compare pieces side by side before attaching.
- Mistake: Under-stuffing the body. Fix: stuff firmly enough that the fabric doesn’t dent when pressed.
Yarn Color Swap Notes
Want a variation on this Pink Panther crochet pattern free design? Swap the main pink for lavender or blue for a completely different character-inspired doll, or use a deeper rose/red for a “vintage cartoon” palette. Keep the cream tummy panel and black eye details the same for the cartoon look to still read clearly regardless of the main color choice.
Estimated Time to Complete (Beginner)
For a confident beginner working a couple of hours per day, expect this Pink Panther crochet pattern free project to take approximately 3–4 weeks, given the doll’s large 35-inch finished size. Experienced amigurumi crocheters can often finish it in 1–2 weeks.
Care Instructions
Spot clean with a damp cloth and mild soap rather than machine washing, since the polyester stuffing can shift or clump when fully saturated. Air dry away from direct heat, and store the finished doll away from direct sunlight to prevent the yarn colors from fading over time.
Frequently Asked Questions
Pink Panther crochet pattern free PDF
Many designers offer a downloadable PDF version of their Pink Panther crochet pattern free pattern through their own shop or blog. If you want a printable copy of this guide, I can generate a formatted PDF version for you — just ask.
Simple Pink Panther crochet pattern free
If the full 35″ version feels like a lot, you can scale this Pink Panther crochet pattern free pattern down by using a smaller hook (2.5mm) and thinner yarn, which naturally produces a mini version with the same round structure, just fewer total stitches per section.
Pink Panther crochet pattern free amigurumi
This entire guide is built around amigurumi construction methods — continuous rounds, spiral single crochet, and stuffed-as-you-go shaping — which is what makes this a true Pink Panther crochet pattern free amigurumi project rather than a flat crochet design.
Easy Pink Panther crochet pattern free
The easiest way to approach this Pink Panther crochet pattern free pattern is to build one piece at a time — start with the eyeballs and ears since they’re small and quick, then work up to the larger body pieces once you’re comfortable with the increase/decrease rhythm.
Sid the Sloth crochet pattern free PDF
If you enjoyed this Pink Panther crochet pattern free tutorial, a Sid the Sloth amigurumi uses very similar techniques — long limbs, a rounded head, and simple facial features — just with a different color palette and slightly shaggier texture if you want to try a coordinating fuzzy yarn.


![Amigurumi Crochet Pattern HALLOWEEN doll – [finished doll / head and body / legs and shoes / ruffled dress / witch hat / curly wig]](https://crochetloversclub.com/wp-content/uploads/2026/08/Crochet_witch_doll_sitting_202608271734-768x768.jpeg)
